
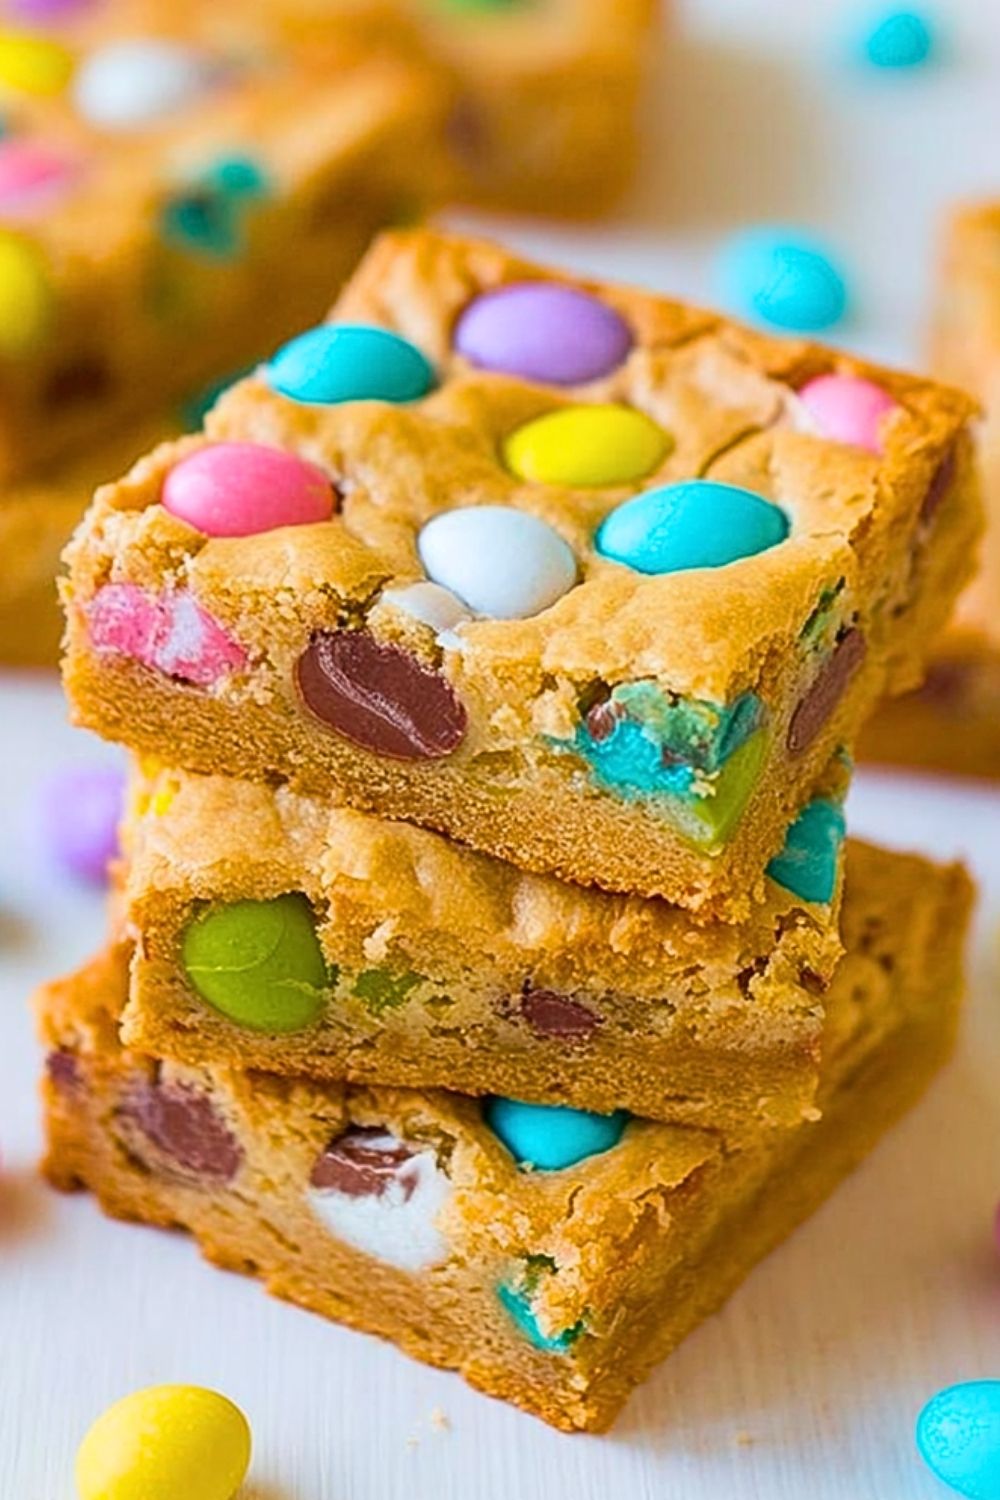
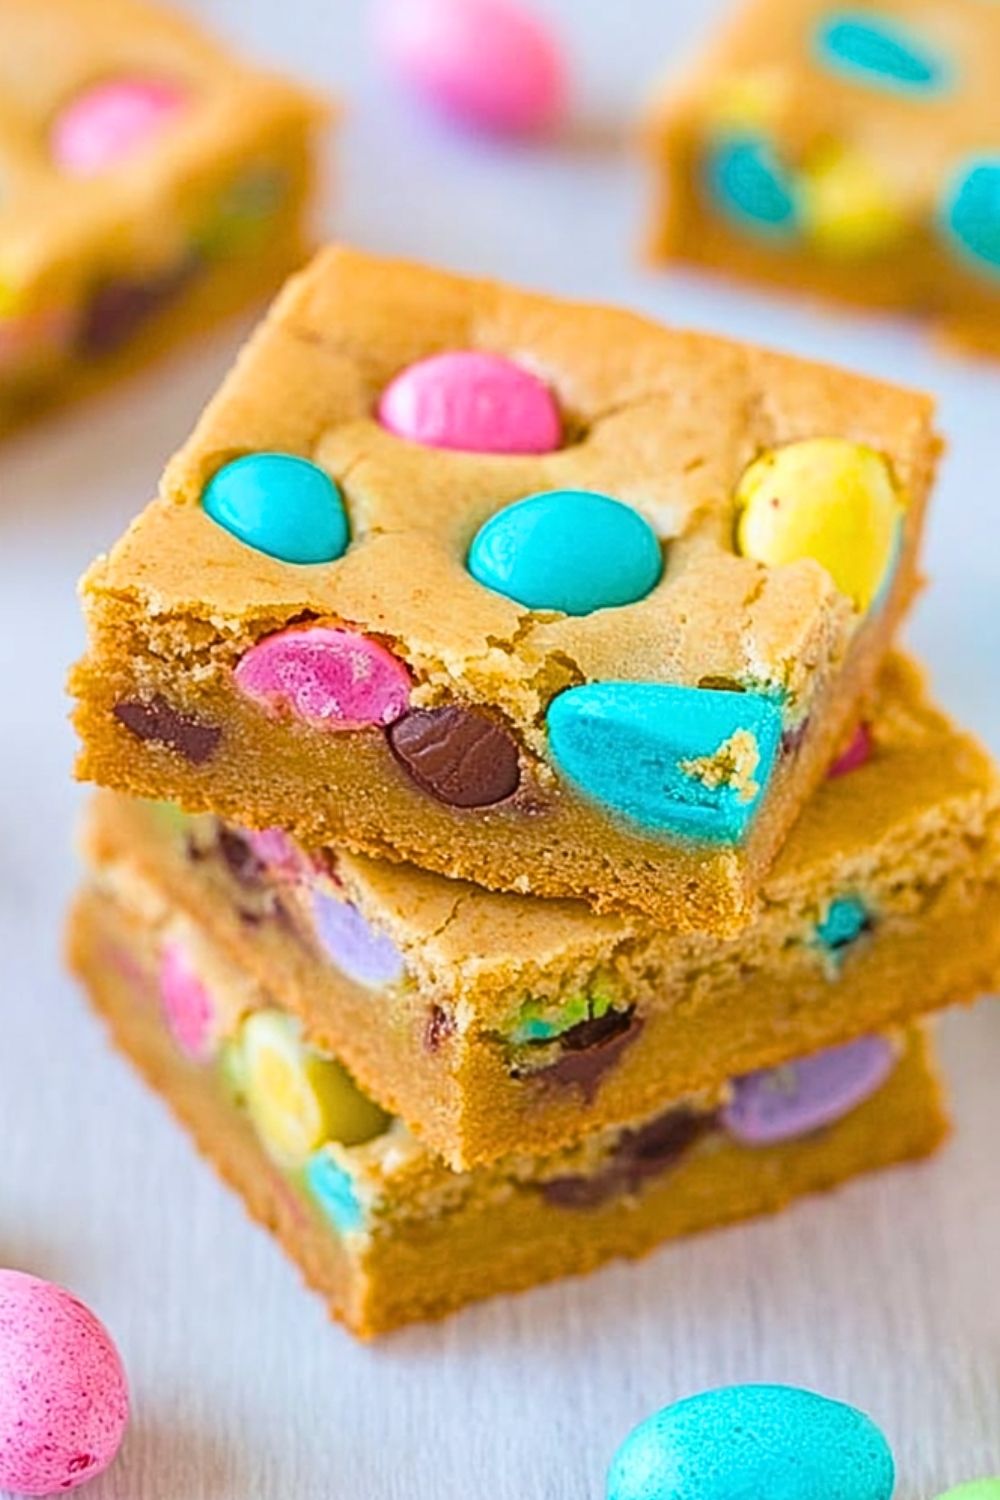
I love baking treats that instantly brighten the table, and these Super Soft Loaded Easter Egg Bars do exactly that. They’re thick, chewy, buttery, and packed with colorful chocolate eggs that melt slightly into every bite. The soft texture combined with the candy crunch creates a dessert that feels festive without requiring complicated baking skills.
Whenever I make these bars around springtime, they disappear faster than almost any other dessert in my kitchen. They’re perfect for Easter gatherings, dessert platters, bake sales, or simply enjoying with a cup of coffee during the weekend. The best part is how simple they are to prepare while still looking bakery-worthy.
Why You’ll Love This Super Soft Loaded Easter Egg Bars
These bars are incredibly soft and rich with a chewy center that stays moist for days. Every square is loaded with colorful Easter candy, making them visually fun and delicious at the same time.
They’re also wonderfully easy to customize. You can switch up the candies, add chocolate chips, or even mix in nuts for extra texture. Since the recipe is baked in one pan, cleanup is minimal and serving is effortless.
Another reason these bars stand out is their balance of flavors. The buttery dough keeps the sweetness from becoming overwhelming, while the candy-coated eggs add little bursts of chocolate in every bite.
What Kind of Easter Chocolate Eggs Should I Use?
Mini candy-coated chocolate eggs work best for these bars because they hold their shape while baking and provide the perfect crunchy texture. Chocolate eggs with crisp candy shells create colorful pockets throughout the bars and make the dessert look extra festive.
You can use classic mini eggs, pastel candy-coated chocolates, or even chopped filled chocolate eggs if you want a richer texture. If the eggs are very large, chopping them slightly helps distribute the chocolate more evenly through the batter.
For the best appearance, I like pressing a few extra candies on top of the dough before baking. This keeps the bright pastel colors visible after the bars come out of the oven.
Options for Substitutions
If you don’t have mini Easter eggs available, chocolate chips are an easy substitute that still gives the bars a rich chocolate flavor. White chocolate chips or peanut butter chips can also create a fun variation.
Brown sugar helps create the soft texture in these bars, but dark brown sugar can be used for a deeper caramel flavor. If you prefer a slightly lighter taste, a combination of white and brown sugar works nicely too.
For a gluten-free version, substitute the regular flour with a good-quality 1-to-1 gluten-free baking blend. The bars still bake up soft and chewy with minimal texture difference.
Butter gives these bars their rich flavor, but plant-based butter can work well if you need a dairy-free option. Just make sure to use a baking-style vegan butter for the best consistency.
You can also add extra mix-ins like chopped pecans, shredded coconut, crushed cookies, or pastel sprinkles to give the bars even more texture and personality.
Ingredients for this Super Soft Loaded Easter Egg Bars
Unsalted Butter
Butter creates the rich, soft, bakery-style texture that makes these bars irresistible. It also helps give the edges a slightly golden finish while keeping the center moist and chewy.
Brown Sugar
Brown sugar is essential for softness and chewiness. The molasses in the sugar adds warmth, moisture, and a deeper caramel flavor that perfectly complements the chocolate eggs.
Granulated Sugar
A small amount of granulated sugar balances the texture and sweetness. It helps the bars bake evenly while adding just the right amount of structure.
Eggs
Eggs bind the dough together and create a rich, tender texture. They also help the bars stay thick and soft after baking.
Vanilla Extract
Vanilla enhances the buttery flavor and adds warmth throughout the dessert. A good vanilla extract makes the bars taste more homemade and comforting.
All-Purpose Flour
Flour provides structure and stability while still allowing the bars to remain soft and chewy. Measuring the flour correctly is important to avoid dry bars.
Cornstarch
Cornstarch is the secret ingredient for an ultra-soft texture. It helps create a melt-in-your-mouth consistency while keeping the bars thick.
Baking Soda
Baking soda gives the bars a gentle lift and prevents them from becoming too dense.
Salt
Salt balances the sweetness and intensifies the chocolate flavor from the Easter eggs.
Mini Chocolate Easter Eggs
These colorful candy-coated chocolate eggs are the star of the recipe. They add crunch, chocolate flavor, and a festive spring appearance.
Chocolate Chips
Chocolate chips create extra pockets of melted chocolate throughout the bars, making them even richer and more indulgent.
Pastel Sprinkles
Sprinkles are optional, but they add extra color and fun to the finished dessert, especially for Easter parties and spring celebrations.
Step 1: Prepare the Baking Pan
Start by preheating your oven to 350°F. Proper oven temperature is important because it helps the bars bake evenly without drying out.
Line a square baking pan with parchment paper, leaving a little overhang on the sides. This makes lifting the bars out of the pan much easier after baking. Lightly grease the parchment paper to prevent sticking.
Preparing the pan ahead of time allows the dough to go straight into the oven once mixed, which helps maintain the perfect texture.
Step 2: Melt the Butter
Place the butter in a microwave-safe bowl and melt it gently. Allow it to cool slightly before mixing with the sugars so the eggs do not cook when added.
Using melted butter instead of softened butter gives these bars their signature chewy texture. It also makes the recipe easier since no mixer is required.
The butter should still be warm but not hot before moving on to the next step.
Step 3: Mix the Sugars and Butter
Add the brown sugar and granulated sugar to the melted butter. Stir until the mixture becomes smooth and glossy.
This step helps dissolve some of the sugar crystals, which contributes to the soft texture of the finished bars.
Take your time mixing thoroughly because it creates a more even batter and richer flavor throughout the dessert.
Step 4: Add the Eggs and Vanilla
Crack the eggs into the bowl one at a time, mixing well after each addition. Stir in the vanilla extract until fully combined.
The mixture should look silky, creamy, and slightly lighter in color after everything is incorporated.
Mixing the wet ingredients properly helps create bars that bake evenly and stay moist for several days.
Step 5: Combine the Dry Ingredients
In a separate bowl, whisk together the flour, cornstarch, baking soda, and salt.
Whisking prevents lumps and evenly distributes the leavening ingredients throughout the flour mixture. This step ensures every bite has the same soft texture.
Gradually add the dry ingredients to the wet ingredients while stirring gently.
Step 6: Fold the Batter Carefully
Mix the dough only until the flour disappears. Overmixing can make the bars dense or tough instead of soft and chewy.
The dough should look thick, smooth, and slightly sticky.
If the dough seems too dry, avoid adding extra flour. Thick dough is what helps create the rich bakery-style texture.
Step 7: Add the Chocolate Eggs and Chocolate Chips
Fold in the mini chocolate Easter eggs and chocolate chips evenly throughout the dough.
Reserve a small handful of candy eggs for the top. Pressing extra candies on top before baking gives the bars a colorful bakery-style appearance.
The combination of crunchy candy shells and melted chocolate creates the perfect texture contrast.
Step 8: Spread the Dough into the Pan
Transfer the dough into the prepared baking pan and spread it evenly using a spatula.
Because the dough is thick, gently pressing it into the corners helps create even bars.
Smooth the surface lightly, then scatter the remaining candy eggs and sprinkles over the top.
Step 9: Bake Until Soft and Golden
Bake the bars until the edges are lightly golden while the center still looks slightly soft.
Avoid overbaking because the bars continue to set as they cool in the pan. Slightly underbaked centers create the ultra-soft texture these bars are known for.
The top should appear lightly crackled with colorful candies peeking through.
Step 10: Cool Before Slicing
Allow the bars to cool completely in the pan before lifting them out.
Cooling is important because it gives the bars time to finish setting properly. Cutting them too early can cause them to fall apart.
Once cooled, slice into squares or rectangles depending on your preferred serving size.
Step 11: Create Bakery-Style Presentation
For a more professional appearance, wipe the knife clean between cuts. This keeps the edges sharp and neat.
You can also drizzle melted chocolate over the bars or add extra crushed Easter candies on top for decoration.
Serving the bars on a pastel dessert tray or cake stand makes them look especially festive for spring celebrations.
Step 12: Enjoy Fresh or Slightly Chilled
These bars taste incredible while still slightly warm because the chocolate remains soft and melty.
If you prefer a firmer texture, chill the bars briefly before serving. The candy coating becomes slightly crunchier while the center stays soft.
Pair them with milk, coffee, tea, or hot chocolate for the ultimate dessert experience.
How Long to Prepare the Super Soft Loaded Easter Egg Bars
Making these bars is surprisingly simple, which is one of the reasons I enjoy baking them so often during spring gatherings and holiday weekends. Most of the preparation involves mixing the dough and folding in the colorful Easter candies, so the process feels quick and fun rather than complicated.
The preparation time is usually around 15 to 20 minutes, depending on how quickly you measure ingredients and prepare the baking pan. Since the dough comes together in one bowl, cleanup is also minimal, making this recipe ideal for busy days when you still want a homemade dessert.
The baking time typically ranges from 25 to 35 minutes. The bars should look lightly golden around the edges while the center remains soft. Avoid waiting for the center to become fully firm in the oven because the bars continue cooking slightly as they cool.
Cooling time is equally important for achieving the perfect texture. Allowing the bars to cool for at least 45 minutes helps them set properly so they slice cleanly without falling apart. If you want extra neat squares, chilling them briefly after cooling works wonderfully.
In total, you can expect the entire process—from preparation to serving—to take about 1 hour and 15 minutes. Much of that time is hands-off cooling, giving you plenty of opportunity to prepare drinks, decorations, or other desserts.
Tips for Perfect Super Soft Loaded Easter Egg Bars
Using room-temperature eggs helps the dough mix together more smoothly and evenly. Cold eggs can cause the butter mixture to stiffen too quickly, affecting the final texture.
Measuring flour correctly is one of the most important details in this recipe. Too much flour can make the bars dry and cakey instead of soft and chewy. Spoon the flour into the measuring cup rather than scooping directly from the bag.
For extra soft bars, avoid overmixing once the flour is added. Stir just until no dry streaks remain in the dough.
Pressing a few chocolate eggs onto the top before baking gives the bars a colorful bakery-style appearance that looks beautiful on dessert platters.
If you prefer thicker bars, use a slightly smaller baking pan. This creates taller bars with extra gooey centers.
Lining the baking pan with parchment paper makes removing the bars effortless and helps prevent sticking.
A sprinkle of flaky sea salt on top after baking creates a delicious contrast to the sweetness and enhances the chocolate flavor.
Letting the bars rest overnight can actually improve the texture because the flavors deepen and the centers become even chewier.
Watch Out for These Mistakes While Cooking
One of the most common mistakes is overbaking the bars. Because the center continues setting after the pan comes out of the oven, leaving them in too long can result in dry and crumbly bars.
Using too much flour is another issue that can dramatically change the texture. Thick dough is normal, but overly dry dough usually means too much flour was added.
Mixing the dough too aggressively after adding the flour can create dense bars instead of soft and tender ones.
Adding the candy eggs while the butter mixture is too hot may cause the chocolate to melt excessively and discolor the dough.
Skipping parchment paper often makes removing the bars difficult and can lead to broken edges.
Cutting the bars before they cool completely may cause them to fall apart because the center needs time to set properly.
Using stale chocolate eggs can affect both flavor and texture. Fresh candies provide the best crunch and chocolate taste.
What to Serve With Super Soft Loaded Easter Egg Bars?
Vanilla Ice Cream
The creamy coldness of vanilla ice cream pairs beautifully with the rich chewy bars. Slightly warm bars served with melting ice cream create an incredibly comforting dessert.
Hot Coffee
Coffee balances the sweetness perfectly and makes these bars feel even more indulgent during brunches or afternoon gatherings.
Strawberry Milkshakes
A fruity strawberry milkshake complements the pastel Easter colors and creates a fun dessert combination for spring celebrations.
Fresh Fruit Platter
Fresh strawberries, raspberries, grapes, and blueberries add brightness and freshness that balance the richness of the bars.
Hot Chocolate
For extra chocolate lovers, serving these bars with creamy hot chocolate creates a rich and cozy dessert experience.
Storage Instructions
These bars store beautifully, which makes them ideal for preparing ahead of parties or holiday events. Once fully cooled, place them in an airtight container to maintain their soft texture.
At room temperature, the bars stay fresh for about 4 to 5 days. Keep them in a cool area away from direct sunlight to prevent the chocolate candies from melting.
If you prefer a firmer texture, refrigerate the bars in a sealed container. Chilled bars develop a slightly denser chewiness while still remaining soft.
For longer storage, these bars freeze extremely well. Wrap individual squares tightly in plastic wrap and place them in a freezer-safe container or zip-top bag.
Frozen bars can last up to 2 months while maintaining excellent flavor and texture. Allow them to thaw at room temperature before serving.
If you want freshly baked flavor after freezing, warming the bars for a few seconds in the microwave makes the chocolate soft and gooey again.
Estimated Nutrition
The nutritional values may vary depending on the exact candies and chocolate used, but each bar generally contains a rich combination of carbohydrates, fats, and chocolate sweetness.
A typical serving may include:
- Calories: 320–420
- Carbohydrates: 42g
- Sugar: 28g
- Fat: 16g
- Saturated Fat: 9g
- Protein: 4g
- Sodium: 180mg
- Fiber: 2g
Because these bars are rich and satisfying, even a small square can feel like a complete dessert.
Frequently Asked Questions
Can I make these bars ahead of time?
Yes, these bars are excellent for making ahead. In fact, the texture often becomes even softer and chewier the next day.
Can I use different candies instead of Easter eggs?
Absolutely. Chocolate chips, peanut butter candies, chopped chocolate bars, or seasonal candies all work well in this recipe.
Why are my bars dry?
Dry bars are usually caused by too much flour or overbaking. Removing them from the oven while the center still looks slightly soft helps maintain moisture.
Can I freeze these bars?
Yes, they freeze very well. Wrap them tightly and store them in an airtight container for up to two months.
How do I know when the bars are done baking?
The edges should look lightly golden while the center remains soft and slightly underbaked. The bars will continue setting as they cool.
Conclusion
Super Soft Loaded Easter Egg Bars are the kind of dessert that instantly brings fun and color to the table. Their buttery chewy texture combined with crunchy chocolate candies makes every bite feel festive and comforting.
I especially love how easy they are to customize for different occasions while still maintaining that rich bakery-style softness everyone enjoys. Whether you serve them for Easter brunch, spring parties, family gatherings, or late-night dessert cravings, these bars always disappear quickly.
The balance of soft cookie-like texture, melted chocolate, and pastel candy crunch creates a dessert that feels both nostalgic and exciting. Once you bake a batch, it’s easy to understand why these bars become a repeat favorite year after year.
Super Soft Loaded Easter Egg Bars
- Prep Time: 20 minutes
- Cook Time: 30 minutes
- Total Time: 50 minutes
- Yield: 16 bars
- Category: Dessert
- Method: Baking
- Cuisine: American
- Diet: Vegetarian
Description
These Super Soft Loaded Easter Egg Bars are thick, chewy, buttery dessert bars packed with colorful chocolate Easter eggs and rich chocolate chips in every bite. They bake up with perfectly soft centers, slightly golden edges, and a bakery-style texture that makes them impossible to resist. Whether you need an easy dessert for Easter brunch, spring parties, family gatherings, bake sales, or fun holiday baking ideas, these bars are guaranteed to stand out on the dessert table. This easy recipe is perfect for anyone looking for quick dessert ideas, easy baking recipes, colorful holiday treats, chewy cookie bars, or fun Easter food ideas. The combination of soft cookie dough, crunchy candy shells, and melted chocolate creates the ultimate sweet treat for both kids and adults.
Ingredients
1 cup unsalted butter, melted
1 1/4 cups brown sugar
1/2 cup granulated sugar
2 large eggs
2 teaspoons vanilla extract
2 3/4 cups all-purpose flour
2 teaspoons cornstarch
1 teaspoon baking soda
1/2 teaspoon salt
1 1/2 cups mini chocolate Easter eggs
1 cup chocolate chips
1/4 cup pastel sprinkles
Instructions
1. Preheat the oven to 350°F and line a 9×13-inch baking pan with parchment paper. Lightly grease the pan for easy removal.
2. Melt the butter and allow it to cool slightly before mixing.
3. In a large bowl, combine the melted butter, brown sugar, and granulated sugar until smooth and glossy.
4. Add the eggs one at a time, mixing well after each addition. Stir in the vanilla extract.
5. In a separate bowl, whisk together the flour, cornstarch, baking soda, and salt.
6. Gradually add the dry ingredients to the wet ingredients and stir until just combined. Avoid overmixing.
7. Fold in the mini chocolate Easter eggs and chocolate chips evenly throughout the dough.
8. Spread the thick dough evenly into the prepared baking pan using a spatula.
9. Press a few extra Easter eggs and sprinkles on top for decoration.
10. Bake for 25 to 35 minutes or until the edges are lightly golden and the center still looks slightly soft.
11. Allow the bars to cool completely before slicing into squares.
12. Serve and enjoy soft, chewy, chocolate-loaded Easter bars.
Notes
Do not overbake the bars or they may lose their soft and chewy texture. The center should still look slightly underbaked when removed from the oven.
Press extra Easter eggs on top before baking for a more colorful bakery-style appearance.
Allow the bars to cool fully before slicing to help them set properly and create clean squares.
Nutrition
- Serving Size: 1 bar
- Calories: 380
- Sugar: 28g
- Sodium: 180mg
- Fat: 16g
- Saturated Fat: 9g
- Unsaturated Fat: 5g
- Trans Fat: 0g
- Carbohydrates: 42g
- Fiber: 2g
- Protein: 4g
- Cholesterol: 45mg
Keywords: Easter dessert, chewy bars, cookie bars, Easter egg bars, easy dessert recipe, spring dessert, chocolate bars, holiday baking, easy Easter treats