
 Ava Garrison
I love baking cookies that feel playful and comforting at the same time, and these Mini Egg Cookies always bring that perfect mix. The soft centers, crisp edges, and pockets of melted chocolate make every bite irresistible. When I first baked them for a spring gathering, they disappeared from the tray in minutes, and ever since then, they’ve become one of my favorite treats to make for holidays, weekend baking, or late-night dessert cravings.
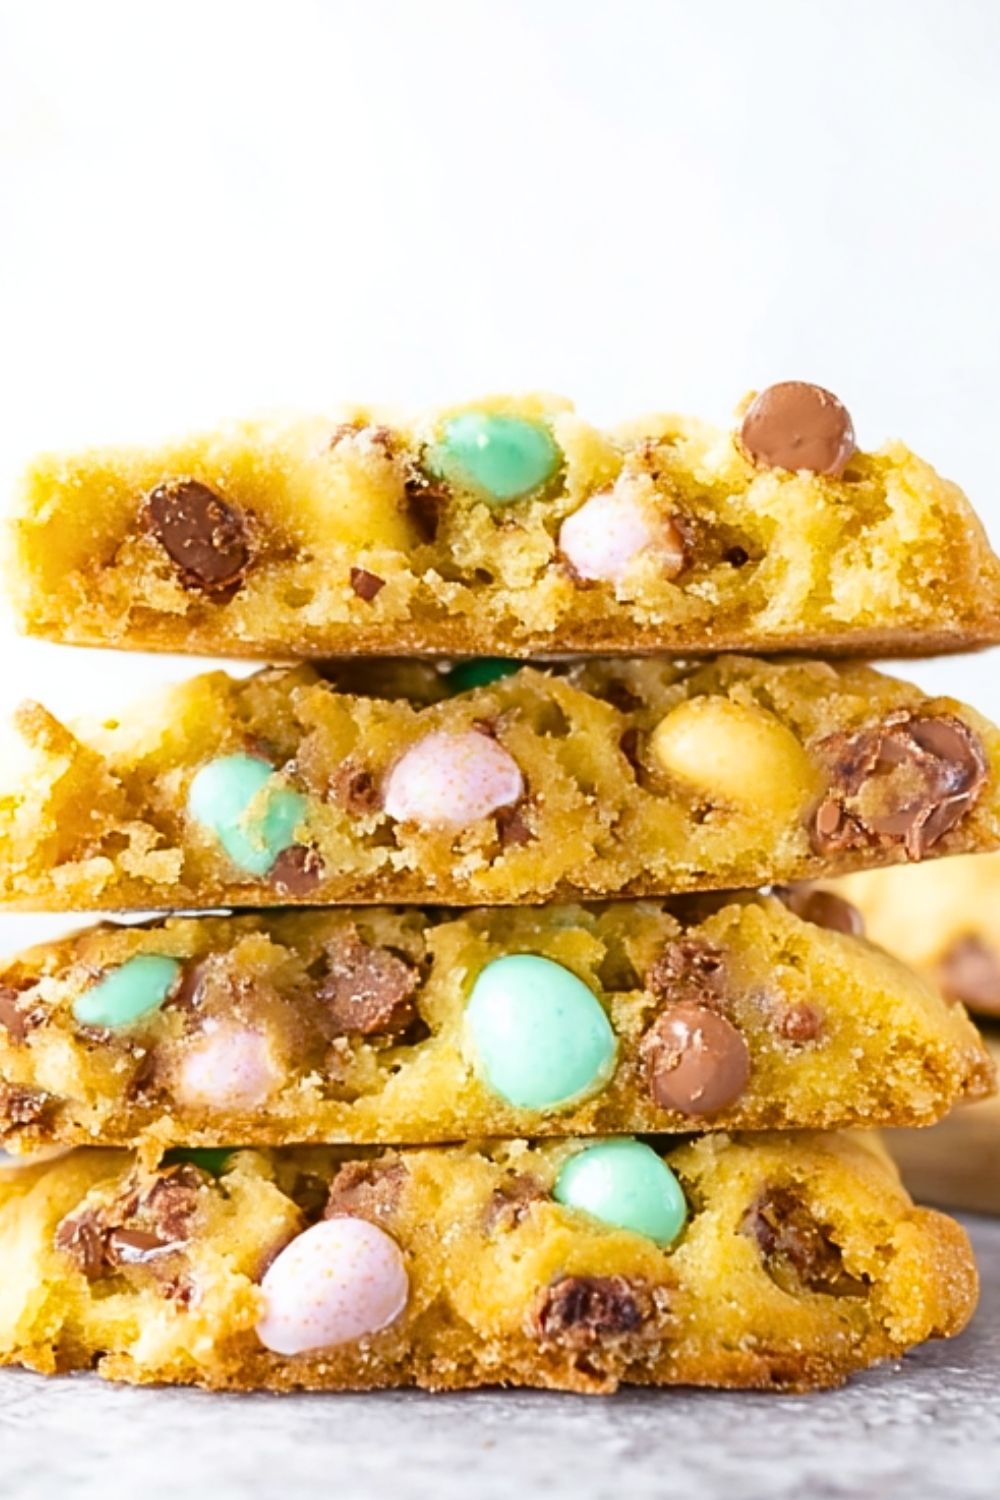
What makes these cookies stand out is the combination of creamy chocolate chips and crunchy candy-coated mini eggs tucked into a rich buttery dough. They look colorful and festive, but they’re also incredibly easy to prepare. Whether you want a fun Easter dessert or simply a bakery-style cookie loaded with chocolate, this recipe delivers every single time.
Why You’ll Love These Mini Egg Cookies
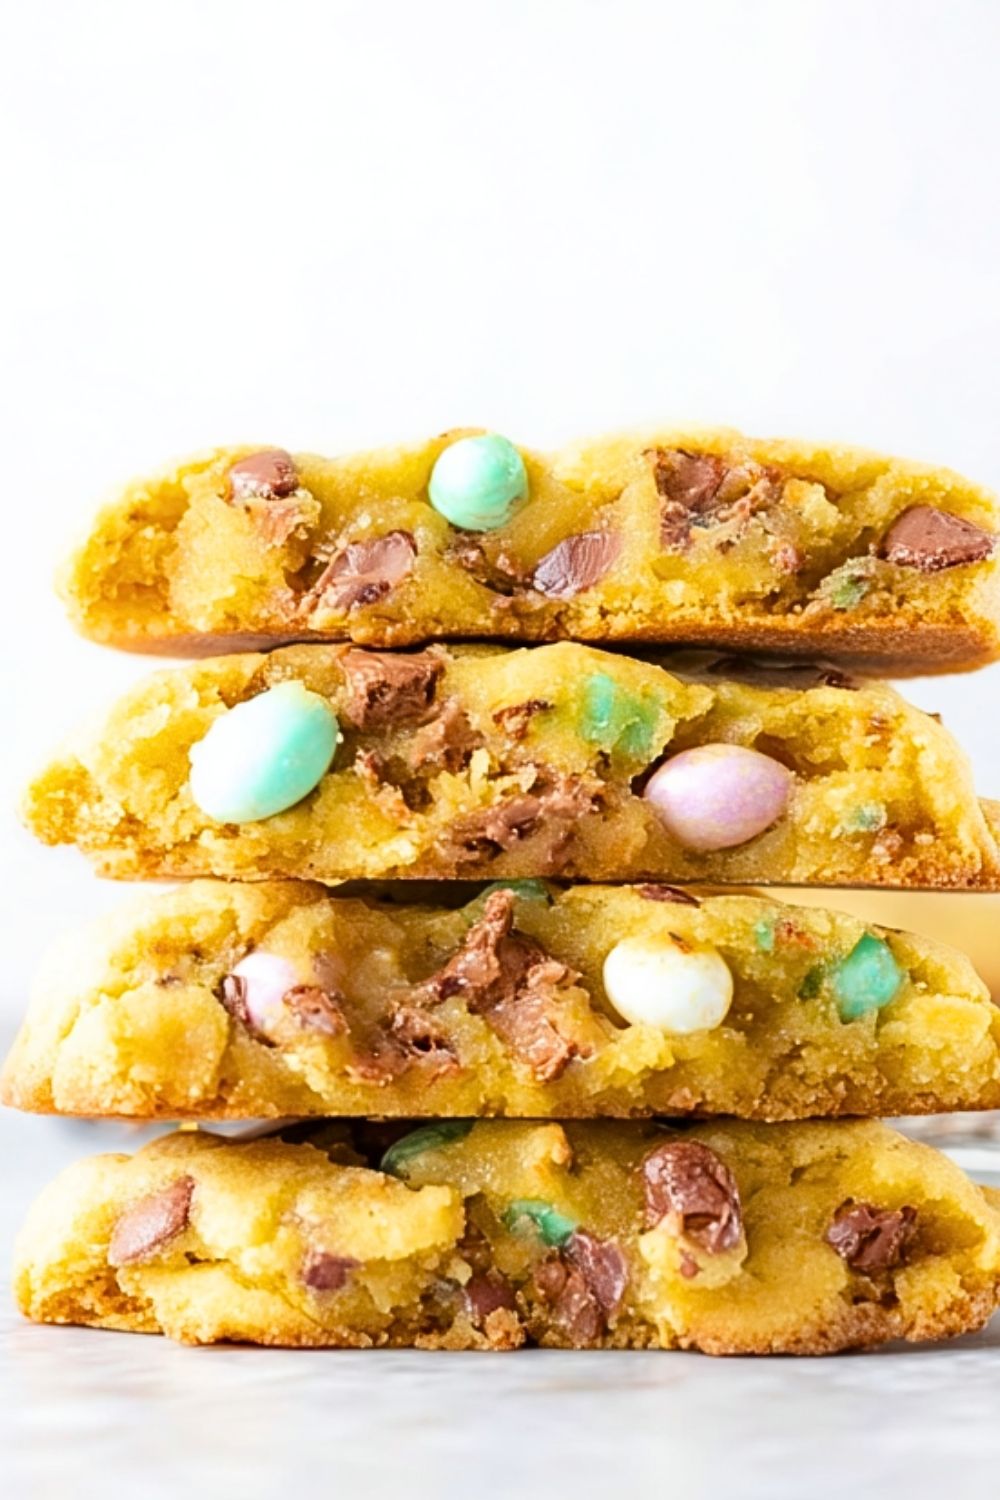
These Mini Egg Cookies are thick, chewy, and packed with chocolate in every bite. The candy shell from the mini eggs adds a slight crunch that contrasts beautifully with the soft cookie texture.
Another reason I keep coming back to this recipe is how simple it is to customize. You can make them extra gooey, crispier around the edges, or even freeze the dough for future baking sessions.
They’re also ideal for sharing. The colorful candy pieces make them perfect for spring parties, Easter dessert tables, bake sales, or homemade gifts.
What Kind of Mini Eggs Should I Use?
Chocolate mini eggs with a crisp candy shell work best for this recipe because they hold their shape while baking and create little crunchy bites throughout the cookies.
Classic milk chocolate mini eggs are the most popular option, but dark chocolate or white chocolate varieties can also work beautifully. Crushing some of the mini eggs before mixing them into the dough helps distribute the chocolate and candy coating evenly.
If you can’t find seasonal mini eggs, candy-coated chocolate pieces from other brands can be substituted without changing the texture too much.
Options for Substitutions
If you want a slightly deeper flavor, brown butter can replace regular melted butter. It adds a warm caramel-like richness that pairs perfectly with chocolate.
For a softer and slightly thicker cookie, swap part of the all-purpose flour with cake flour. This creates a more tender texture while still holding the cookie together.
Milk chocolate chips can easily be replaced with dark chocolate chunks, white chocolate chips, or even peanut butter chips depending on the flavor you prefer.
If you need a gluten-free version, use a reliable one-to-one gluten-free flour blend designed for baking. The cookies will still bake up soft and chewy.
For a dairy-free option, plant-based butter and dairy-free chocolate chips work surprisingly well while keeping the cookies rich and flavorful.
Ingredients for These Mini Egg Cookies
All-Purpose Flour
Flour forms the structure of the cookies and gives them enough stability to hold the melted chocolate and crushed mini eggs. Using the right amount keeps the cookies soft in the center while still allowing the edges to become lightly golden.
Baking Soda
Baking soda helps the cookies spread properly while creating a chewy texture. It also contributes to the slightly crisp outer edges that make bakery-style cookies so satisfying.
Salt
Salt balances the sweetness of the dough and enhances the chocolate flavor throughout the cookies. Even a small amount makes a noticeable difference in the final taste.
Unsalted Butter
Butter creates richness, moisture, and flavor. Melted butter gives the cookies a dense and chewy center while helping the dough come together smoothly.
Brown Sugar
Brown sugar adds moisture and creates a soft texture with subtle caramel notes. It is one of the key ingredients that gives these cookies their deep flavor.
Granulated Sugar
Granulated sugar helps the cookies spread while also contributing to lightly crisp edges. Combining it with brown sugar creates the ideal balance of chewy and crisp textures.
Eggs
Eggs bind the dough together and add structure. They also help create a rich texture that keeps the cookies soft after baking.
Vanilla Extract
Vanilla enhances the sweetness and brings warmth to the flavor profile. It complements both the chocolate chips and mini eggs beautifully.
Chocolate Chips
Chocolate chips create pockets of melted chocolate throughout the cookies. Milk chocolate provides extra sweetness, while dark chocolate adds a richer flavor.
Mini Chocolate Eggs
Mini eggs are the star ingredient in this recipe. Their crunchy candy shell and creamy chocolate center add texture, color, and sweetness to every bite.
Optional Sea Salt Flakes
A light sprinkle of flaky sea salt on top balances the sweetness and enhances the chocolate flavor even more.
Step 1: Prepare the Baking Trays
Start by preheating your oven to 350°F (175°C). Line two baking sheets with parchment paper to prevent sticking and ensure even baking.
Preparing the trays before mixing the dough helps the baking process move quickly once the cookies are ready to scoop.
Step 2: Crush the Mini Eggs
Place the mini eggs into a zip-top bag and gently crush them using a rolling pin or the bottom of a heavy glass. You want a mixture of larger chunks and smaller candy pieces.
Avoid crushing them too finely because the larger pieces create pockets of melted chocolate and crunchy candy shell throughout the cookies.
Step 3: Mix the Dry Ingredients
In a medium bowl, whisk together the flour, baking soda, and salt until evenly combined.
Mixing the dry ingredients separately ensures the baking soda distributes evenly throughout the dough, preventing uneven texture during baking.
Step 4: Combine the Butter and Sugars
In a large mixing bowl, whisk the melted butter with the brown sugar and granulated sugar until smooth and glossy.
The mixture should appear thick and creamy. Properly combining the butter and sugars helps create a chewy cookie texture.
Step 5: Add the Eggs and Vanilla
Crack the eggs into the butter mixture one at a time, whisking well after each addition. Stir in the vanilla extract until fully incorporated.
The mixture should become lighter and slightly fluffy as the eggs blend into the dough.
Step 6: Incorporate the Dry Ingredients
Gradually fold the dry ingredients into the wet mixture using a spatula or wooden spoon.
Mix only until no dry streaks remain. Overmixing can lead to dense cookies instead of soft and tender ones.
Step 7: Fold in the Chocolate Chips and Mini Eggs
Add the chocolate chips and crushed mini eggs to the dough and gently fold everything together.
Reserve a handful of chocolate chips and mini egg pieces for pressing onto the tops of the cookies before baking. This gives the cookies a more attractive bakery-style appearance.
Step 8: Chill the Dough
Cover the bowl and refrigerate the cookie dough for at least 30 minutes.
Chilling prevents the cookies from spreading too much in the oven and deepens the flavor of the dough. For even thicker cookies, chill the dough for up to 24 hours.
Step 9: Scoop the Cookie Dough
Use a cookie scoop or spoon to portion the dough into evenly sized balls. Place them onto the prepared baking sheets with enough space between each cookie.
Press extra mini egg pieces and chocolate chips onto the tops for a colorful finish.
Step 10: Bake the Cookies
Bake the cookies for 10 to 13 minutes or until the edges are lightly golden and the centers still look slightly soft.
The cookies will continue to cook on the baking tray after they come out of the oven, so avoid overbaking them.
Step 11: Cool Before Serving
Allow the cookies to cool on the baking sheet for about 5 minutes before transferring them to a wire rack.
This resting time helps the cookies set properly while keeping the centers soft and gooey.
Serve them warm for the ultimate melted chocolate texture or let them cool completely for a chewy bakery-style bite.
How Long to Prepare These Mini Egg Cookies
Making Mini Egg Cookies is surprisingly simple, and most of the preparation time comes from chilling the dough to achieve the perfect texture. The actual mixing process is quick, making this recipe ideal for busy weekdays, holiday baking sessions, or spontaneous dessert cravings.
The dough itself usually takes around 15 to 20 minutes to prepare from start to finish. Crushing the mini eggs, measuring ingredients, and mixing the dough all come together quickly once everything is organized.
Preparation Time
The preparation stage typically takes about 20 minutes. This includes:
- Measuring the ingredients
- Crushing the mini eggs
- Mixing the cookie dough
- Scooping the dough onto trays
If you are baking with kids or preparing multiple batches, the prep time may be slightly longer.
Chilling Time
For best results, chill the dough for at least 30 minutes before baking.
This extra step helps:
- Prevent excessive spreading
- Improve flavor development
- Create thicker bakery-style cookies
- Enhance the chewy texture
If you have extra time, chilling overnight creates even richer flavor and thicker cookies.
Baking Time
The cookies usually bake in 10 to 13 minutes depending on their size and your preferred texture.
For softer cookies, remove them when the centers still appear slightly underbaked. If you prefer crispier edges, bake them for an additional minute or two.
Cooling Time
Allow the cookies to cool on the baking tray for 5 minutes before moving them to a wire rack.
This cooling period allows the cookies to finish setting while keeping the centers soft and gooey.
Tips for Perfect Mini Egg Cookies
Use Room Temperature Eggs
Room temperature eggs blend more smoothly into the dough and help create a consistent cookie texture.
Don’t Skip Chilling the Dough
Chilled dough produces thicker cookies with better flavor and texture. Warm dough tends to spread too quickly in the oven.
Slightly Underbake the Cookies
The cookies continue baking on the tray after leaving the oven. Removing them while the centers are still soft ensures a chewy texture.
Reserve Extra Mini Eggs for the Top
Pressing additional mini egg pieces onto the dough balls before baking creates bakery-style cookies that look extra colorful and appealing.
Use High-Quality Chocolate
Better chocolate creates richer flavor. Chocolate chunks often melt more dramatically than standard chips, creating gooey pockets throughout the cookies.
Measure Flour Correctly
Too much flour can make the cookies dry and dense. Spoon the flour into the measuring cup and level it off instead of scooping directly from the bag.
Let the Cookies Rest Before Eating
Fresh-from-the-oven cookies smell amazing, but letting them cool slightly helps the texture develop properly.
Watch Out for These Mistakes While Cooking
Overmixing the Dough
Mixing too much after adding the flour develops excess gluten, which can make the cookies tough instead of soft.
Overbaking the Cookies
One of the most common mistakes is waiting for the centers to look fully baked. The cookies should still look slightly soft in the middle when removed from the oven.
Crushing the Mini Eggs Too Finely
If the mini eggs become powdery, you lose the satisfying crunch and chocolate pockets that make these cookies special.
Using Warm Baking Trays
Placing dough onto hot baking trays causes the cookies to spread too quickly before baking properly.
Skipping Parchment Paper
Parchment paper helps the cookies bake evenly and prevents sticking or over-browning on the bottom.
Adding Too Many Mix-Ins
Although extra chocolate sounds tempting, overloading the dough can cause uneven baking and make the cookies fall apart.
What to Serve With Mini Egg Cookies?
Vanilla Ice Cream
Warm Mini Egg Cookies paired with creamy vanilla ice cream create an easy dessert that feels bakery-worthy.
Hot Chocolate
A rich cup of hot chocolate complements the crunchy candy shell and melted chocolate inside the cookies.
Coffee or Latte
The sweetness of the cookies pairs beautifully with coffee, especially espresso-based drinks like cappuccinos or lattes.
Fresh Strawberries
Fresh berries provide a refreshing contrast to the richness of the cookies and add a bright spring flavor.
Milkshakes
Serve the cookies alongside a chocolate or vanilla milkshake for an indulgent dessert combination.
Storage Instructions
Storing at Room Temperature
Place the cooled cookies in an airtight container and store them at room temperature for up to 5 days.
Adding a slice of bread to the container can help maintain softness by preventing the cookies from drying out.
Refrigerating the Cookies
Although refrigeration is not necessary, you can refrigerate the cookies if your kitchen is warm.
Store them in a sealed container and allow them to return to room temperature before serving for the best texture.
Freezing Baked Cookies
Baked cookies freeze very well. Arrange them in a freezer-safe container with parchment paper between layers to prevent sticking.
They can be frozen for up to 3 months.
Freezing Cookie Dough
Cookie dough balls can also be frozen before baking.
Place the dough balls on a baking tray until frozen solid, then transfer them to a freezer bag.
Bake directly from frozen by adding an extra 1 to 2 minutes to the baking time.
Estimated Nutrition
The nutritional values can vary depending on the brands of chocolate and mini eggs used, but an average cookie typically contains:
- Calories: 320
- Carbohydrates: 38g
- Protein: 4g
- Fat: 17g
- Saturated Fat: 10g
- Sugar: 24g
- Fiber: 2g
- Sodium: 180mg
These cookies are definitely a treat, making them perfect for special occasions, holiday baking, or sharing with friends and family.
Frequently Asked Questions
Can I make the cookie dough ahead of time?
Yes, the dough can be prepared up to 48 hours in advance and stored in the refrigerator before baking.
Why are my cookies spreading too much?
This usually happens when the dough is too warm or the butter was overly melted. Chilling the dough helps control spreading.
Can I use different types of chocolate?
Absolutely. Milk chocolate, dark chocolate, white chocolate, or even caramel-filled chocolate chunks work well in this recipe.
How do I keep the cookies soft?
Store them in an airtight container and avoid overbaking. Slightly underbaked cookies stay softer for longer.
Can I freeze the baked cookies?
Yes, baked cookies freeze beautifully for up to 3 months when stored properly in an airtight container.
Conclusion
Mini Egg Cookies combine everything people love about bakery-style cookies with the fun crunch of candy-coated chocolate eggs. They are soft, chewy, rich, and packed with melted chocolate in every bite.
Whether you bake them for Easter celebrations, spring gatherings, or everyday dessert cravings, these cookies always feel festive and comforting. The recipe is easy enough for beginner bakers while still delivering impressive results that look and taste bakery-quality.
Once you try them warm from the oven with gooey chocolate centers and crisp candy pieces, they quickly become the kind of recipe you’ll want to make again and again.
Mini Egg Cookies
- Prep Time: 20 minutes
- Cook Time: 12 minutes
- Total Time: 32 minutes
- Yield: 18 cookies
- Category: Dessert
- Method: Baking
- Cuisine: American
- Diet: Vegetarian
Description
These Mini Egg Cookies are thick, chewy, gooey, and packed with melted chocolate in every bite. The crunchy candy-coated mini eggs add the perfect festive touch, making these cookies ideal for Easter desserts, spring baking, quick dessert ideas, party treats, or easy homemade bakery-style cookies. With crisp golden edges and soft centers loaded with chocolate chunks and colorful candy pieces, this easy cookie recipe is perfect for anyone looking for fun baking ideas, easy desserts, or comforting homemade sweets.
Ingredients
2 1/4 cups all-purpose flour
1 teaspoon baking soda
1/2 teaspoon salt
1 cup unsalted butter, melted
1 cup brown sugar
1/2 cup granulated sugar
2 large eggs
2 teaspoons vanilla extract
1 1/2 cups chocolate chips
1 1/4 cups mini chocolate eggs, lightly crushed
1 tablespoon flaky sea salt (optional)
Instructions
1. Preheat the oven to 350°F (175°C) and line two baking sheets with parchment paper.
2. Place the mini eggs into a zip-top bag and gently crush them into a mixture of large and small pieces.
3. In a medium bowl, whisk together the flour, baking soda, and salt.
4. In a large bowl, whisk the melted butter, brown sugar, and granulated sugar until smooth and glossy.
5. Add the eggs one at a time, whisking after each addition, then stir in the vanilla extract.
6. Gradually fold the dry ingredients into the wet ingredients until just combined.
7. Fold in the chocolate chips and crushed mini eggs, reserving a few pieces for topping.
8. Cover the dough and chill for at least 30 minutes.
9. Scoop the dough into evenly sized balls and place them onto the prepared baking sheets.
10. Press extra mini egg pieces and chocolate chips onto the tops of the cookies.
11. Bake for 10 to 13 minutes or until the edges are lightly golden and the centers still look soft.
12. Allow the cookies to cool on the baking tray for 5 minutes before transferring them to a wire rack.
13. Serve warm or completely cooled for a chewy bakery-style texture.
Notes
Do not overbake the cookies because they continue cooking on the tray after being removed from the oven.
Chilling the dough helps create thicker cookies with a chewier texture and richer flavor.
Reserve extra mini egg pieces for topping the cookies before baking to create a bakery-style appearance.
Nutrition
- Serving Size: 1 cookie
- Calories: 320
- Sugar: 24g
- Sodium: 180mg
- Fat: 17g
- Saturated Fat: 10g
- Unsaturated Fat: 5g
- Trans Fat: 0g
- Carbohydrates: 38g
- Fiber: 2g
- Protein: 4g
- Cholesterol: 42mg
Keywords: mini egg cookies, easter cookies, chewy cookies, chocolate chip cookies, bakery style cookies, easy dessert recipe, spring baking, homemade cookies