
I remember the first time I made Santa’s Trash Cookie Bars—it was one of those spontaneous baking days where I tossed together leftover pantry goodies and hoped for the best. What came out of the oven was something unexpectedly magical: chewy, crunchy, chocolatey layers packed into one festive bite. Ever since then, this recipe has become my go-to during the holidays when I want something fun, indulgent, and a little bit nostalgic.
What I love most is how forgiving and playful this recipe feels. There’s no pressure for perfection here—just a delicious mix of textures and flavors that somehow come together beautifully. Whether you’re baking with kids or simply using up extra snacks, these bars bring a sense of joy to the kitchen.
Why You’ll Love This Santa’s Trash Cookie Bars
These bars are the ultimate crowd-pleaser. They combine sweet, salty, crunchy, and chewy elements all in one bite, making them irresistible for just about anyone. You don’t need fancy ingredients or advanced baking skills—just a willingness to mix, layer, and enjoy.
They’re also incredibly versatile. You can switch up the mix-ins depending on what you have on hand, which means no two batches ever have to be exactly the same. Plus, they store well, making them perfect for gifting or prepping ahead during busy holiday weeks.
What Makes Santa’s Trash Cookie Bars So Irresistible?
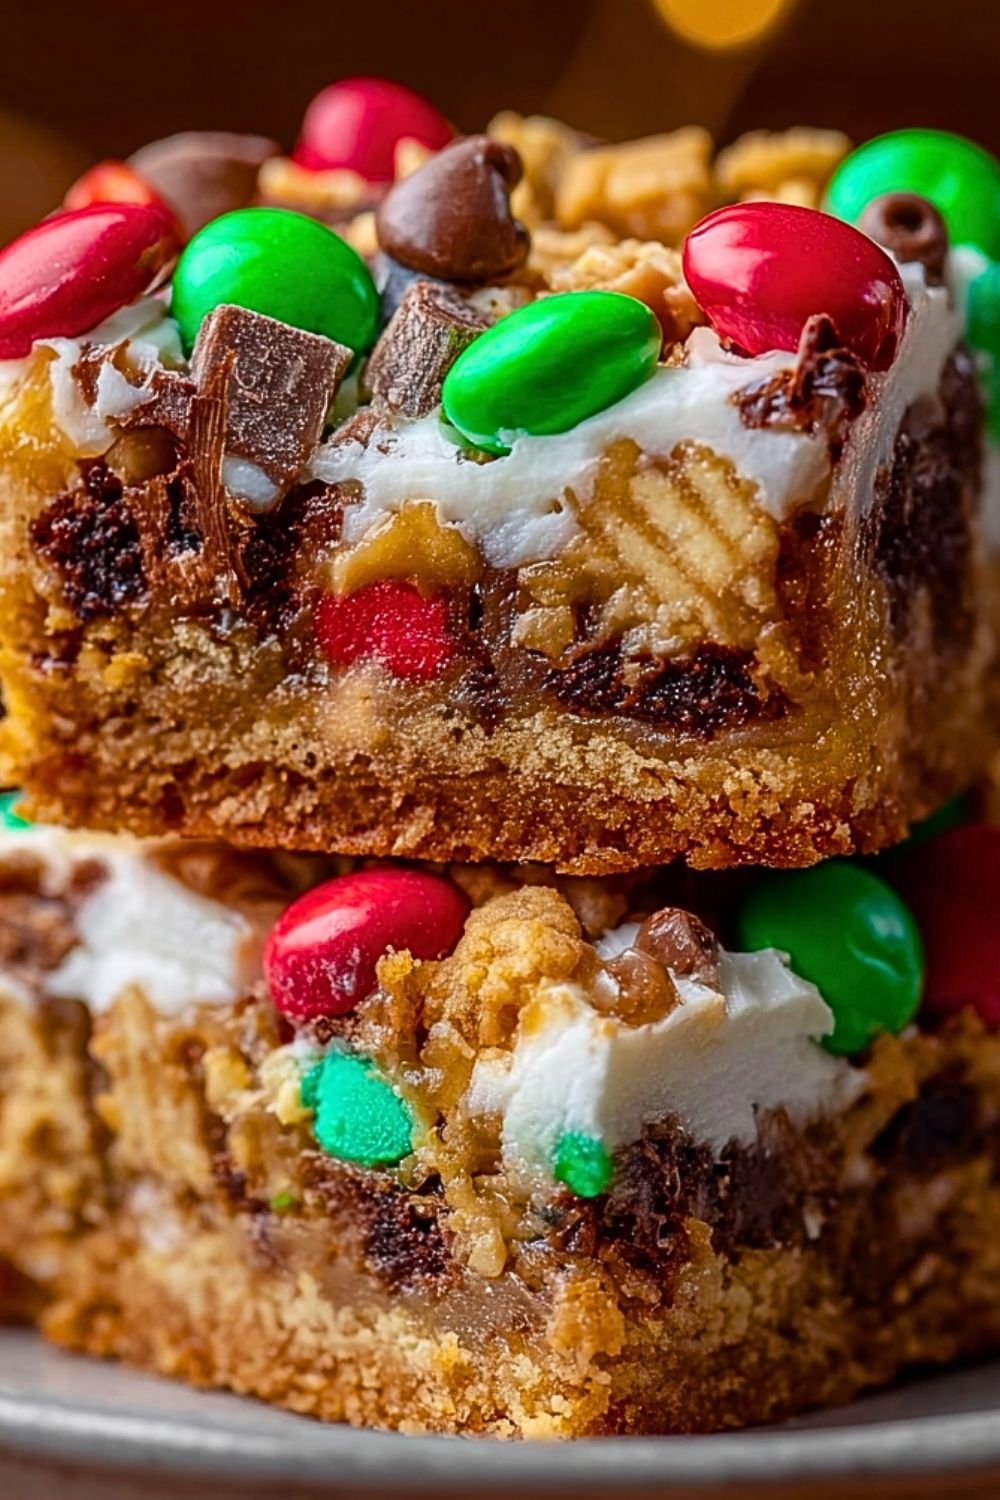
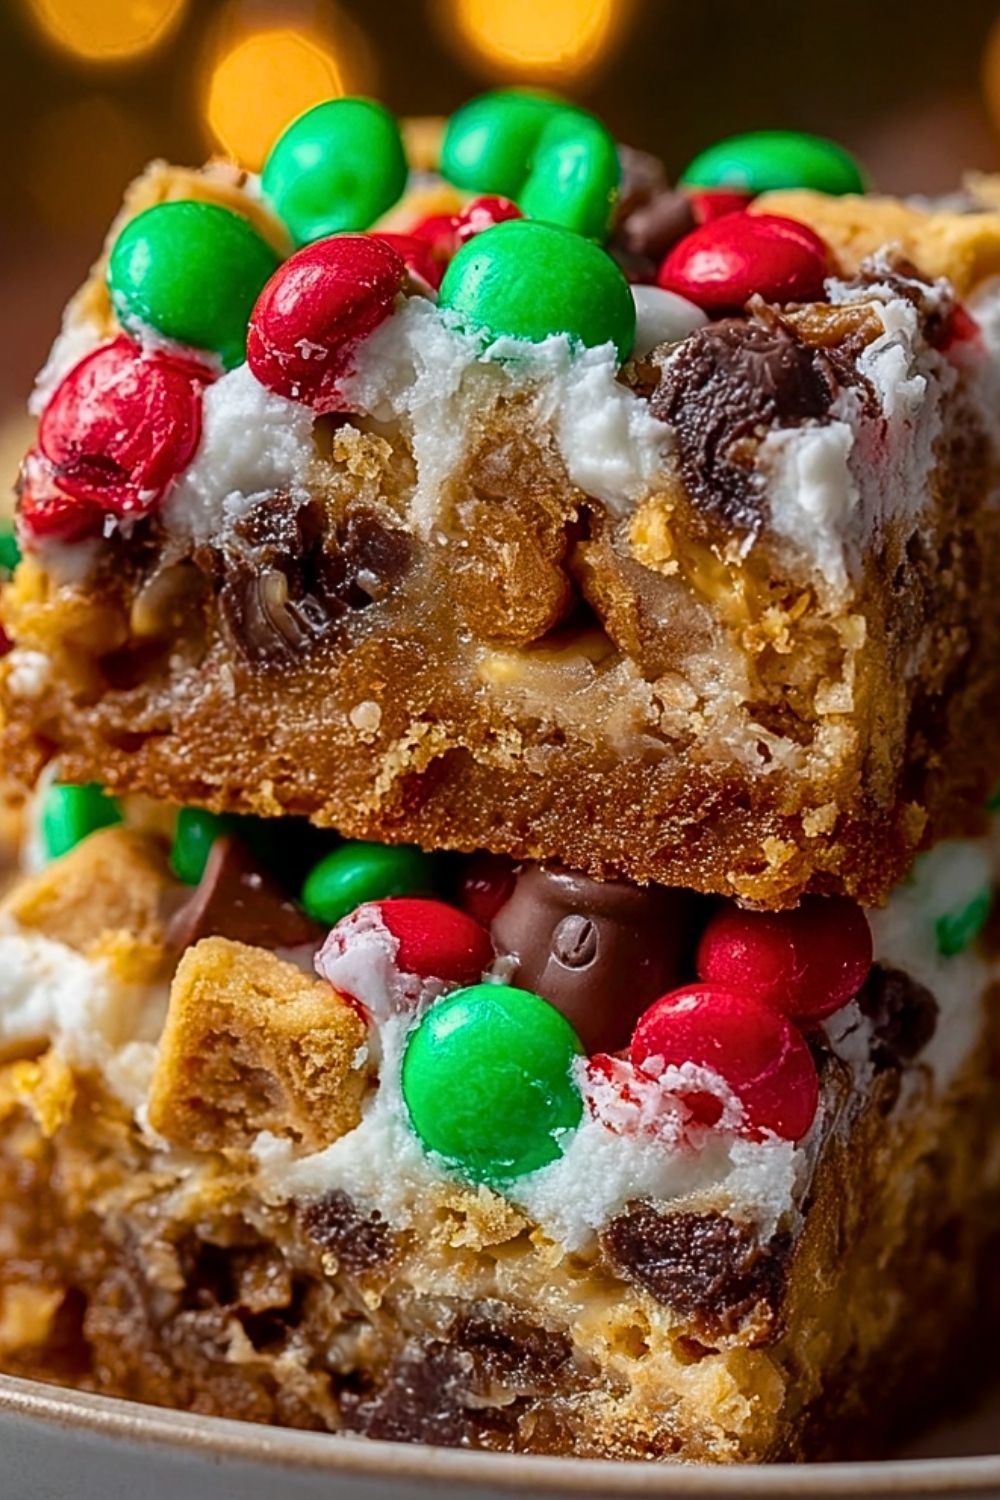
It’s all about contrast. The soft, gooey base pairs perfectly with crunchy cereal pieces and candy-coated chocolates, while a creamy topping ties everything together. Each bite delivers a little surprise, which keeps things interesting and addictive.
Another reason these bars stand out is their festive appearance. Bright pops of red and green candies instantly make them holiday-ready without requiring any extra decorating effort.
Options for Substitutions
If you don’t have the exact ingredients, don’t worry—this recipe welcomes creativity. Swap out chocolate chips for white chocolate or butterscotch chips if you prefer a different sweetness profile. Instead of M&M’s, you can use any candy-coated chocolates or even chopped candy bars.
For the crunchy element, feel free to replace cereal pieces with pretzels, crushed graham crackers, or even nuts if you like a bit of added richness. And if you’re looking for a slightly lighter version, consider using reduced-fat cream cheese or a whipped topping alternative for the frosting layer.
Ingredients for this Santa’s Trash Cookie Bars
Butter
Butter creates the rich, melt-in-your-mouth base that holds everything together while adding a deep, comforting flavor.
Brown Sugar
Brown sugar brings moisture and a caramel-like sweetness that gives the bars their chewy texture.
Granulated Sugar
This balances the sweetness and helps create a slightly crisp edge on the bars.
Eggs
Eggs act as the binding agent, giving structure and stability to the cookie bars.
Vanilla Extract
Vanilla enhances all the flavors, adding warmth and depth to every bite.
All-Purpose Flour
Flour forms the foundation of the bars, providing structure and supporting all the mix-ins.
Baking Soda
This helps the bars rise slightly and keeps them from becoming too dense.
Salt
Salt balances the sweetness and enhances the overall flavor profile.
Chocolate Chips
Chocolate chips add gooey pockets of melted chocolate throughout the bars.
Holiday M&M’s
These bring festive color, crunch, and bursts of chocolate flavor.
Cereal Squares
Cereal adds a light crunch that contrasts beautifully with the soft cookie base.
Pretzels
Pretzels introduce a salty crunch that makes the bars more dynamic and less overly sweet.
Sweetened Condensed Milk
This creates a rich, gooey layer that binds the toppings and adds indulgent sweetness.
Cream Cheese
Cream cheese is used for the topping, adding a tangy, creamy layer that balances the sweetness.
Powdered Sugar
This sweetens the cream cheese topping and gives it a smooth consistency.
Heavy Cream
Heavy cream helps achieve a light, spreadable frosting texture.
Step 1: Prepare Your Baking Pan
Preheat your oven to 350°F (175°C). Line a 9×13-inch baking dish with parchment paper, leaving some overhang for easy removal. Lightly grease the paper to prevent sticking.
Step 2: Make the Cookie Dough Base
In a large mixing bowl, cream together the butter, brown sugar, and granulated sugar until light and fluffy. Add the eggs one at a time, mixing well after each addition, then stir in the vanilla extract.
Step 3: Combine Dry Ingredients
In a separate bowl, whisk together the flour, baking soda, and salt. Gradually add this mixture to the wet ingredients, stirring until a soft dough forms.
Step 4: Fold in the Mix-Ins
Gently fold in the chocolate chips, half of the M&M’s, cereal pieces, and pretzels. Be careful not to overmix, as you want to keep the texture light and varied.
Step 5: Press and Layer
Spread the dough evenly into the prepared baking pan. Pour the sweetened condensed milk evenly over the top, allowing it to seep into the dough slightly.
Step 6: Bake to Perfection
Place the pan in the oven and bake for 25–30 minutes, or until the edges are golden brown and the center is set but still slightly soft.
Step 7: Cool Completely
Remove from the oven and let the bars cool completely in the pan. This step is essential for clean slicing and proper texture.
Step 8: Prepare the Cream Cheese Topping
In a mixing bowl, beat the cream cheese until smooth. Add powdered sugar and heavy cream, mixing until light, fluffy, and spreadable.
Step 9: Frost the Bars
Spread the cream cheese topping evenly over the cooled bars using a spatula.
Step 10: Add Final Toppings
Sprinkle the remaining M&M’s, extra cereal pieces, and crushed pretzels on top for a festive finish.
Step 11: Slice and Serve
Lift the bars out using the parchment paper overhang, place on a cutting board, and slice into squares. Serve and enjoy!
How Long to Prepare Santa’s Trash Cookie Bars
Making Santa’s Trash Cookie Bars is pleasantly straightforward, and most of the time is hands-off while the oven does the work. From start to finish, you can expect the entire process to take under an hour, making it perfect for busy baking days or last-minute holiday treats.
Preparation typically takes about 15–20 minutes, especially if you have all your ingredients measured and ready. Baking adds another 25–30 minutes, followed by at least 30 minutes of cooling time to ensure the bars set properly before slicing.
Tips for Perfect Santa’s Trash Cookie Bars
Use room temperature butter and cream cheese for smoother mixing and better texture.
Don’t overmix the dough once you add the dry ingredients, as this can make the bars dense instead of soft and chewy.
Line your pan with parchment paper to make removal and cleanup much easier.
For extra texture, reserve some mix-ins to sprinkle on top after baking.
Let the bars cool completely before frosting to prevent the topping from melting.
Watch Out for These Mistakes While Cooking
Overbaking can dry out the bars, so keep an eye on the edges—they should be golden while the center remains slightly soft.
Skipping the cooling step can result in crumbly bars that fall apart when sliced.
Adding too many mix-ins can overwhelm the dough and prevent even baking.
Using cold ingredients for the frosting can lead to a lumpy texture.
What to Serve With Santa’s Trash Cookie Bars?
Hot Chocolate
A warm mug of hot chocolate complements the sweetness and adds a cozy holiday feel.
Vanilla Ice Cream
The creamy coldness pairs beautifully with the rich, chewy bars.
Coffee or Espresso
A slightly bitter coffee balances the sugary richness perfectly.
Milk
A classic pairing that enhances the nostalgic cookie flavor.
Holiday Punch
A fruity, festive drink adds brightness and makes these bars party-ready.
Storage Instructions
Store the bars in an airtight container at room temperature for up to 3 days. If your kitchen is warm, consider refrigerating them to keep the cream cheese topping fresh.
For longer storage, place the bars in the refrigerator for up to a week. Make sure they are well covered to prevent them from drying out.
You can also freeze the bars (without the topping) for up to 2 months. Wrap them tightly in plastic wrap and store in a freezer-safe container. Thaw at room temperature before adding fresh frosting and serving.
Estimated Nutrition
Each serving (based on typical portion sizes) contains approximately:
Calories: 280–350
Carbohydrates: 35–45g
Protein: 3–5g
Fat: 12–18g
Sugar: 20–30g
Values may vary depending on the exact ingredients and substitutions used.
Frequently Asked Questions
Can I make Santa’s Trash Cookie Bars ahead of time?
Yes, these bars are great for making ahead. Prepare them a day in advance and store properly until ready to serve.
Can I freeze Santa’s Trash Cookie Bars?
Absolutely. Freeze them without the frosting for best results, then add the topping after thawing.
What other mix-ins can I use?
You can use nuts, shredded coconut, toffee bits, or crushed cookies to customize your bars.
How do I know when the bars are done baking?
The edges should be golden brown, and the center should be set but still slightly soft.
Can I make this recipe gluten-free?
Yes, simply substitute the flour and mix-ins with gluten-free alternatives.
Conclusion
Santa’s Trash Cookie Bars are the kind of treat that turns simple ingredients into something memorable. They’re fun to make, easy to customize, and perfect for sharing during the holidays or anytime you want a playful dessert. Once you try them, they might just become a yearly tradition in your kitchen.
Santa’s Trash Cookie Bars
- Prep Time: 20 minutes
- Cook Time: 30 minutes
- Total Time: 50 minutes
- Yield: 12-16 bars
- Category: Dessert
- Method: Baking
- Cuisine: American
- Diet: Vegetarian
Description
If you’re looking for a fun, festive, and irresistibly indulgent treat, Santa’s Trash Cookie Bars are exactly what you need. This easy recipe combines gooey cookie dough, crunchy mix-ins, and a creamy topping to create the ultimate dessert bar. Perfect for holiday gatherings, quick dessert ideas, or even a sweet snack.
Ingredients
1 cup unsalted butter, softened
1 cup brown sugar
1/2 cup granulated sugar
2 large eggs
2 teaspoons vanilla extract
2 1/2 cups all-purpose flour
1 teaspoon baking soda
1/2 teaspoon salt
1 cup chocolate chips
1 cup holiday M&M’s (divided)
1 cup cereal squares
3/4 cup crushed pretzels
1 can (14 oz) sweetened condensed milk
8 oz cream cheese, softened
1 cup powdered sugar
2 tablespoons heavy cream
Instructions
1. Preheat oven to 350°F (175°C) and line a 9×13-inch pan with parchment paper.
2. Cream butter, brown sugar, and granulated sugar until light and fluffy.
3. Add eggs one at a time, then mix in vanilla extract.
4. In a separate bowl, whisk flour, baking soda, and salt.
5. Gradually combine dry ingredients with wet mixture to form dough.
6. Fold in chocolate chips, half of the M&M’s, cereal, and pretzels.
7. Press dough evenly into prepared pan.
8. Pour sweetened condensed milk evenly over the top.
9. Bake for 25–30 minutes until golden on edges and set in center.
10. Cool completely in the pan.
11. Beat cream cheese, powdered sugar, and heavy cream until smooth.
12. Spread frosting over cooled bars.
13. Top with remaining M&M’s, cereal, and pretzels.
14. Slice into bars and serve.
Notes
Use room temperature butter and cream cheese for best texture.
Do not overbake; keep the center slightly soft.
Cool completely before adding frosting to prevent melting.
Nutrition
- Serving Size: 1 bar
- Calories: 320
- Sugar: 25g
- Sodium: 180mg
- Fat: 15g
- Saturated Fat: 9g
- Unsaturated Fat: 5g
- Trans Fat: 0g
- Carbohydrates: 40g
- Fiber: 1g
- Protein: 4g
- Cholesterol: 55mg
Keywords: easy dessert, holiday treats, cookie bars, festive baking, quick dessert ideas