
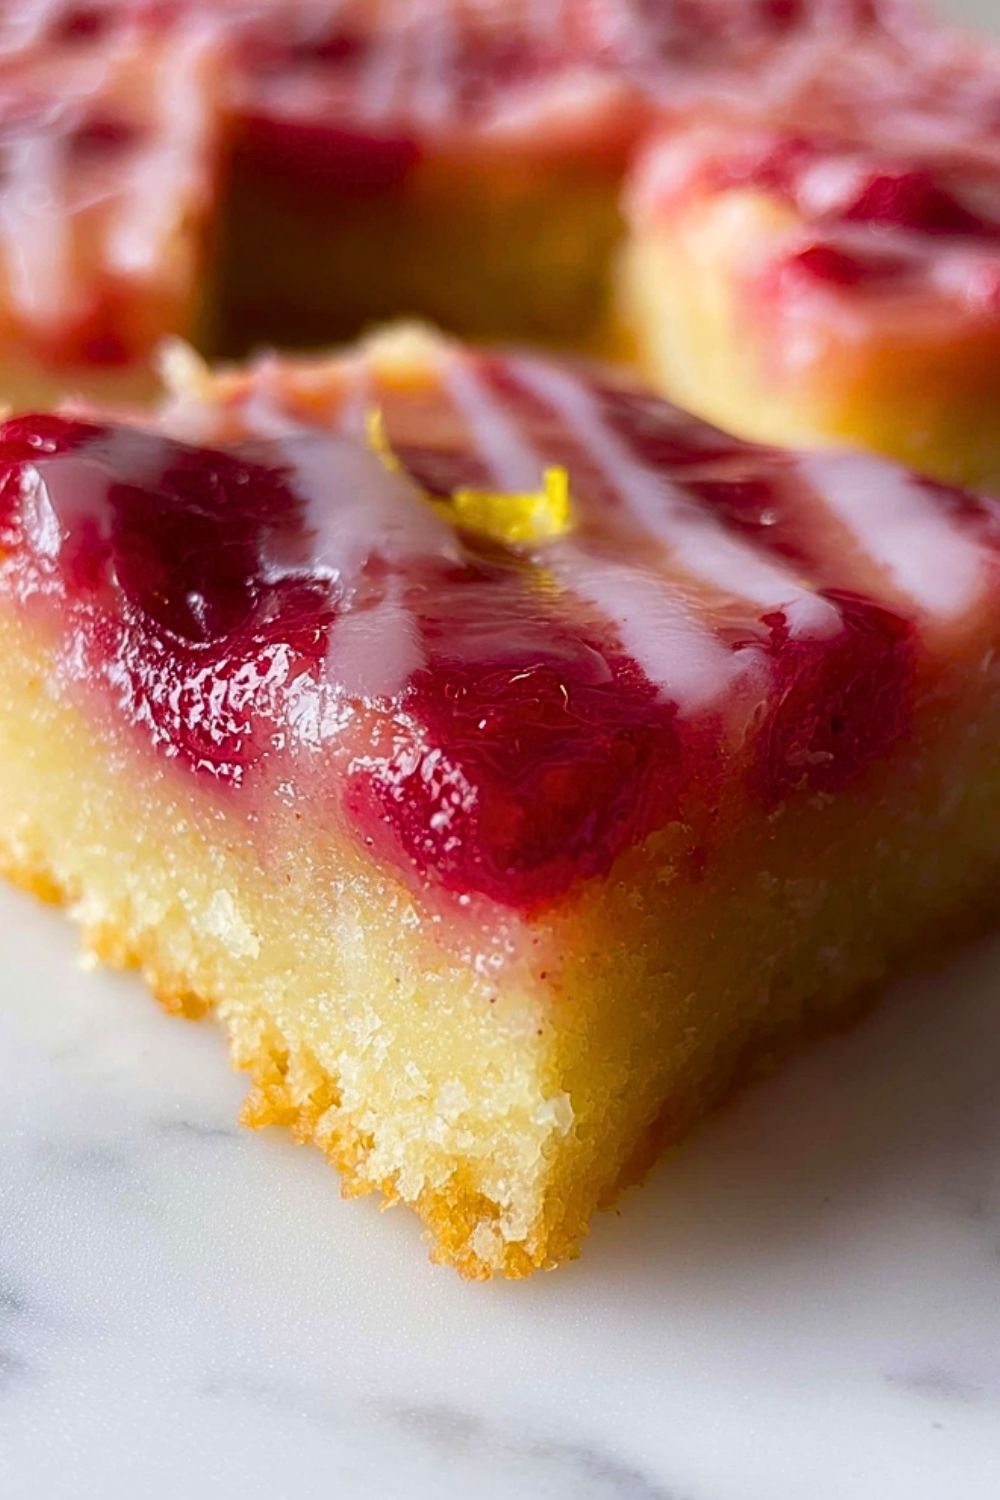
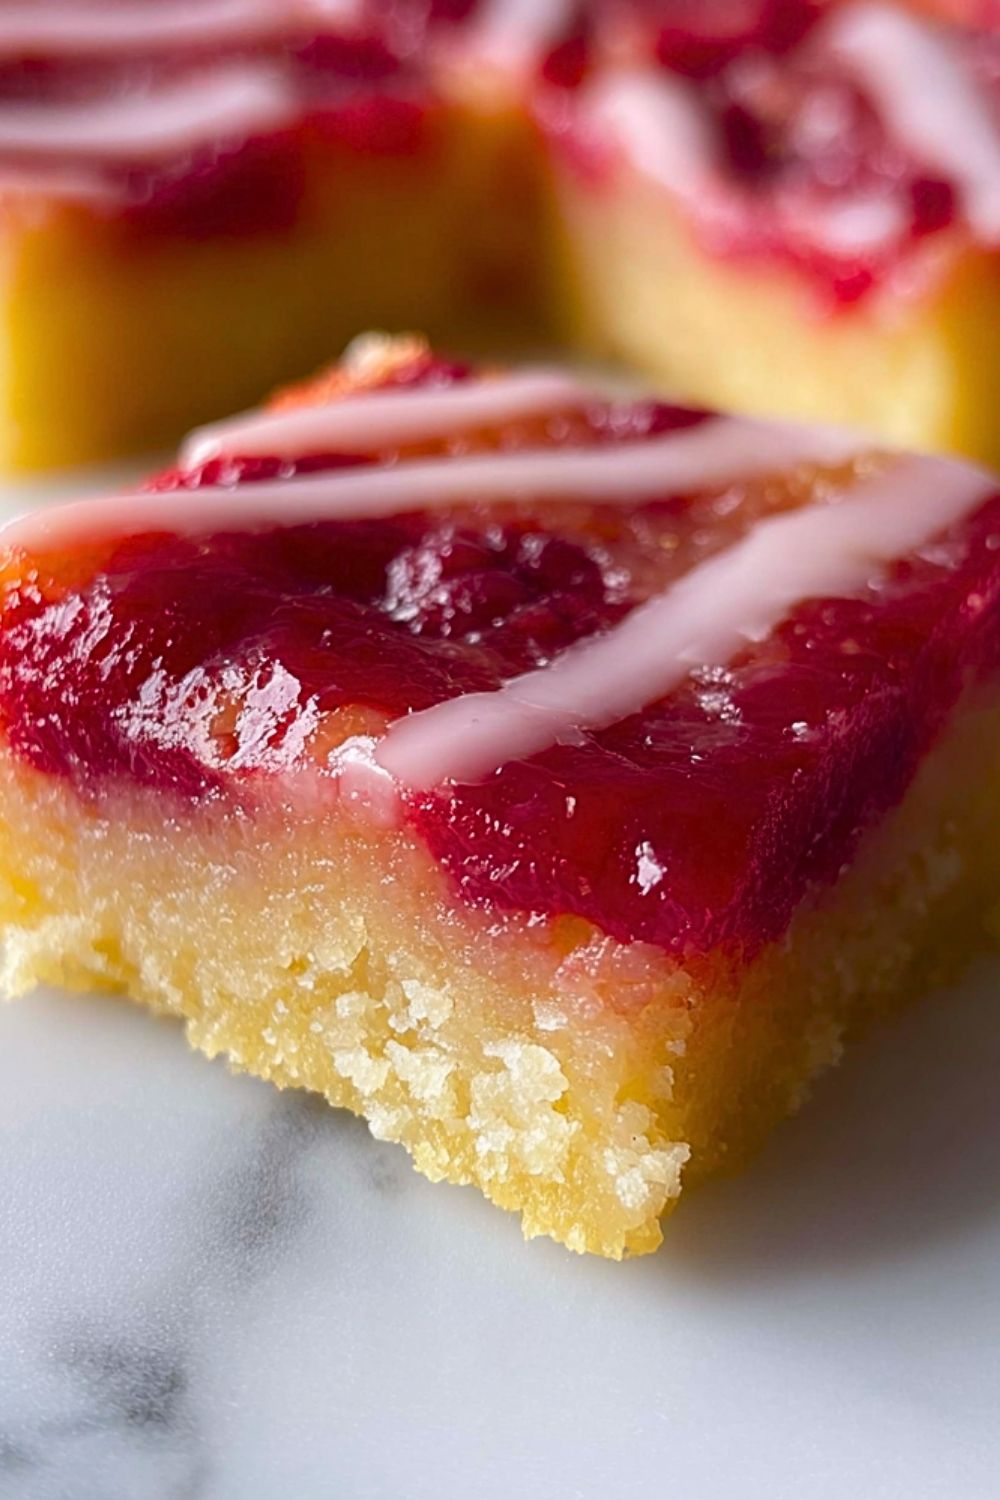
Bright, tangy, and bursting with juicy raspberry flavor, Raspberry Lemonade Bars bring together the sweetness of fresh berries and the citrusy zing of lemon in every bite. These soft dessert bars feature a buttery cake-like base topped with a vibrant raspberry lemonade layer that melts into the surface as it bakes, creating a beautiful marbled finish. A light drizzle of sweet glaze on top adds the perfect finishing touch.
Perfect for spring gatherings, summer picnics, bake sales, or a refreshing afternoon treat, these bars are easy to make and impossible to resist. The balance of tart lemon and sweet raspberry creates a refreshing dessert that feels light yet indulgent. Served chilled or at room temperature, Raspberry Lemonade Bars are the kind of dessert that disappears quickly from the dessert table.
Why You’ll Love This Raspberry Lemonade Bars Recipe
These Raspberry Lemonade Bars are packed with fresh fruity flavor and require simple pantry ingredients, making them perfect for beginner and experienced bakers alike. The soft texture pairs beautifully with the tart raspberry topping, while the lemon flavor keeps every bite bright and refreshing. They are easy to slice, transport well for parties or potlucks, and can even be made ahead of time for stress-free entertaining. Their vibrant pink topping and glossy glaze also make them visually stunning for holidays, brunch spreads, or summer dessert platters.
Preparation Phase & Tools to Use
To make Raspberry Lemonade Bars successfully, having the right kitchen tools helps ensure smooth preparation and even baking. A 9×13-inch baking pan is essential for creating evenly thick bars that bake consistently. Mixing bowls are needed to prepare the batter and raspberry topping separately without overmixing. A hand mixer or stand mixer helps create a smooth, fluffy batter that gives the bars their soft texture. Measuring cups and spoons are important for accurate ingredient portions, especially when balancing sweet and tart flavors. A silicone spatula is useful for folding ingredients gently and scraping every bit of batter into the pan. Parchment paper can make lifting and slicing the bars much easier after baking, while a cooling rack helps the bars cool evenly before glazing.
Preparation Tips
For the best flavor, use fresh lemon juice instead of bottled juice, as it gives the bars a brighter citrus taste. If using frozen raspberries, thaw and drain them slightly to prevent excess moisture from affecting the texture. Avoid overmixing the batter once the dry ingredients are added, since this can make the bars dense instead of soft and tender. Lining the baking pan with parchment paper makes cleanup easier and helps create neat slices. Allow the bars to cool completely before adding the glaze so the topping stays smooth and visually appealing. Chilling the bars for a short time before slicing can also help produce cleaner edges and more defined layers.
Ingredients for This Raspberry Lemonade Bars Recipe
For the Bars
- 1 cup unsalted butter, softened
- 1 ¾ cups granulated sugar
- 4 large eggs
- 2 tablespoons fresh lemon zest
- ¼ cup freshly squeezed lemon juice
- 1 teaspoon vanilla extract
- 2 ¾ cups all-purpose flour
- 1 teaspoon baking powder
- ½ teaspoon salt
- ¾ cup whole milk
For the Raspberry Layer
- 2 cups fresh or frozen raspberries
- ⅓ cup granulated sugar
- 1 tablespoon cornstarch
- 2 tablespoons lemon juice
- 1 teaspoon lemon zest
For the Lemon Glaze
- 1 cup powdered sugar
- 2 to 3 tablespoons lemon juice
- ½ teaspoon vanilla extract
Optional Garnishes
- Fresh raspberries
- Thin lemon slices
- Extra lemon zest
- Powdered sugar dusting
- Mint leaves for serving
Step 1: Prepare the Baking Pan and Oven
Preheat your oven to 350°F (175°C). Grease a 9×13-inch baking pan lightly with butter or nonstick spray. Line the pan with parchment paper, leaving extra paper hanging over the sides to create easy handles for lifting the bars after baking. Preparing the pan properly prevents sticking and helps create clean slices later.
Step 2: Prepare the Raspberry Mixture
In a medium saucepan, combine the raspberries, sugar, cornstarch, lemon juice, and lemon zest. Cook the mixture over medium heat while stirring gently. As the berries begin to break down, the mixture will thicken into a glossy raspberry sauce. This usually takes about 5 to 7 minutes. Remove the pan from the heat and allow the raspberry mixture to cool slightly while preparing the batter.
If you prefer a smoother topping, press the raspberry mixture through a fine mesh sieve to remove the seeds. For a more rustic texture, leave the seeds intact.
Step 3: Cream the Butter and Sugar
In a large mixing bowl, beat the softened butter and granulated sugar together using a hand mixer or stand mixer. Continue mixing for about 3 to 4 minutes until the mixture becomes pale, light, and fluffy. This step is important because it creates air in the batter, helping the bars bake into a soft and tender texture.
Scrape down the sides of the bowl occasionally to ensure all ingredients are evenly combined.
Step 4: Add the Wet Ingredients
Add the eggs one at a time, mixing well after each addition. Stir in the lemon zest, fresh lemon juice, and vanilla extract. The batter may look slightly curdled because of the lemon juice, but this is completely normal.
Using fresh lemon juice and zest gives the dessert its bright lemonade flavor and enhances the fruity raspberry topping.
Step 5: Combine the Dry Ingredients
In a separate bowl, whisk together the flour, baking powder, and salt. Mixing the dry ingredients separately helps distribute the leavening evenly throughout the batter.
Gradually add the dry mixture into the wet ingredients while alternating with the milk. Start and end with the dry ingredients. Mix just until combined, being careful not to overmix.
The finished batter should be smooth, creamy, and thick enough to spread evenly in the baking pan.
Step 6: Spread the Batter into the Pan
Transfer the batter into the prepared baking pan. Use a silicone spatula or offset spatula to spread the batter evenly into all corners.
Tap the pan gently on the counter a few times to release any trapped air bubbles and create a smooth surface for the raspberry layer.
Step 7: Add the Raspberry Layer
Spoon the raspberry mixture evenly over the batter. Use the back of a spoon or a butter knife to swirl the raspberry topping slightly into the batter. Avoid overmixing the swirls so the bars keep their beautiful marbled appearance.
The raspberry layer will sink slightly into the batter during baking, creating rich pockets of fruit flavor throughout the bars.
Step 8: Bake the Raspberry Lemonade Bars
Place the pan in the preheated oven and bake for 35 to 40 minutes, or until the edges are lightly golden and a toothpick inserted into the center comes out mostly clean.
Avoid overbaking, as this can dry out the bars. The center should remain soft and slightly moist while still being fully baked.
If the top begins browning too quickly, loosely tent the pan with aluminum foil during the final minutes of baking.
Step 9: Cool Completely Before Glazing
Remove the pan from the oven and place it on a cooling rack. Allow the bars to cool completely in the pan before adding the glaze.
Cooling is important because warm bars can cause the glaze to melt and disappear into the surface instead of forming decorative drizzle lines.
For cleaner slices, refrigerate the cooled bars for 20 to 30 minutes before cutting.
Step 10: Prepare the Lemon Glaze
In a small bowl, whisk together the powdered sugar, lemon juice, and vanilla extract until smooth. Adjust the consistency as needed by adding more powdered sugar for a thicker glaze or more lemon juice for a thinner drizzle.
Drizzle the glaze over the cooled bars using a spoon or piping bag. Let the glaze set for several minutes before slicing and serving.
Step 11: Slice and Serve
Use the parchment paper handles to lift the bars from the pan. Place them on a cutting board and slice into squares or rectangles using a sharp knife.
For extra clean cuts, wipe the knife between slices. Garnish with fresh raspberries, lemon zest, or a dusting of powdered sugar if desired.
These Raspberry Lemonade Bars taste delicious served chilled, slightly cool, or at room temperature. Pair them with iced tea, lemonade, coffee, or fresh fruit for a refreshing dessert experience.
Notes
Raspberry Lemonade Bars are one of those desserts that taste even better after they have had time to rest. Allowing the bars to chill slightly before serving helps the lemon and raspberry flavors blend together beautifully while also improving the texture. These bars can easily be customized depending on the season or your personal taste preferences. Fresh raspberries provide the brightest flavor, but frozen raspberries work just as well when berries are out of season.
For a richer dessert, you can add white chocolate chips to the batter or drizzle melted white chocolate over the top instead of the lemon glaze. If you enjoy extra tartness, increase the lemon zest slightly for a stronger lemonade flavor. The recipe also works wonderfully for brunch spreads, baby showers, summer celebrations, holiday dessert trays, or afternoon coffee breaks.
The soft cake-like base absorbs some of the raspberry topping during baking, creating a moist and flavorful texture throughout the bars. Because of this, the bars remain tender for several days when stored properly. These bars are also easy to transport, making them ideal for potlucks, bake sales, picnics, and family gatherings.
Watch Out for These Mistakes While Cooking
Overmixing the Batter
Mixing the batter too much after adding the flour can develop excess gluten, leading to dense or tough bars instead of a soft and tender texture. Stir only until the ingredients are combined.
Using Cold Ingredients
Cold butter, eggs, or milk can prevent the batter from mixing evenly. Room-temperature ingredients create a smoother batter and better overall texture.
Adding Too Much Raspberry Sauce
Excess raspberry filling can make the bars overly wet and difficult to bake evenly. Spread the topping evenly without creating thick heavy pockets.
Skipping the Parchment Paper
Without parchment paper, the bars may stick to the pan and break apart during slicing. Lining the pan also helps lift the bars out cleanly.
Overbaking the Bars
Leaving the bars in the oven too long can dry them out. Remove them once the edges are lightly golden and the center is just set.
Glazing While Warm
If the bars are still warm, the glaze may melt completely into the surface instead of sitting beautifully on top.
Not Cooling Before Cutting
Warm bars can crumble or fall apart when sliced. Cooling completely helps the bars hold their shape and creates cleaner edges.
Storage Instructions
Store Raspberry Lemonade Bars in an airtight container at room temperature for up to 2 days or refrigerate them for up to 5 days for maximum freshness. Refrigeration helps preserve the bright fruit flavor and keeps the glaze firm. If stacking the bars, place parchment paper between layers to prevent sticking.
For longer storage, freeze the bars in a freezer-safe container for up to 2 months. Wrap individual slices tightly in plastic wrap and then place them in a sealed freezer bag or airtight container. Thaw overnight in the refrigerator before serving.
These bars are especially refreshing when served chilled straight from the refrigerator during warmer months.
Estimated Nutrition
Per Serving (Based on 16 Bars)
- Calories: 290
- Carbohydrates: 39g
- Protein: 4g
- Fat: 13g
- Saturated Fat: 8g
- Cholesterol: 70mg
- Sodium: 140mg
- Fiber: 2g
- Sugar: 26g
- Vitamin C: 10% Daily Value
- Calcium: 4% Daily Value
- Iron: 6% Daily Value
Nutritional values are approximate and may vary depending on ingredient brands and portion sizes.
Frequently Asked Questions
Can I use frozen raspberries instead of fresh raspberries?
Yes, frozen raspberries work very well in this recipe. Thaw them slightly and drain any excess liquid before cooking the raspberry mixture.
Can I make Raspberry Lemonade Bars ahead of time?
Absolutely. These bars actually taste even better after chilling for several hours because the flavors become more developed.
How do I know when the bars are fully baked?
The edges should appear lightly golden and a toothpick inserted near the center should come out mostly clean with a few moist crumbs.
Can I make the bars more tart?
Yes. Adding extra lemon zest or slightly increasing the lemon juice can create a stronger lemonade flavor.
What is the best way to cut clean dessert bars?
Use a sharp knife and wipe it clean between each cut. Chilling the bars before slicing also helps create neater edges.
Can I use another fruit instead of raspberries?
Yes. Strawberries, blackberries, blueberries, or mixed berries all work beautifully in this recipe.
Do the bars need to be refrigerated?
They can stay at room temperature for short periods, but refrigeration is recommended for longer freshness and better texture.
Can I freeze Raspberry Lemonade Bars?
Yes. Wrap the bars tightly and freeze for up to 2 months. Thaw them overnight in the refrigerator before serving.
Conclusion
Raspberry Lemonade Bars combine sweet berry flavor with bright citrus freshness in a dessert that feels both comforting and refreshing. Their soft texture, vibrant raspberry topping, and light lemon glaze make them a standout treat for any occasion. Whether you serve them at summer gatherings, brunch parties, family dinners, or simply enjoy them with a cup of coffee, these bars deliver a perfect balance of sweetness and tartness in every bite.
Easy to prepare and beautiful to serve, Raspberry Lemonade Bars are a dessert worth making again and again. From the buttery base to the fruity topping and glossy glaze, every layer works together to create a dessert that is simple, colorful, and completely irresistible.
Raspberry Lemonade Bars
- Prep Time: 20 minutes
- Cook Time: 40 minutes
- Total Time: 1 hour
- Yield: 16 bars
- Category: Dessert
- Method: Baking
- Cuisine: American
- Diet: Vegetarian
Description
Sweet, tangy, and bursting with fresh berry flavor, these Raspberry Lemonade Bars are the perfect easy dessert for spring and summer gatherings. Featuring a soft buttery base layered with vibrant raspberry lemonade topping and finished with a light lemon glaze, these dessert bars are refreshing, colorful, and incredibly satisfying. Whether you need quick dessert ideas, easy party treats, brunch desserts, picnic sweets, or fruity baked goods for holidays and celebrations, this easy recipe delivers bright citrus flavor and juicy raspberry goodness in every bite.
Ingredients
1 cup unsalted butter, softened
1 3/4 cups granulated sugar
4 large eggs
2 tablespoons fresh lemon zest
1/4 cup fresh lemon juice
1 teaspoon vanilla extract
2 3/4 cups all-purpose flour
1 teaspoon baking powder
1/2 teaspoon salt
3/4 cup whole milk
2 cups raspberries
1/3 cup granulated sugar
1 tablespoon cornstarch
2 tablespoons lemon juice
1 teaspoon lemon zest
1 cup powdered sugar
2 to 3 tablespoons lemon juice
1/2 teaspoon vanilla extract
Instructions
1. Preheat the oven to 350°F and line a 9×13-inch baking pan with parchment paper.
2. In a saucepan, combine raspberries, sugar, cornstarch, lemon juice, and lemon zest. Cook until thickened, then let cool slightly.
3. In a large bowl, beat butter and sugar until light and fluffy.
4. Add eggs one at a time, then mix in lemon zest, lemon juice, and vanilla extract.
5. In another bowl, whisk together flour, baking powder, and salt.
6. Gradually mix the dry ingredients into the wet ingredients while alternating with milk.
7. Spread the batter evenly into the prepared baking pan.
8. Spoon the raspberry mixture over the batter and gently swirl with a knife.
9. Bake for 35 to 40 minutes or until the edges are lightly golden and the center is set.
10. Allow the bars to cool completely before glazing.
11. Whisk together powdered sugar, lemon juice, and vanilla extract to make the glaze.
12. Drizzle the glaze over the cooled bars.
13. Slice into squares and serve chilled or at room temperature.
Notes
Use fresh lemon juice for the brightest lemonade flavor and best overall taste.
Chill the bars before slicing for cleaner cuts and more defined layers.
Avoid overmixing the batter to keep the bars soft, moist, and tender.
Nutrition
- Serving Size: 1 bar
- Calories: 290
- Sugar: 26g
- Sodium: 140mg
- Fat: 13g
- Saturated Fat: 8g
- Unsaturated Fat: 4g
- Trans Fat: 0g
- Carbohydrates: 39g
- Fiber: 2g
- Protein: 4g
- Cholesterol: 70mg
Keywords: raspberry lemonade bars, easy dessert bars, summer dessert, lemon raspberry dessert, fruity dessert bars, easy baking recipe, brunch desserts, picnic desserts