
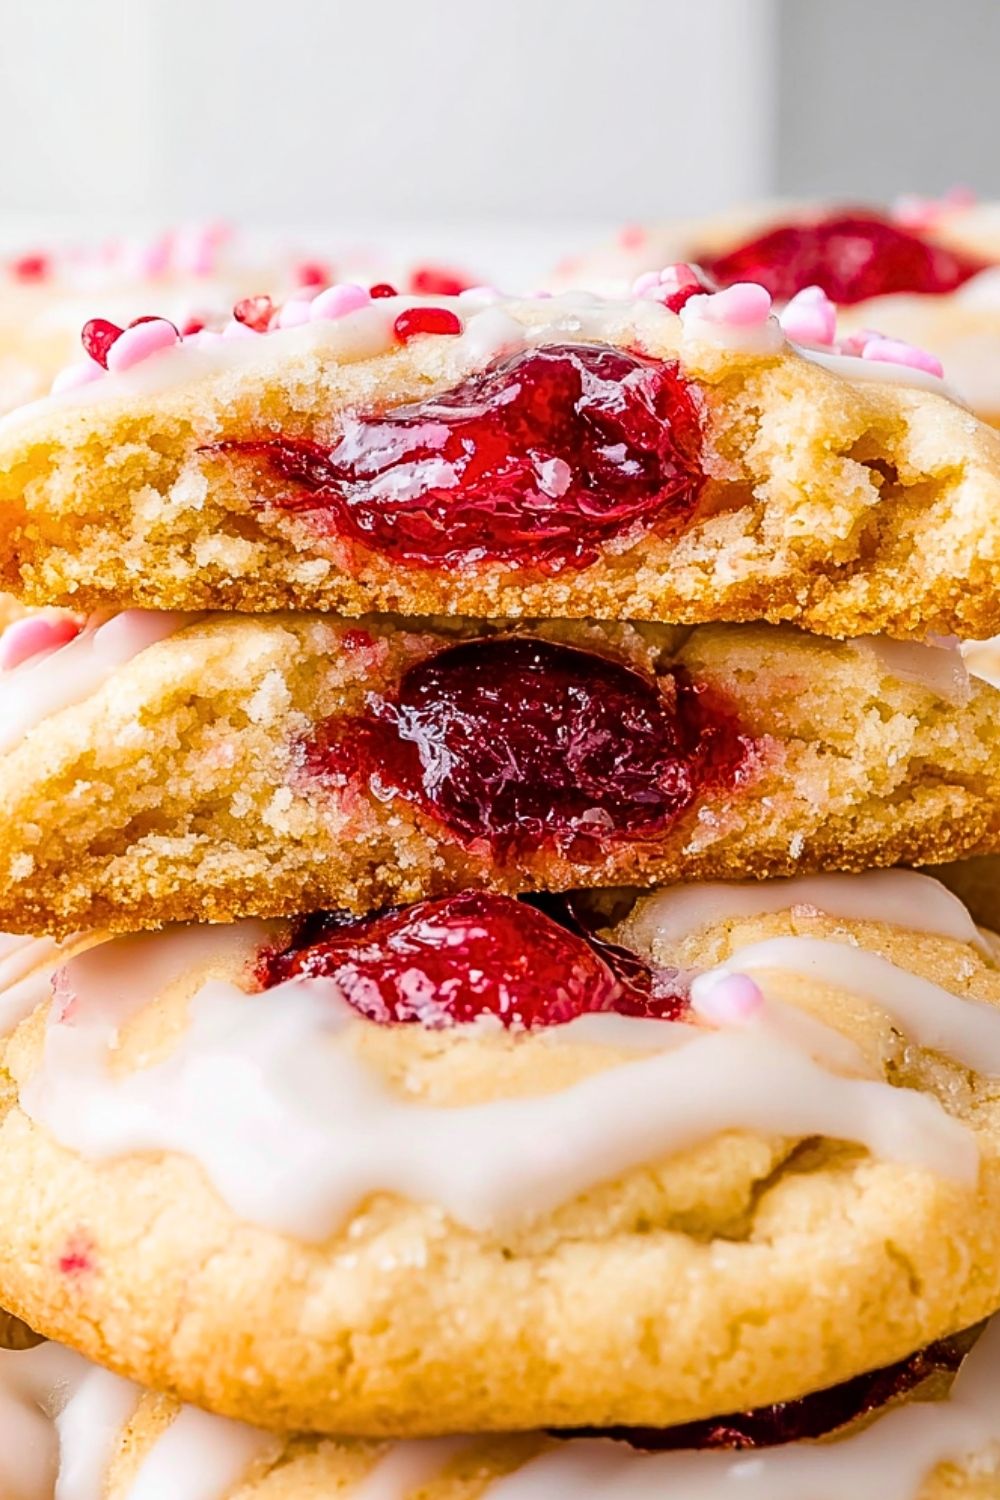
Soft, buttery cookies filled with sweet cherry pie filling and topped with a smooth vanilla glaze make these Easy Glazed Stuffed Cherry Pie Cookies impossible to resist. Every bite combines the comforting flavor of homemade sugar cookies with the rich, fruity center of cherry pie, creating a dessert that feels bakery-worthy without requiring complicated steps. The glossy glaze and colorful sprinkles add a festive touch that makes them perfect for Valentine’s Day, baby showers, holiday trays, or whenever you want a cheerful homemade treat.

What makes these cookies especially memorable is the contrast of textures. The outside stays tender and lightly crisp around the edges, while the center bursts with warm cherry filling that melts into the soft cookie dough. They look impressive enough for special occasions, yet the recipe is approachable for beginner bakers looking for easy dessert ideas that still deliver big flavor.
Why You’ll Love This Easy Glazed Stuffed Cherry Pie Cookies Recipe
These cookies bring together everything people love about pie and cookies in one handheld dessert. The cherry filling adds a juicy sweetness that pairs beautifully with the buttery dough, while the glaze creates a bakery-style finish that feels extra special. Since the recipe uses simple pantry staples and canned cherry pie filling, you can create a stunning dessert without spending hours in the kitchen.
Another reason these cookies stand out is their versatility. They work beautifully for parties, holiday dessert platters, bake sales, or cozy weekend baking sessions. You can even customize them with different pie fillings like strawberry, blueberry, or raspberry for a fun variation. Their eye-catching appearance and rich flavor make them a guaranteed crowd favorite.
Preparation Phase & Tools to Use
Having the right tools ready before you start baking makes the process smoother and helps the cookies turn out perfectly every time.
Mixing Bowls: Essential for separating wet and dry ingredients while keeping the dough evenly mixed.
Electric Mixer or Stand Mixer: Helps cream the butter and sugar properly, creating a light and tender cookie texture.
Measuring Cups and Spoons: Accurate measurements are important for balanced flavor and consistent dough texture.
Baking Sheets: A sturdy baking sheet ensures even heat distribution so the cookies bake uniformly.
Parchment Paper: Prevents sticking and makes cleanup much easier while helping the bottoms bake evenly.
Cookie Scoop: Useful for portioning evenly sized cookies so they bake at the same rate.
Cooling Rack: Allows the cookies to cool completely without trapping steam underneath.
Small Spoon or Scoop: Makes it easier to add the cherry pie filling neatly into the center of each cookie.
Preparation Tips
For the best results, chill the cookie dough briefly if it feels too soft before shaping the cookies. This helps prevent spreading and keeps the cherry filling sealed inside during baking. Avoid overfilling the cookies with pie filling, as too much can leak out while baking. Pat the cherry filling lightly with a paper towel if it seems overly syrupy to reduce excess moisture. When glazing the cookies, make sure they are fully cooled so the icing sets smoothly instead of melting into the tops. Adding sprinkles immediately after glazing helps them stick perfectly and gives the cookies a polished bakery-style appearance.
Ingredients for this Easy Glazed Stuffed Cherry Pie Cookies Recipe
For the Cookie Dough
- 1 cup unsalted butter, softened
- 1 ¼ cups granulated sugar
- 2 large eggs, room temperature
- 2 teaspoons pure vanilla extract
- 3 cups all-purpose flour
- 1 teaspoon baking powder
- ½ teaspoon baking soda
- ½ teaspoon salt
- 3 tablespoons cornstarch
- 2 tablespoons milk if needed for softer dough consistency
For the Cherry Filling
- 1 cup cherry pie filling
- ½ teaspoon almond extract (optional but highly recommended)
For the Vanilla Glaze
- 1 ½ cups powdered sugar
- 2 to 3 tablespoons milk
- ½ teaspoon vanilla extract
Optional Toppings
- Pink, red, or white sprinkles
- Crushed freeze-dried cherries
- Sanding sugar for sparkle
Ingredient Notes
Butter: Using real unsalted butter gives the cookies a rich bakery-style flavor and soft texture.
Cornstarch: Helps create a tender and melt-in-your-mouth cookie crumb.
Cherry Pie Filling: Thick canned filling works best because it stays inside the cookies more easily during baking.
Almond Extract: Cherry and almond flavors pair beautifully together and enhance the pie-like taste.
Powdered Sugar: Creates a smooth glaze that hardens slightly for the perfect finish.
Step 1: Prepare the Baking Area
Preheat your oven to 350°F (175°C). Line large baking sheets with parchment paper to prevent sticking and encourage even baking. Organizing all ingredients before mixing makes the process easier and helps avoid missing important steps.
Step 2: Cream the Butter and Sugar
In a large mixing bowl, beat the softened butter and granulated sugar together using an electric mixer for about 2 to 3 minutes. The mixture should look pale, fluffy, and creamy. Proper creaming incorporates air into the dough, helping create soft and tender cookies.
Step 3: Add the Wet Ingredients
Mix in the eggs one at a time, beating well after each addition. Stir in the vanilla extract and almond extract if using. The mixture should become smooth and silky.
Step 4: Combine the Dry Ingredients
In a separate bowl, whisk together the flour, baking powder, baking soda, salt, and cornstarch. Slowly add the dry mixture into the wet ingredients while mixing on low speed. Continue mixing until a soft dough forms. If the dough appears too thick or crumbly, add a tablespoon or two of milk.
Step 5: Chill the Dough
Cover the dough and refrigerate it for 20 to 30 minutes. Chilling helps prevent the cookies from spreading too much and makes them easier to stuff with filling.
Step 6: Prepare the Cherry Filling
Place the cherry pie filling into a small bowl. If the cherries are very large, chop them into smaller pieces for easier stuffing. Stir in almond extract if desired for extra flavor depth.
Step 7: Portion the Cookie Dough
Use a cookie scoop or tablespoon to scoop equal portions of dough. Flatten one portion slightly in your hand to create a small disc.
Step 8: Add the Cherry Filling
Place about 1 teaspoon of cherry filling in the center of the flattened dough. Be careful not to overfill, or the filling may leak during baking.
Step 9: Seal the Cookies
Take another flattened piece of dough and place it on top of the cherry-filled dough. Carefully pinch the edges together and gently roll into a ball to fully seal the filling inside.
Step 10: Arrange on Baking Sheet
Place the stuffed cookie dough balls on the prepared baking sheets, leaving about 2 inches of space between each cookie to allow for spreading.
Step 11: Bake the Cookies
Bake for 12 to 15 minutes or until the edges become lightly golden while the centers remain soft. Avoid overbaking to keep the cookies tender.
Baking Tip
Rotate the baking sheet halfway through baking for more even browning.
Step 12: Cool Completely
Allow the cookies to cool on the baking sheet for 5 minutes before transferring them to a wire rack. Cooling completely is important before glazing.
Step 13: Make the Vanilla Glaze
In a medium bowl, whisk together powdered sugar, vanilla extract, and milk until smooth. Adjust the consistency as needed by adding more milk for a thinner glaze or more powdered sugar for a thicker glaze.
Glaze Texture Guide
- Thick glaze creates dramatic drips and a bakery-style finish.
- Thin glaze gives a light sweet coating.
- Medium glaze works best for adding sprinkles.
Step 14: Glaze the Cookies
Spoon or drizzle the glaze over the cooled cookies. Let the icing drip naturally down the sides for a beautiful homemade appearance.
Step 15: Decorate and Finish
Immediately top the glazed cookies with sprinkles or crushed freeze-dried cherries before the glaze sets. Let the cookies rest for about 20 minutes so the glaze can firm up.
Step 16: Serve and Enjoy
Serve these Easy Glazed Stuffed Cherry Pie Cookies slightly warm or at room temperature. Pair them with coffee, tea, milk, or hot chocolate for a comforting dessert experience.
Serving Ideas
- Arrange them on holiday dessert trays.
- Package them in decorative boxes for edible gifts.
- Serve alongside vanilla ice cream for an extra indulgent dessert.
- Add them to brunch tables for a sweet bakery-style treat.
Notes
These Easy Glazed Stuffed Cherry Pie Cookies are best enjoyed fresh the same day they are glazed, but they also store beautifully for later snacking. The cookie dough itself is soft and buttery, which creates the perfect contrast to the sweet cherry filling hidden inside. If you want a stronger cherry flavor, adding a few drops of almond extract makes a huge difference because it naturally enhances fruit-based desserts.
For a bakery-style presentation, drizzle the glaze generously and allow it to drip naturally over the edges of the cookies. Chilling the dough before stuffing is highly recommended because it keeps the cookies thicker and helps prevent filling leaks. If you enjoy experimenting in the kitchen, this recipe is also incredibly flexible. You can swap the cherry pie filling with blueberry, raspberry, strawberry, or even apple pie filling for seasonal variations.
When baking multiple trays, keep the unused dough refrigerated between batches. Warm dough spreads more quickly in the oven and may not hold the filling as well. Using parchment paper instead of greasing the pan also helps the bottoms bake evenly without overbrowning.
Watch Out for These Mistakes While Cooking
Overfilling the Cookies
Adding too much cherry filling may cause the cookies to burst open during baking. Keep the filling amount small and centered.
Skipping the Dough Chilling Step
Warm dough spreads too much in the oven and can make the cookies thin and messy. Chilling creates thicker, softer cookies.
Not Sealing the Dough Properly
If the cookie edges are not sealed tightly, the filling may leak out while baking. Gently pinch all seams closed before baking.
Overbaking
The cookies should look slightly soft in the center when removed from the oven. Overbaking leads to dry cookies instead of soft bakery-style texture.
Glazing Warm Cookies
Applying glaze before the cookies cool completely will cause the icing to melt and become too thin.
Using Watery Filling
Thin pie filling creates leaks and soggy centers. If needed, blot excess syrup with paper towels before stuffing.
Crowding the Baking Sheet
Cookies need room to spread slightly. Leaving enough spacing ensures even baking and proper airflow.
Measuring Flour Incorrectly
Scooping flour directly with the measuring cup can pack in too much flour, resulting in dense cookies. Spoon and level the flour instead.
Storage Instructions
Store the cookies in an airtight container at room temperature for up to 3 days. Place parchment paper between layers to prevent the glaze from sticking. For longer freshness, refrigerate the cookies for up to 1 week. Allow chilled cookies to come to room temperature before serving for the best texture.
These cookies also freeze surprisingly well. Freeze unglazed cookies in a freezer-safe container for up to 2 months. Once thawed, add fresh glaze before serving for the best appearance and flavor. You can also freeze the cookie dough balls before baking. Simply stuff and shape the cookies, freeze them on a tray until solid, then transfer them to freezer bags. Bake directly from frozen by adding 1 to 2 extra minutes to the baking time.
Estimated Nutrition
Per Cookie Approximation
- Calories: 280
- Carbohydrates: 39g
- Protein: 3g
- Fat: 12g
- Saturated Fat: 7g
- Cholesterol: 40mg
- Sodium: 120mg
- Sugar: 24g
- Fiber: 1g
Nutrition values may vary depending on ingredient brands, glaze amount, and cookie size.
Frequently Asked Questions
Can I use homemade cherry pie filling?
Yes, homemade cherry pie filling works wonderfully as long as it is thick enough to stay inside the cookies during baking.
Can I make the dough ahead of time?
Absolutely. The dough can be refrigerated for up to 48 hours before baking.
Why did my cookies spread too much?
This usually happens when the dough is too warm or the butter was overly softened. Chilling the dough helps control spreading.
Can I freeze the baked cookies?
Yes, baked cookies freeze very well. Freeze them without glaze for the best texture after thawing.
What other fillings can I use?
Blueberry, raspberry, apple, strawberry, peach, or mixed berry fillings all work beautifully in this recipe.
How do I keep the filling from leaking out?
Use a small amount of filling and carefully seal the dough edges completely before baking.
Can I make these cookies without glaze?
Yes, the cookies are still delicious without glaze. You can instead dust them lightly with powdered sugar.
Are these cookies good for holidays and gifting?
Definitely. Their colorful appearance and soft texture make them ideal for Valentine’s Day, Christmas cookie trays, birthdays, and homemade dessert gifts.
Conclusion
Easy Glazed Stuffed Cherry Pie Cookies combine the comforting flavor of homemade cookies with the rich sweetness of cherry pie filling in one irresistible dessert. Their soft buttery texture, glossy vanilla glaze, and vibrant cherry center create a treat that looks impressive while remaining simple enough for everyday baking. Whether you are preparing them for a holiday gathering, weekend dessert table, bake sale, or sweet homemade gift, these cookies deliver bakery-style flavor with every bite.
The combination of fruity filling and tender cookie dough makes them a memorable dessert that guests will immediately reach for. Once you try them fresh from the oven with their sweet glaze and soft cherry center, they are sure to become a favorite recipe you return to again and again.
Easy Glazed Stuffed Cherry Pie Cookies
- Prep Time: 30 minutes
- Cook Time: 15 minutes
- Total Time: 45 minutes
- Yield: 18 cookies
- Category: Dessert
- Method: Baking
- Cuisine: American
- Diet: Vegetarian
Description
These Easy Glazed Stuffed Cherry Pie Cookies are soft, buttery, and filled with sweet cherry pie filling for the ultimate bakery-style dessert. Topped with a smooth vanilla glaze and festive sprinkles, these cookies are perfect for holiday dessert trays, Valentine’s Day treats, bake sales, quick dessert ideas, and easy homemade sweets. The tender sugar cookie exterior combined with the juicy cherry center creates an irresistible dessert that tastes like cherry pie in cookie form. Whether you are searching for fun baking ideas, easy cookie recipes, or crowd-pleasing dessert recipes, these stuffed cherry cookies are guaranteed to impress.
Ingredients
1 cup unsalted butter, softened
1 ¼ cups granulated sugar
2 large eggs
2 teaspoons vanilla extract
3 cups all-purpose flour
1 teaspoon baking powder
½ teaspoon baking soda
½ teaspoon salt
3 tablespoons cornstarch
2 tablespoons milk if needed
1 cup cherry pie filling
½ teaspoon almond extract optional
1 ½ cups powdered sugar
2 to 3 tablespoons milk
½ teaspoon vanilla extract
2 tablespoons pink and red sprinkles
1 tablespoon crushed freeze-dried cherries
Instructions
1. Preheat the oven to 350°F and line baking sheets with parchment paper.
2. Beat butter and sugar together until light and fluffy.
3. Add eggs one at a time and mix in vanilla extract.
4. In another bowl whisk flour, baking powder, baking soda, salt, and cornstarch.
5. Slowly combine dry ingredients with wet ingredients until a soft dough forms.
6. Refrigerate dough for 20 to 30 minutes.
7. Stir almond extract into cherry pie filling if using.
8. Scoop cookie dough and flatten slightly in your hand.
9. Add 1 teaspoon cherry filling to the center.
10. Cover with another flattened dough piece and seal edges completely.
11. Arrange cookies on prepared baking sheets spaced 2 inches apart.
12. Bake for 12 to 15 minutes until edges are lightly golden.
13. Cool cookies completely on a wire rack.
14. Whisk powdered sugar, milk, and vanilla extract together to make glaze.
15. Drizzle glaze over cooled cookies.
16. Decorate with sprinkles and let glaze set before serving.
Notes
Chilling the dough helps prevent spreading and keeps the filling sealed inside the cookies.
Avoid overfilling with cherry pie filling because excess filling can leak during baking.
For the best bakery-style appearance, glaze the cookies only after they have completely cooled.
Nutrition
- Serving Size: 1 cookie
- Calories: 280
- Sugar: 24g
- Sodium: 120mg
- Fat: 12g
- Saturated Fat: 7g
- Unsaturated Fat: 4g
- Trans Fat: 0g
- Carbohydrates: 39g
- Fiber: 1g
- Protein: 3g
- Cholesterol: 40mg
Keywords: easy cookies, cherry pie cookies, stuffed cookies, glazed cookies, easy dessert recipe, homemade cookies, holiday cookies, bakery style cookies