
I’ve made plenty of pie crusts over the years, but this Easy Flaky All Butter Pie Crust is the one I come back to every single time. It delivers that irresistible buttery flavor with layers so tender and crisp that every slice feels bakery-worthy. Whether I’m baking a classic apple pie, a creamy pumpkin filling, or a savory quiche, this crust never lets me down.

What I love most is how simple the process can be when you know a few key tricks. With just a handful of pantry staples, you can create a homemade pie crust that tastes far better than anything store-bought. The dough rolls out beautifully, bakes up golden, and gives every dessert a rich homemade touch.
Why You’ll Love This Easy Flaky All Butter Pie Crust
This Easy Flaky All Butter Pie Crust has everything you want in a homemade crust. The butter creates rich flavor while also producing delicate flaky layers that practically melt in your mouth. Every bite has that crisp, golden texture that makes homemade pies feel extra special.
Another reason this crust stands out is its versatility. You can use it for sweet fruit pies, creamy custard pies, hand pies, galettes, and even savory recipes. Since it uses basic ingredients, it’s also budget-friendly and easy to make whenever the craving for fresh pie strikes.
The dough is beginner-friendly too. Even if you’ve struggled with pie crust in the past, this recipe is forgiving and easy to handle when chilled properly. Once you try it, you may never go back to pre-made crusts again.
What Kind of Butter Should I Use for Easy Flaky All Butter Pie Crust?
Butter is the heart of this recipe, so choosing the right kind makes a big difference. I always prefer using unsalted butter because it allows better control over the overall flavor and salt level in the dough. European-style butter is another fantastic option since it contains a higher fat percentage, giving the crust an even richer taste and flakier texture.
Keeping the butter cold is just as important as the type you choose. Very cold butter creates little pockets throughout the dough, which turn into those beautiful flaky layers during baking. Some bakers even freeze the butter briefly before cutting it into the flour.
If salted butter is all you have on hand, you can still use it successfully. Simply reduce the added salt in the recipe slightly so the crust doesn’t become overly salty.
Options for Substitutions
If you need to make a few adjustments, there are several easy substitutions that still produce a delicious pie crust. For the flour, all-purpose flour works best, but pastry flour can create an even more tender texture. If you want a slightly heartier crust, you can replace a small portion of the flour with whole wheat flour.
Ice water is traditionally used to bring the dough together, though some bakers enjoy adding a splash of vodka instead. Vodka helps create a flaky crust because it limits gluten development while keeping the dough workable.
For those avoiding dairy, cold plant-based butter substitutes can work surprisingly well. Just make sure the substitute is designed for baking and stays firm when chilled. The final texture may vary slightly, but you can still achieve a crisp and flavorful crust.
You can also experiment with flavor additions. A pinch of cinnamon works beautifully for fruit pies, while a little black pepper or herbs can complement savory fillings.
Ingredients for this Easy Flaky All Butter Pie Crust
All-Purpose Flour
All-purpose flour forms the foundation of the pie crust and gives the dough enough structure to hold together while still staying tender and flaky. It creates the balance needed between softness and stability so the crust can support a variety of fillings without becoming dense.
Unsalted Butter
Butter is the most important ingredient in this recipe because it creates the rich flavor and signature flaky texture. As the cold butter melts during baking, it releases steam that forms delicate layers throughout the crust. Using high-quality butter gives the crust a deep buttery taste that makes homemade pie unforgettable.
Salt
A small amount of salt enhances the flavor of the butter and flour while balancing the richness of the crust. Even in sweet pies, salt plays a key role in making the flavors taste complete and well-rounded.
Ice Water
Ice water helps bring the dough together while keeping the butter cold. Cold ingredients are essential for achieving flaky layers because they prevent the butter from melting into the flour before baking.
Granulated Sugar
A little sugar adds subtle flavor and helps the crust brown beautifully in the oven. It also adds a slight crispness that works especially well for dessert pies.
Optional Egg Wash
An egg wash brushed over the crust before baking creates a glossy golden finish. It gives the pie a polished bakery-style appearance and helps decorative edges stand out.
Optional Vinegar or Vodka
A splash of vinegar or vodka can help keep the dough tender by limiting gluten development. Many bakers use this trick to make pie crust easier to roll and even flakier after baking.
Step 1: Gather and Chill Your Ingredients
Before starting, measure all ingredients carefully and place the butter in the refrigerator or freezer until extremely cold. Cold butter is essential because it creates steam pockets during baking, which results in flaky layers.
Fill a small bowl with ice water and let it sit while preparing the flour mixture. Chilling the water ensures the dough stays cold from beginning to end.
It’s also a good idea to chill your mixing bowl and pastry cutter if your kitchen is warm. Pie dough works best when everything stays as cool as possible.
Step 2: Mix the Dry Ingredients
In a large mixing bowl, whisk together the all-purpose flour, salt, and sugar until evenly combined. This ensures the flavor is distributed throughout the dough and prevents salty spots.
Whisking the dry ingredients also aerates the flour slightly, which contributes to a lighter crust texture.
Step 3: Cut the Butter Into the Flour
Cut the cold butter into small cubes and add it to the flour mixture. Using a pastry cutter, fork, or your fingertips, work the butter into the flour until the mixture resembles coarse crumbs with some pea-sized butter pieces remaining.
Those visible butter pieces are exactly what create flaky layers during baking. Avoid overmixing at this stage because fully blending the butter into the flour can lead to a dense crust instead of a flaky one.
If at any point the butter becomes soft, place the bowl in the refrigerator for several minutes before continuing.
Step 4: Add Ice Water Gradually
Slowly drizzle ice water into the flour mixture one tablespoon at a time. Gently stir the dough with a fork after each addition until the mixture begins to clump together.
The dough should look slightly shaggy and moist but not sticky. You may not need all the water depending on humidity and flour absorption.
Be careful not to overwork the dough. Handling it too much develops gluten, which can make the crust tough rather than tender.
Step 5: Form the Dough Into Discs
Turn the dough onto a lightly floured surface and gently press it together with your hands. Divide the dough into two equal portions and shape each into a flat disc.
Flattening the dough helps it chill more evenly and makes rolling easier later. Wrap each disc tightly in plastic wrap.
At this point, the dough may still look slightly rough, which is perfectly normal. The texture smooths out as it rests.
Step 6: Chill the Dough Thoroughly
Refrigerate the wrapped dough for at least one hour before rolling it out. Chilling allows the flour to fully hydrate while also firming the butter back up.
This resting period improves both texture and flavor while preventing shrinkage during baking.
For even better flavor, you can refrigerate the dough overnight.
Step 7: Roll Out the Dough
Lightly flour your work surface and rolling pin. Roll one dough disc outward from the center, rotating frequently to maintain an even circular shape.
Aim for a thickness of about one-eighth inch. If the dough cracks slightly at the edges, gently press it back together.
If the dough becomes too soft while rolling, return it to the refrigerator for a few minutes before continuing.
Step 8: Transfer the Dough to the Pie Dish
Carefully roll the dough around the rolling pin and unroll it into the pie dish. Gently press it into the bottom and sides without stretching the dough.
Stretching can cause the crust to shrink while baking. Trim excess dough around the edges, leaving a slight overhang for crimping.
For double-crust pies, repeat the rolling process with the second dough disc.
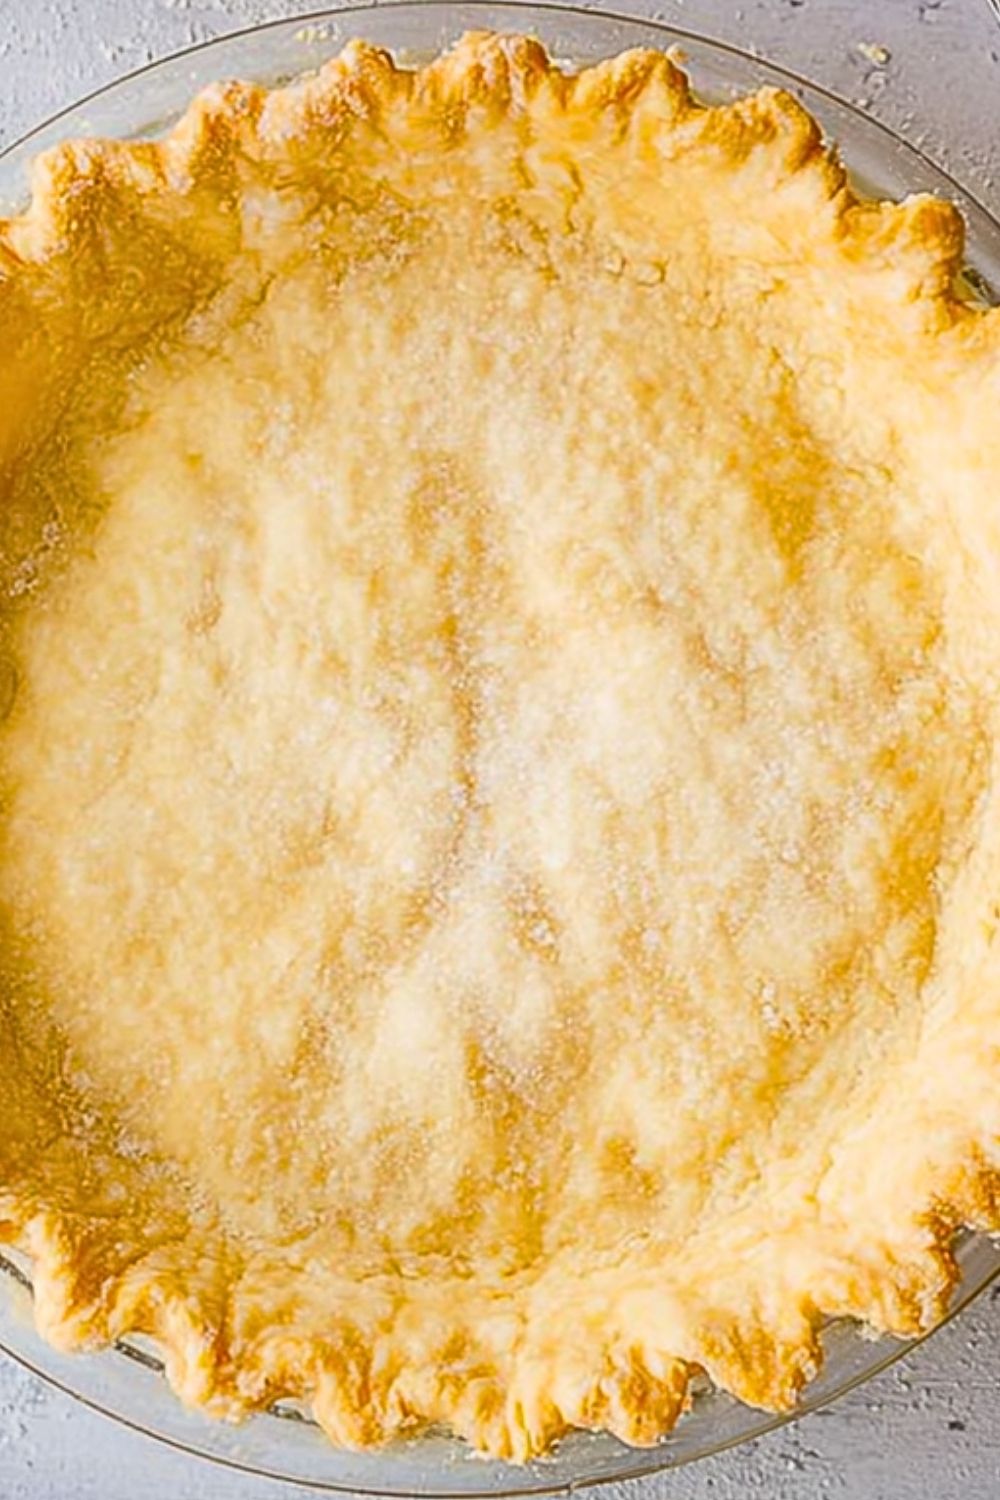
Step 9: Crimp and Decorate the Edges
Fold the overhanging dough under itself along the rim of the pie dish to create a thicker edge. Use your fingers or a fork to crimp the edges into decorative patterns.
This step not only improves appearance but also helps seal in fillings for fruit pies and savory dishes.
You can also use small dough cutouts for decorative accents if desired.
Step 10: Chill the Prepared Crust Again
Before baking, chill the prepared pie crust for another 15 to 30 minutes. This final chill helps the butter stay cold and keeps the crust from shrinking in the oven.
A well-chilled crust also holds decorative details better during baking.
Step 11: Blind Bake if Needed
For custard pies or no-bake fillings, blind baking is often necessary. Line the crust with parchment paper and fill it with pie weights or dried beans.
Bake until the edges begin turning golden, then remove the weights and continue baking until the bottom looks lightly golden and dry.
Blind baking prevents soggy bottoms and keeps the crust crisp.
Step 12: Fill and Bake the Pie
Add your desired filling and bake according to your pie recipe instructions. Fruit pies often require longer baking times so the filling thickens properly while the crust becomes deeply golden.
For extra shine, brush the top crust with egg wash before baking.
The finished crust should be flaky, buttery, crisp, and beautifully golden.
Easy Flaky All Butter Pie Crust
How Long to Prepare the Easy Flaky All Butter Pie Crust
Making a homemade pie crust takes a little patience, but the results are absolutely worth the effort. Most of the active preparation time is fairly short, especially once you become familiar with the process. Mixing the dough, cutting in the butter, and shaping the discs generally takes about 20 to 25 minutes from start to finish.
The chilling time is where most of the waiting happens, but this step is essential for achieving the perfect flaky texture. The dough should chill for at least one hour before rolling, and another short chill after shaping helps prevent shrinking during baking. If you plan ahead and chill the dough overnight, the flavor and texture become even better.
Preparation Time
The initial dough preparation usually takes around 20 to 25 minutes. This includes measuring ingredients, cutting in the butter, and forming the dough into discs.
Chilling Time
The dough needs at least 1 hour of refrigeration before rolling. After shaping the crust in the pie dish, an additional 15 to 30 minutes of chilling is recommended.
Baking Time
Depending on the pie recipe, the crust may bake anywhere from 15 minutes for partial blind baking to 50 minutes for fully baked fruit pies.
Total Time
Including chilling and baking, the total process can range from 2 to 3 hours. Much of this time is hands-off, making it easy to prepare the dough in advance.
Tips for Perfect Easy Flaky All Butter Pie Crust
One of the best tips for pie crust success is keeping every ingredient as cold as possible. Cold butter is what creates flaky layers, so avoid letting it soften too much during mixing or rolling.
Use ice water sparingly when bringing the dough together. Too much water can make the dough sticky and tough. Add only enough for the dough to hold together when pressed.
Avoid overworking the dough at every stage. Excess mixing develops gluten, which can lead to a chewy or dense crust instead of a tender flaky texture.
When rolling out the dough, rotate it frequently and use light pressure. This helps maintain an even thickness and prevents sticking.
Always chill the dough before baking. This step solidifies the butter again and helps the crust hold its shape in the oven.
For extra flavor and color, brush the top crust with egg wash and sprinkle lightly with coarse sugar before baking.
If you notice the edges browning too quickly, cover them loosely with foil or a pie shield during the remainder of baking.
Watch Out for These Mistakes While Cooking
One common mistake is using warm butter. Soft butter blends too completely into the flour, which prevents flaky layers from forming properly.
Adding too much water is another issue many bakers face. Sticky dough can become difficult to roll and may bake into a tough crust.
Overmixing the dough is also problematic. The dough should remain slightly shaggy rather than perfectly smooth before chilling.
Skipping the chilling steps often leads to shrinking and uneven baking. Chilled dough holds its shape far better in the oven.
Another mistake is stretching the dough when placing it into the pie dish. Stretching causes the crust to shrink back as it bakes.
Underbaking can leave the bottom crust pale and soggy. Always bake until the crust reaches a rich golden color.
Using too much flour while rolling can dry out the dough. Use only enough flour to prevent sticking.
What to Serve With Easy Flaky All Butter Pie Crust?
Classic Apple Pie Filling
A buttery flaky crust pairs beautifully with warm cinnamon-spiced apples. The crisp texture complements the soft fruit filling perfectly.
Homemade Whipped Cream
Fresh whipped cream adds a light creamy contrast that enhances both sweet and savory pies made with this crust.
Vanilla Ice Cream
Warm pie served with cold vanilla ice cream creates a comforting dessert combination that never goes out of style.
Savory Chicken Pot Pie Filling
This crust also works wonderfully for savory dishes. Creamy chicken pot pie filling becomes even more satisfying with a flaky golden crust.
Fresh Berry Compote
A spoonful of berry compote can add freshness, sweetness, and vibrant color to baked pies and tarts.
Storage Instructions
Refrigerating the Dough
Unbaked pie dough can be stored in the refrigerator for up to 3 days when wrapped tightly in plastic wrap. Keeping it sealed prevents the dough from drying out or absorbing refrigerator odors.
Freezing the Dough
For longer storage, wrap the dough discs in plastic wrap and place them inside a freezer-safe bag. Frozen pie dough can last for up to 3 months. Thaw overnight in the refrigerator before using.
Storing a Baked Crust
A fully baked pie crust can be kept at room temperature for about 2 days if covered loosely. For longer freshness, refrigerate it in an airtight container.
Reheating Tips
To refresh a baked crust, place it in a 350-degree oven for several minutes. This helps restore crispness and buttery texture.
Estimated Nutrition
Calories
A single slice of pie crust contains approximately 220 to 300 calories depending on thickness and portion size.
Fat
Butter contributes most of the fat content, giving the crust its rich flavor and flaky texture.
Carbohydrates
The flour provides carbohydrates that form the structure of the crust.
Protein
Pie crust contains a small amount of protein from the flour and butter.
Sodium
Salt levels can vary depending on whether salted or unsalted butter is used.
Frequently Asked Questions
Can I make the dough ahead of time?
Yes, the dough can be refrigerated for up to 3 days or frozen for several months. Making it ahead often improves flavor and convenience.
Why is my pie crust tough instead of flaky?
Tough crust usually happens from overmixing the dough or adding too much water. Handle the dough gently for the best texture.
Do I have to blind bake the crust?
Blind baking is only necessary for certain pies such as custard pies or no-bake fillings. Fruit pies generally bake with the filling inside.
Can I freeze baked pie crust?
Yes, fully baked crusts freeze well when wrapped carefully. Allow them to cool completely before freezing.
What should I do if my dough cracks while rolling?
If cracks appear, gently press the dough back together with your fingers. Letting the dough soften slightly at room temperature can also help.
Conclusion
This Easy Flaky All Butter Pie Crust is one of those foundational recipes every home baker should have in their collection. It combines simple ingredients with reliable techniques to create a crust that tastes rich, buttery, crisp, and beautifully flaky every single time.
Once you learn the basics of handling cold butter, chilling the dough properly, and avoiding overmixing, homemade pie crust becomes far less intimidating. Whether you use it for holiday desserts, comforting family pies, or savory dishes, this crust brings homemade warmth and incredible flavor to every bite.
After trying this recipe, you may discover that making pie crust from scratch is not only easier than expected but also deeply rewarding. The golden flaky layers and rich buttery flavor truly make all the difference.
Easy Flaky All Butter Pie Crust
- Prep Time: 25 minutes
- Cook Time: 45 minutes
- Total Time: 2 hours 10 minutes
- Yield: 2 pie crusts
- Category: Dessert
- Method: Baking
- Cuisine: American
- Diet: Vegetarian
Description
This Easy Flaky All Butter Pie Crust delivers buttery flavor, crisp golden edges, and perfectly flaky layers every single time. Whether you are looking for an easy dessert recipe, homemade pie dough, holiday baking ideas, or a reliable crust for sweet and savory pies, this recipe is a must-have for every kitchen. Made with simple pantry staples and rich butter, this homemade pie crust creates bakery-style results with very little effort. It works beautifully for apple pie, pumpkin pie, chicken pot pie, berry pies, and so much more.
Ingredients
2 1/2 cups all-purpose flour
1 cup unsalted butter, very cold and cubed
1 teaspoon salt
1 tablespoon granulated sugar
6 to 8 tablespoons ice water
1 teaspoon vinegar or vodka (optional)
1 egg beaten with 1 tablespoon water for egg wash (optional)
Instructions
1. In a large mixing bowl, whisk together the all-purpose flour, salt, and sugar until evenly combined.
2. Add the cold cubed butter to the flour mixture and cut it in using a pastry cutter or your fingertips until the mixture resembles coarse crumbs with pea-sized butter pieces remaining.
3. Slowly drizzle in the ice water one tablespoon at a time, gently mixing with a fork until the dough starts coming together.
4. Add the vinegar or vodka if using, then gently gather the dough without overmixing.
5. Divide the dough into two equal portions and shape each into a flat disc.
6. Wrap each dough disc tightly in plastic wrap and refrigerate for at least 1 hour.
7. Lightly flour a work surface and roll the dough outward from the center into a large circle about 1/8-inch thick.
8. Carefully transfer the dough to a pie dish and gently press it into the bottom and sides without stretching it.
9. Trim excess dough and crimp the edges as desired.
10. Chill the prepared crust for another 15 to 30 minutes before baking.
11. For blind baking, line the crust with parchment paper and pie weights, then bake until lightly golden.
12. Add your desired filling and bake according to your pie recipe instructions until the crust is deeply golden and flaky.
Notes
Keep all ingredients as cold as possible for the flakiest texture.
Avoid overmixing the dough to prevent a tough crust.
Chill the dough before and after rolling to help the crust hold its shape while baking.
Nutrition
- Serving Size: 1 slice
- Calories: 280
- Sugar: 1g
- Sodium: 180mg
- Fat: 18g
- Saturated Fat: 11g
- Unsaturated Fat: 5g
- Trans Fat: 0g
- Carbohydrates: 25g
- Fiber: 1g
- Protein: 3g
- Cholesterol: 45mg
Keywords: easy pie crust, flaky pie crust, all butter pie crust, homemade pie dough, dessert recipe, baking recipe, holiday pie crust, buttery pie crust