
 Ava Garrison
There’s something deeply satisfying about making a homemade Buttery Flaky Pie Crust from scratch. The tender, crisp layers and rich buttery flavor create the perfect foundation for everything from classic apple pie to silky chocolate cream pie. A well-made crust transforms any dessert into something bakery-worthy, with a delicate texture that melts in your mouth while still holding its shape beautifully.
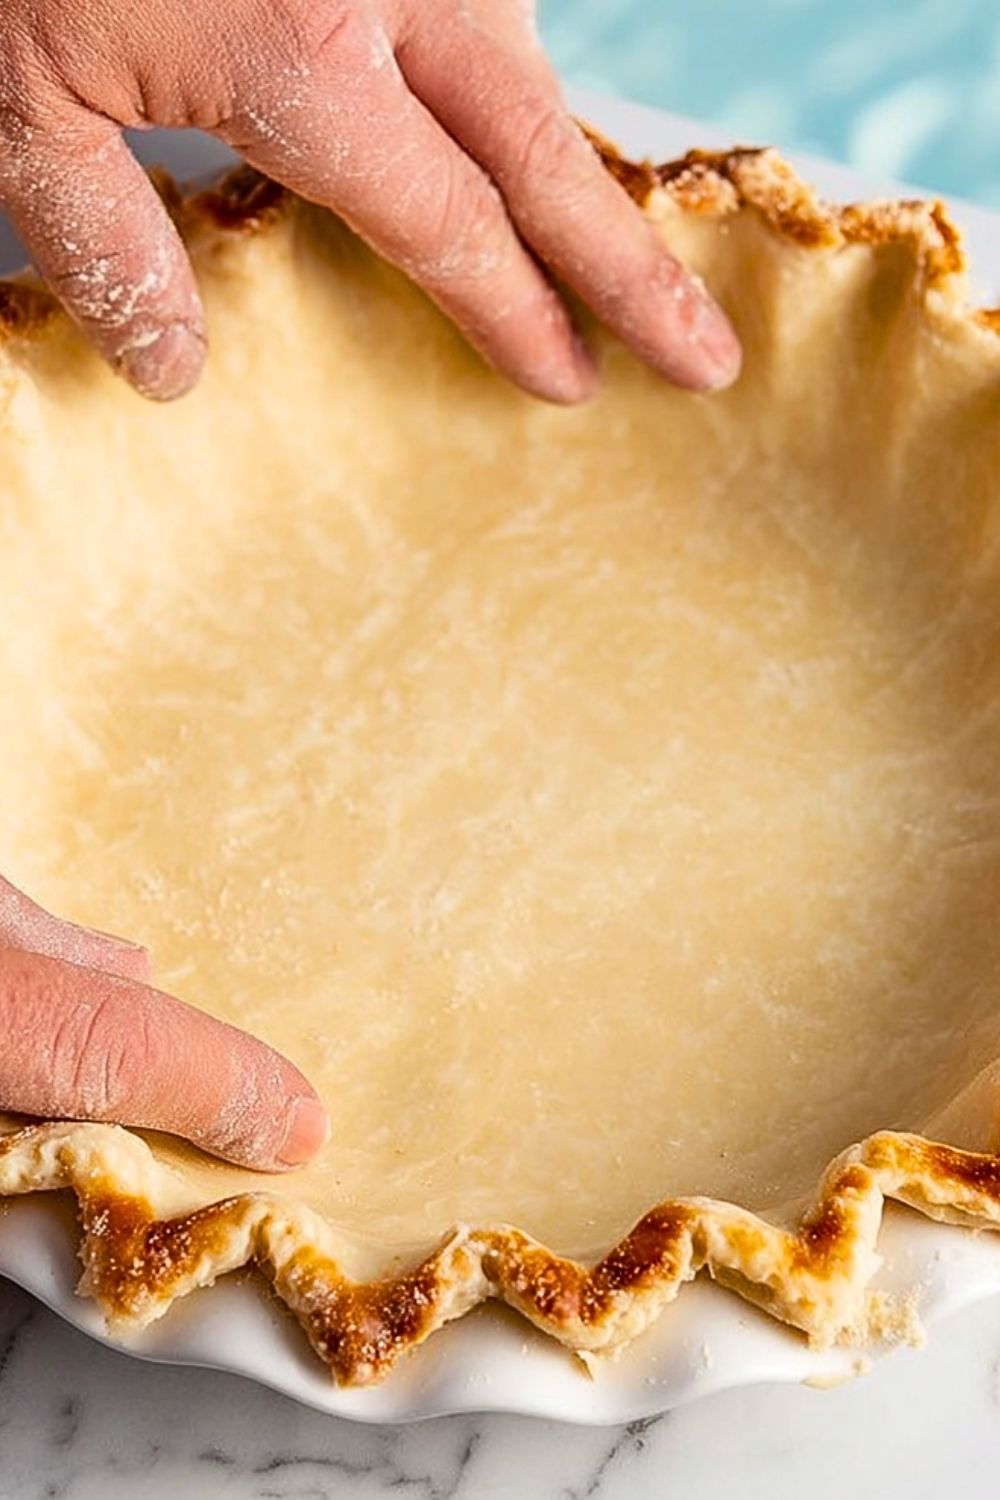
This Buttery Flaky Pie Crust is designed to be approachable for beginners while delivering professional-quality results. With just a few pantry staples and a handful of reliable techniques, you can create a crust that bakes up golden, crisp, and irresistibly flaky every single time. Whether you’re preparing holiday pies or casual weekend desserts, this crust is a dependable recipe you’ll come back to again and again.
Why You’ll Love This Buttery Flaky Pie Crust
This crust strikes the perfect balance between tenderness and structure, making it ideal for both sweet and savory pies. The buttery flavor shines through in every bite, while the flaky texture creates those beautiful layers everyone loves. Because the dough comes together quickly, it’s easy enough for weeknight baking yet elegant enough for special occasions.
Another reason this recipe stands out is its versatility. You can use it for fruit pies, quiches, pot pies, hand pies, or even galettes. The dough is forgiving, rolls out smoothly, and can be made ahead of time for convenience. Once you master this simple crust, you’ll never feel the need to buy store-bought pastry again.
Preparation Phase & Tools to Use
Creating the perfect Buttery Flaky Pie Crust starts with having the right tools on hand. Each piece of equipment plays an important role in achieving a crust that is light, tender, and flaky.
A large mixing bowl gives you enough room to combine ingredients evenly without overworking the dough. A pastry cutter is essential for cutting cold butter into the flour while keeping visible butter pieces intact, which helps create flaky layers during baking. If you don’t have a pastry cutter, two forks or a food processor can work as alternatives.
A rolling pin is necessary for evenly rolling out the dough to the proper thickness. Using a marble rolling pin or chilled rolling surface helps keep the butter cold. Measuring cups and spoons ensure accurate ingredient ratios, which are especially important in pastry recipes. A pie dish provides structure and shape for the crust while baking, and parchment paper with pie weights is useful if blind baking the crust.
Keeping ingredients cold is one of the most important factors in pie dough success, so having refrigerator space ready for chilling the dough is equally valuable. Cold butter creates steam pockets as the crust bakes, resulting in the signature flaky texture.
Preparation Tips
Start by chilling your butter thoroughly before mixing the dough, and use ice-cold water to keep everything as cold as possible throughout the process. Avoid overmixing the dough, since excessive handling develops gluten and can make the crust tough instead of tender. When adding water, do so gradually—just enough for the dough to hold together when pressed between your fingers.
After forming the dough, let it rest in the refrigerator for at least one hour. This relaxes the gluten and firms up the butter, making the dough easier to roll and improving the final texture. While rolling, work quickly and lightly dust the surface with flour to prevent sticking without drying out the dough. If the dough becomes too soft or warm at any point, place it back in the refrigerator for a few minutes before continuing.
Ingredients for This Buttery Flaky Pie Crust
Making a truly exceptional Buttery Flaky Pie Crust only requires a handful of simple ingredients, but each one plays a key role in creating the perfect texture and flavor. Using high-quality butter and properly chilled ingredients makes a noticeable difference in the final result.
Dry Ingredients
- 2 ½ cups all-purpose flour
- 1 teaspoon salt
- 1 tablespoon granulated sugar (optional, but recommended for sweet pies)
Fat
- 1 cup unsalted butter, very cold and cut into small cubes
Liquid
- 6 to 8 tablespoons ice water
Optional Additions
- 1 teaspoon apple cider vinegar or lemon juice for extra tenderness
- Extra flour for rolling the dough
Step 1: Chill the Ingredients
Before starting, place the cubed butter in the refrigerator or freezer for about 15–20 minutes. Cold butter is essential because it creates steam pockets in the oven, resulting in flaky layers throughout the crust.
Fill a small bowl with ice water and keep it nearby while preparing the dough. Chilled ingredients prevent the butter from melting too early and help maintain the ideal pastry texture.
Step 2: Combine the Dry Ingredients
In a large mixing bowl, whisk together the flour, salt, and sugar until evenly combined. Mixing the dry ingredients first ensures consistent flavor and texture throughout the dough.
If you are making a savory pie, you can reduce or omit the sugar entirely. The small amount of sugar in this recipe mainly enhances browning and flavor.
Step 3: Cut the Butter Into the Flour
Add the chilled butter cubes to the flour mixture. Using a pastry cutter, two forks, or your fingertips, cut the butter into the flour until the mixture resembles coarse crumbs with some pea-sized butter pieces remaining.
Do not overwork the butter. Visible butter chunks are exactly what create the flaky layers in the crust during baking. If the butter starts softening too much, place the bowl in the refrigerator for a few minutes before continuing.
Step 4: Add the Ice Water
Drizzle in the ice water one tablespoon at a time, gently mixing after each addition. Continue adding water until the dough just begins to come together when squeezed between your fingers.
The dough should look slightly shaggy rather than perfectly smooth. Adding too much water can make the crust dense and tough, so use only the amount needed for the dough to hold together.
Step 5: Form the Dough
Turn the dough onto a lightly floured surface and gently gather it into a ball. Divide the dough into two equal portions if making a double crust pie.
Flatten each portion into a disk shape rather than a ball. This makes rolling easier later and helps the dough chill evenly. Wrap each disk tightly in plastic wrap.
Step 6: Chill the Dough
Place the wrapped dough disks in the refrigerator for at least 1 hour. Chilling allows the gluten to relax and firms up the butter again, which is critical for achieving a tender and flaky crust.
For even better flavor and texture, you can refrigerate the dough overnight. The dough can also be frozen for longer storage.
Step 7: Roll Out the Dough
Lightly flour your work surface and rolling pin. Roll the dough outward from the center, rotating it occasionally to maintain an even circular shape.
Roll the dough into a circle about 12 inches wide and roughly ⅛ inch thick. If cracks appear around the edges, gently press them back together with your fingers.
Avoid using too much flour during rolling, as excess flour can dry out the dough.
Step 8: Transfer the Dough to the Pie Dish
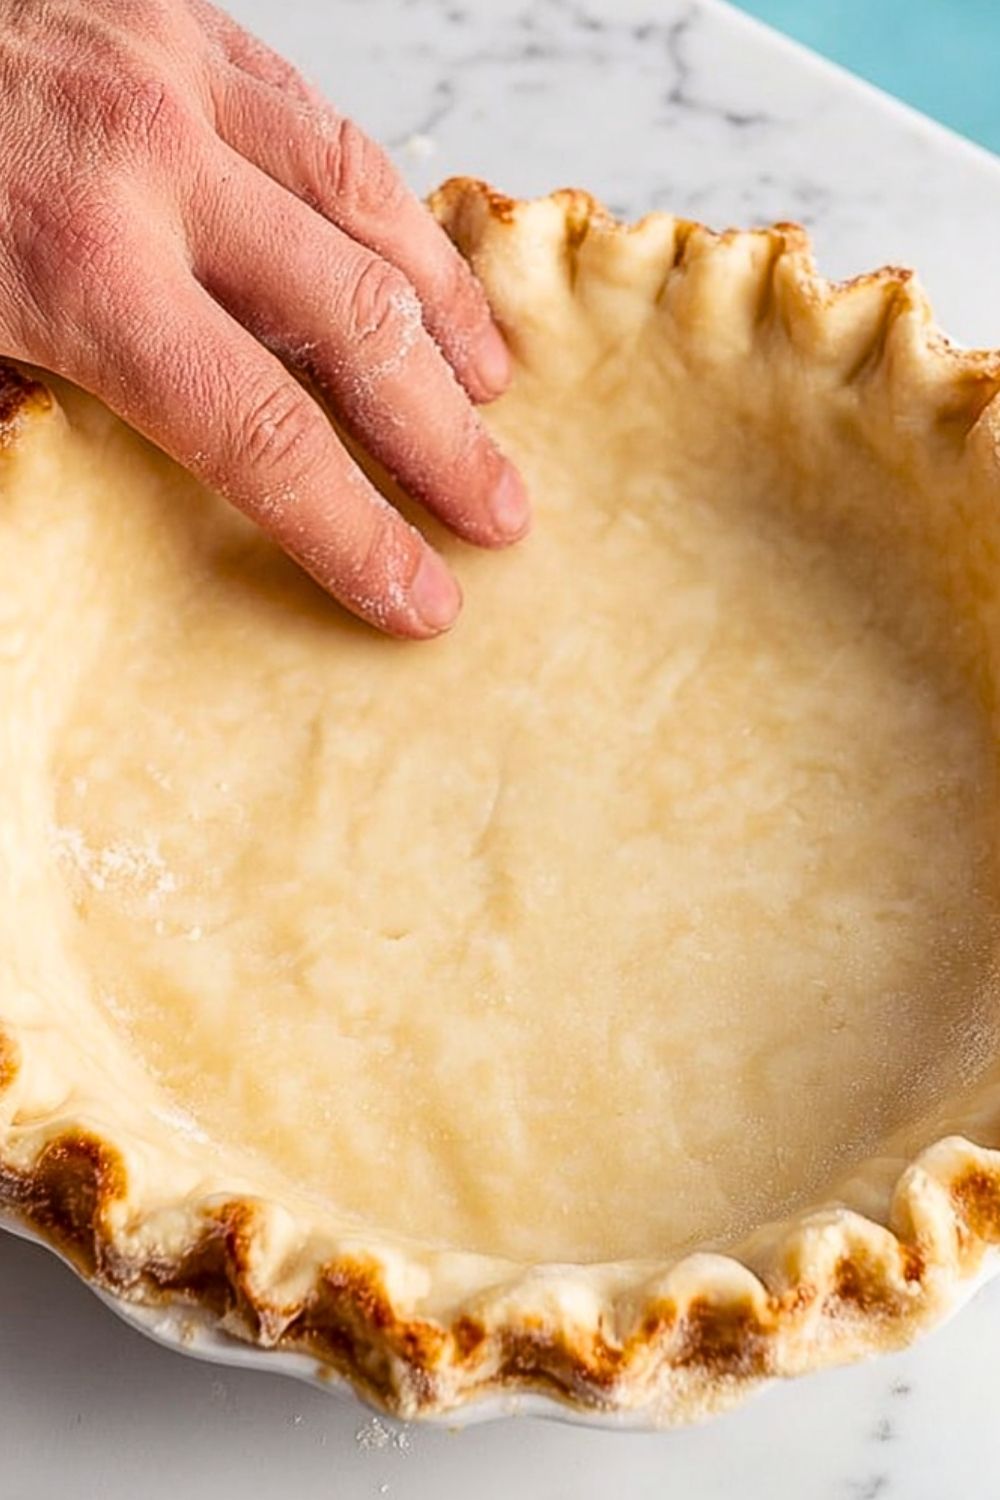
Carefully fold the dough in half or roll it loosely around the rolling pin to transfer it into the pie dish. Gently press the dough into the bottom and sides without stretching it.
Stretching the dough can cause shrinking during baking. Leave about 1 inch of overhang around the edges for crimping.
Step 9: Crimp the Edges
Trim any excess dough if necessary, then fold the edges underneath themselves to create a thicker border. Use your fingers or a fork to crimp the edges decoratively.
A properly crimped edge not only looks beautiful but also helps hold the crust shape during baking.
Step 10: Chill the Prepared Crust
Before baking, place the prepared crust back into the refrigerator for 15–20 minutes. This final chill helps solidify the butter and reduces shrinking in the oven.
Cold dough entering a hot oven is one of the secrets to creating ultra-flaky pastry.
Step 11: Blind Bake if Needed
For recipes requiring a pre-baked crust, line the chilled dough with parchment paper and fill it with pie weights or dried beans.
Bake at 375°F (190°C) for 15–20 minutes until the edges begin turning golden. Remove the weights and parchment, then continue baking for another 5–10 minutes if a fully baked crust is needed.
Blind baking prevents soggy bottoms in custard or cream pies.
Step 12: Fill and Bake
Once your crust is prepared, add your desired filling and bake according to your pie recipe instructions.
As the pie bakes, the butter melts and releases steam, forming delicate flaky layers while the crust develops a rich golden color and crisp texture.
Step 13: Cool Before Slicing
Allow the baked pie to cool completely or according to recipe directions before slicing. Cooling helps the filling set properly and keeps the crust crisp and structured.
The result is a buttery, tender, flaky pie crust that complements both sweet and savory fillings beautifully.
Notes
A great Buttery Flaky Pie Crust depends more on technique than complicated ingredients. One of the biggest secrets is maintaining cold temperatures throughout the entire process. Cold butter creates steam while baking, which forms the flaky layers that make homemade crust irresistible. If the butter melts before baking, the crust can turn dense and greasy instead of light and crisp.
Another important factor is handling the dough gently. Overmixing develops gluten, leading to a chewy texture rather than a tender bite. The dough should look slightly rough and uneven before chilling, which is perfectly normal. Resting the dough in the refrigerator is equally essential because it relaxes the gluten and improves both texture and rollability.
This recipe is also highly adaptable. For sweeter pies, a little extra sugar can enhance flavor and browning. For savory dishes like chicken pot pie or quiche, reducing the sugar creates a more neutral pastry. You can even incorporate herbs, spices, or grated cheese for added depth and creativity.
When baking fruit pies, consider brushing the crust with egg wash before placing it in the oven. This gives the crust a glossy golden finish and enhances visual appeal. Sprinkling coarse sugar on top can also add a delicate crunch and sparkle for dessert pies.
Watch Out for These Mistakes While Cooking
Using Warm Butter
Warm butter blends too fully into the flour and prevents flaky layers from forming. Always keep the butter cold until the dough goes into the oven.
Adding Too Much Water
Excess water creates sticky dough and encourages gluten development, making the crust tough instead of tender. Add water slowly and stop once the dough holds together.
Overworking the Dough
Handling the dough too much during mixing or rolling can create a dense, chewy texture. Mix only until combined and roll with gentle pressure.
Skipping Chill Time
Chilling the dough is not optional. It firms the butter and relaxes gluten, preventing shrinking and improving texture during baking.
Stretching the Dough Into the Pan
Stretching causes the crust to shrink as it bakes. Instead, gently lower the dough into the pie dish and ease it into place naturally.
Forgetting to Dock or Use Pie Weights
When blind baking, failing to dock the crust or use pie weights can lead to puffing and uneven baking.
Baking at the Wrong Temperature
A properly preheated oven is essential for flaky pastry. If the oven is too cool, the butter melts before steam can create layers.
Using Too Much Flour While Rolling
Excess flour dries out the dough and can make the crust crumbly. Use only enough flour to prevent sticking.
Storage Instructions
Freshly prepared pie dough can be wrapped tightly and stored in the refrigerator for up to 3 days before baking. Keeping the dough chilled helps preserve the butter structure and maintains the flaky texture once baked.
For longer storage, wrap the dough disks securely in plastic wrap and place them inside a freezer-safe bag or airtight container. The dough can be frozen for up to 3 months. When ready to use, thaw overnight in the refrigerator before rolling.
A fully baked pie crust should be cooled completely before storing. Cover loosely with foil or plastic wrap and keep at room temperature for up to 2 days, depending on the filling used. Refrigeration may be necessary for cream-based or custard pies.
To refresh a baked crust, place it in a 350°F oven for several minutes to restore crispness before serving.
Estimated Nutrition
Per Serving (Based on 8 Servings)
- Calories: 320
- Total Fat: 22g
- Saturated Fat: 14g
- Cholesterol: 55mg
- Sodium: 180mg
- Carbohydrates: 28g
- Fiber: 1g
- Sugar: 1g
- Protein: 3g
Nutritional values may vary depending on ingredient brands, portion sizes, and optional additions.
Frequently Asked Questions
Can I make the pie dough ahead of time?
Yes, the dough can be prepared up to 3 days in advance and stored in the refrigerator. It also freezes very well for long-term storage.
Why is my pie crust tough instead of flaky?
This usually happens from overmixing the dough or adding too much water. Gentle handling is key to maintaining tenderness.
Can I use salted butter instead of unsalted butter?
Yes, but reduce the added salt slightly to avoid an overly salty crust.
What is the best flour for pie crust?
All-purpose flour works best because it provides the ideal balance between tenderness and structure.
Why did my crust shrink during baking?
Shrinking often happens when the dough is stretched into the pan or not chilled long enough before baking.
Do I need pie weights for blind baking?
Pie weights are highly recommended because they prevent the crust from puffing up and losing shape.
Can I freeze a baked pie crust?
Yes, fully baked crusts can be frozen after cooling completely. Wrap tightly and freeze for up to 2 months.
How do I make the crust extra golden?
Brushing the crust with egg wash before baking helps create a shiny, rich golden finish.
Conclusion
Mastering a homemade Buttery Flaky Pie Crust is one of the most rewarding baking skills you can develop. With its rich buttery flavor, delicate flaky layers, and versatile nature, this crust becomes the perfect base for countless sweet and savory creations. By focusing on cold ingredients, gentle handling, and proper chilling, you can consistently create bakery-quality results right in your own kitchen.
Once you experience the flavor and texture of homemade pie crust, it’s hard to return to store-bought versions. Whether you’re preparing a comforting holiday dessert, a rustic fruit pie, or a savory dinner pie, this reliable recipe delivers beautiful results every time.
Buttery Flaky Pie Crust
- Prep Time: 20 minutes
- Cook Time: 20 minutes
- Total Time: 1 hour 40 minutes
- Yield: 2 pie crusts
- Category: Dessert
- Method: Baking
- Cuisine: American
- Diet: Vegetarian
Description
This Buttery Flaky Pie Crust is the perfect foundation for all your favorite desserts and savory pies. Made with simple pantry staples and rich cold butter, this easy recipe creates tender, crisp, golden layers that melt in your mouth. Whether you’re looking for holiday baking ideas, easy dessert recipes, homemade pie dough, or reliable dinner ideas like quiche and pot pie, this flaky crust delivers bakery-quality results every time. The dough comes together quickly, rolls out beautifully, and bakes into a buttery, perfectly crisp crust with irresistible flaky layers. Ideal for fruit pies, cream pies, savory pies, and make-ahead baking, this homemade pie crust recipe is one every home baker should keep on hand.
Ingredients
2 ½ cups all-purpose flour
1 teaspoon salt
1 tablespoon granulated sugar
1 cup unsalted butter, cold and cubed
6 tablespoons ice water
1 teaspoon apple cider vinegar
Instructions
1. Place the cubed butter in the refrigerator or freezer for 15–20 minutes before starting. Prepare a small bowl of ice water and set aside.
2. In a large mixing bowl, whisk together the flour, salt, and sugar until evenly combined.
3. Add the cold butter cubes to the flour mixture and cut the butter into the flour using a pastry cutter or forks until the mixture resembles coarse crumbs with pea-sized butter pieces remaining.
4. Add the apple cider vinegar and drizzle in the ice water one tablespoon at a time, mixing gently until the dough just begins to come together.
5. Transfer the dough onto a lightly floured surface and gently gather it into a ball without overworking it.
6. Divide the dough into two equal portions and flatten each into a disk shape. Wrap tightly with plastic wrap.
7. Refrigerate the dough for at least 1 hour to allow the butter to firm up and the gluten to relax.
8. Roll the chilled dough on a lightly floured surface into a 12-inch circle about ⅛ inch thick.
9. Carefully transfer the dough into a pie dish, gently pressing it into the bottom and sides without stretching.
10. Trim excess dough, fold the edges underneath, and crimp decoratively.
11. Chill the prepared crust for an additional 15–20 minutes before baking.
12. For blind baking, line the crust with parchment paper and pie weights, then bake at 375°F for 15–20 minutes. Remove the weights and continue baking if needed.
13. Fill and bake according to your pie recipe instructions or allow the crust to cool completely before adding no-bake fillings.
Notes
Use very cold butter and ice water to achieve the flakiest texture possible.
Do not overmix the dough, as excessive handling can create a tough crust instead of a tender one.
Always chill the dough before rolling and before baking to prevent shrinking and maintain flaky layers.
Nutrition
- Serving Size: 1 slice
- Calories: 320
- Sugar: 1g
- Sodium: 180mg
- Fat: 22g
- Saturated Fat: 14g
- Unsaturated Fat: 6g
- Trans Fat: 0g
- Carbohydrates: 28g
- Fiber: 1g
- Protein: 3g
- Cholesterol: 55mg
Keywords: buttery flaky pie crust, homemade pie crust, easy pie crust recipe, flaky pastry dough, dessert ideas, baking recipes, pie dough recipe, homemade pastry