
I still remember the first time I combined banana pudding with cheesecake—it felt like bringing together two of my favorite desserts into one irresistible bite. When I decided to serve it in a cone, everything changed. Suddenly, it wasn’t just a dessert; it became a fun, handheld treat that looks as impressive as it tastes. These Banana Pudding Cheesecake Cones are now my go-to whenever I want something playful yet indulgent.
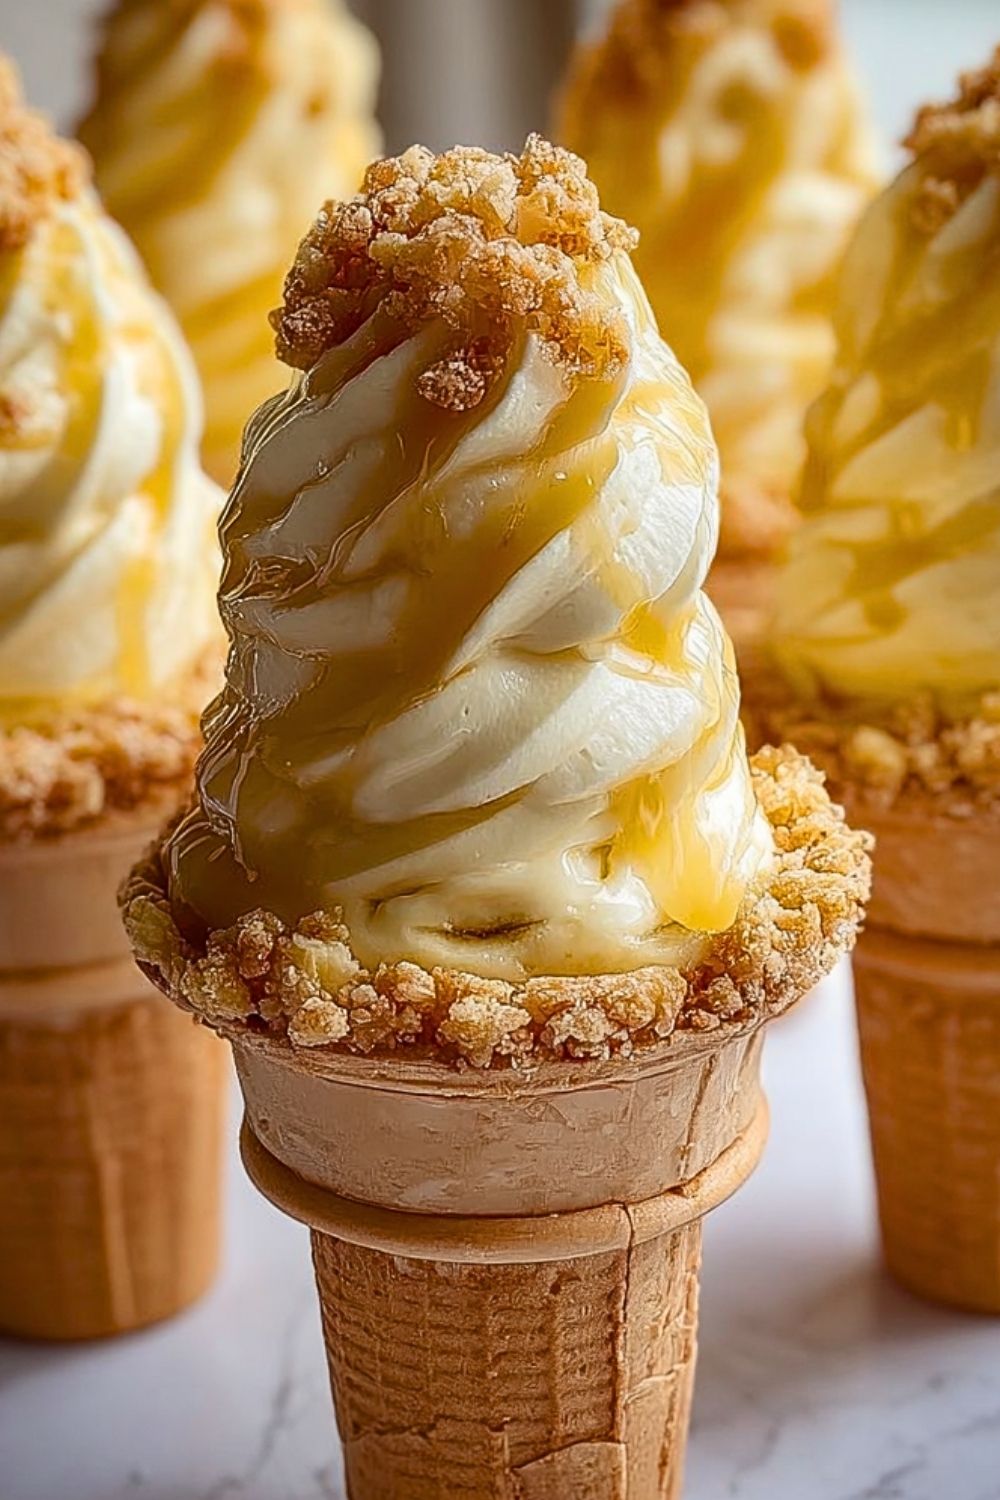
What I love most is how each layer tells its own story—from the crunchy cone and buttery crumbs to the silky cheesecake filling and fresh banana slices. Every bite delivers that perfect balance of creamy, sweet, and slightly crunchy textures. Trust me, once you try these, they’ll quickly become a favorite in your dessert rotation.
Why You’ll Love This Banana Pudding Cheesecake Cones
This dessert is all about convenience without sacrificing flavor. It’s easy to assemble, doesn’t require complicated baking techniques, and still gives you that bakery-style presentation. The combination of banana pudding and cheesecake creates a rich, creamy filling that feels luxurious but comforting at the same time.
Another reason this recipe stands out is its versatility. Whether you’re hosting a party, planning a quick family dessert, or just craving something sweet, these cones fit perfectly. They’re portion-controlled, easy to serve, and absolutely crowd-pleasing.
What Makes Banana Pudding Cheesecake Cones So Special?
You might wonder what sets this dessert apart from classic banana pudding or traditional cheesecake. The answer lies in the layering and presentation. By serving it in a cone, you get a delightful crunch that contrasts beautifully with the smooth filling.
Additionally, the fusion of flavors elevates both components. The cheesecake adds richness and structure, while the banana pudding keeps it light and nostalgic. It’s the best of both worlds in a single, eye-catching treat.
Options for Substitutions
One of the things I appreciate about this recipe is how flexible it is. If you’re out of certain ingredients or want to customize it, there are plenty of easy swaps you can make.
You can use vanilla wafers, graham crackers, or even digestive biscuits for the crumb layer. For the filling, Greek yogurt can replace part of the cream cheese for a lighter version, while dairy-free alternatives work well if you need a vegan option. Bananas can be swapped with other fruits like strawberries if you want to experiment with flavors.
Even the cones can be switched—waffle cones, sugar cones, or small dessert cups all work beautifully depending on what you have on hand.
Ingredients for this Banana Pudding Cheesecake Cones
Waffle Cones – These act as the edible base, giving structure and a crisp contrast to the creamy filling. Their slightly sweet flavor complements the dessert perfectly.
Cream Cheese – The backbone of the cheesecake layer, providing richness, tang, and that signature smooth texture.
Heavy Whipping Cream – Adds lightness and helps create a fluffy, mousse-like consistency when whipped and folded into the cheesecake mixture.
Powdered Sugar – Sweetens the filling without leaving any graininess, ensuring a silky finish.
Vanilla Extract – Enhances all the flavors, especially the banana and cream cheese, adding depth and warmth.
Instant Banana Pudding Mix – Brings that classic banana pudding flavor quickly and reliably, while also helping to stabilize the filling.
Cold Milk – Activates the pudding mix and contributes to the creamy texture of the filling.
Fresh Bananas – Provide natural sweetness, texture, and that unmistakable banana flavor in every bite.
Graham Cracker Crumbs or Vanilla Wafer Crumbs – Used to coat the rim and add a buttery crunch that mimics traditional banana pudding layers.
Butter (Melted) – Helps bind the crumbs together and adds a rich, slightly toasted flavor.
Caramel Sauce or Honey – Drizzled on top for extra sweetness and a beautiful finishing touch.
Whipped Cream (Optional Garnish) – Adds height, elegance, and an extra creamy layer to the presentation.
Step 1: Prepare the Cone Base
Start by melting the butter and mixing it thoroughly with the graham cracker or vanilla wafer crumbs until the texture resembles wet sand. Dip the rims of each waffle cone into a light coating of caramel or honey, then roll them into the crumb mixture. This creates a decorative and flavorful crust. Place the cones upright in a sturdy holder or a tray filled with rice to keep them stable while you prepare the filling.
Step 2: Make the Banana Pudding Layer
In a medium bowl, whisk together the instant banana pudding mix and cold milk. Continue whisking for about 2–3 minutes until it thickens noticeably. Let it sit for a few minutes to fully set. The consistency should be thick but still smooth enough to fold into other components.
Step 3: Prepare the Cheesecake Filling
In a separate large bowl, beat the cream cheese until completely smooth and free of lumps. Add powdered sugar and vanilla extract, then continue mixing until well combined. In another bowl, whip the heavy cream until stiff peaks form. Gently fold the whipped cream into the cream cheese mixture, being careful not to deflate it. This creates a light, airy cheesecake base.
Step 4: Combine the Layers
Fold the prepared banana pudding into the cheesecake mixture gradually. Mix gently until fully incorporated but still fluffy. The result should be a rich, creamy banana cheesecake filling with a smooth, pipeable consistency.
Step 5: Slice and Prep the Bananas
Peel and slice the fresh bananas into even rounds. To prevent browning, you can lightly toss them in a small amount of lemon juice, though this step is optional if serving immediately.
Step 6: Assemble the Cones
Begin by adding a few banana slices to the bottom of each cone. Using a piping bag (or spoon), add a layer of the banana cheesecake filling. Repeat the layering with more banana slices and filling until the cone is filled to the top.
Step 7: Pipe the Final Swirl
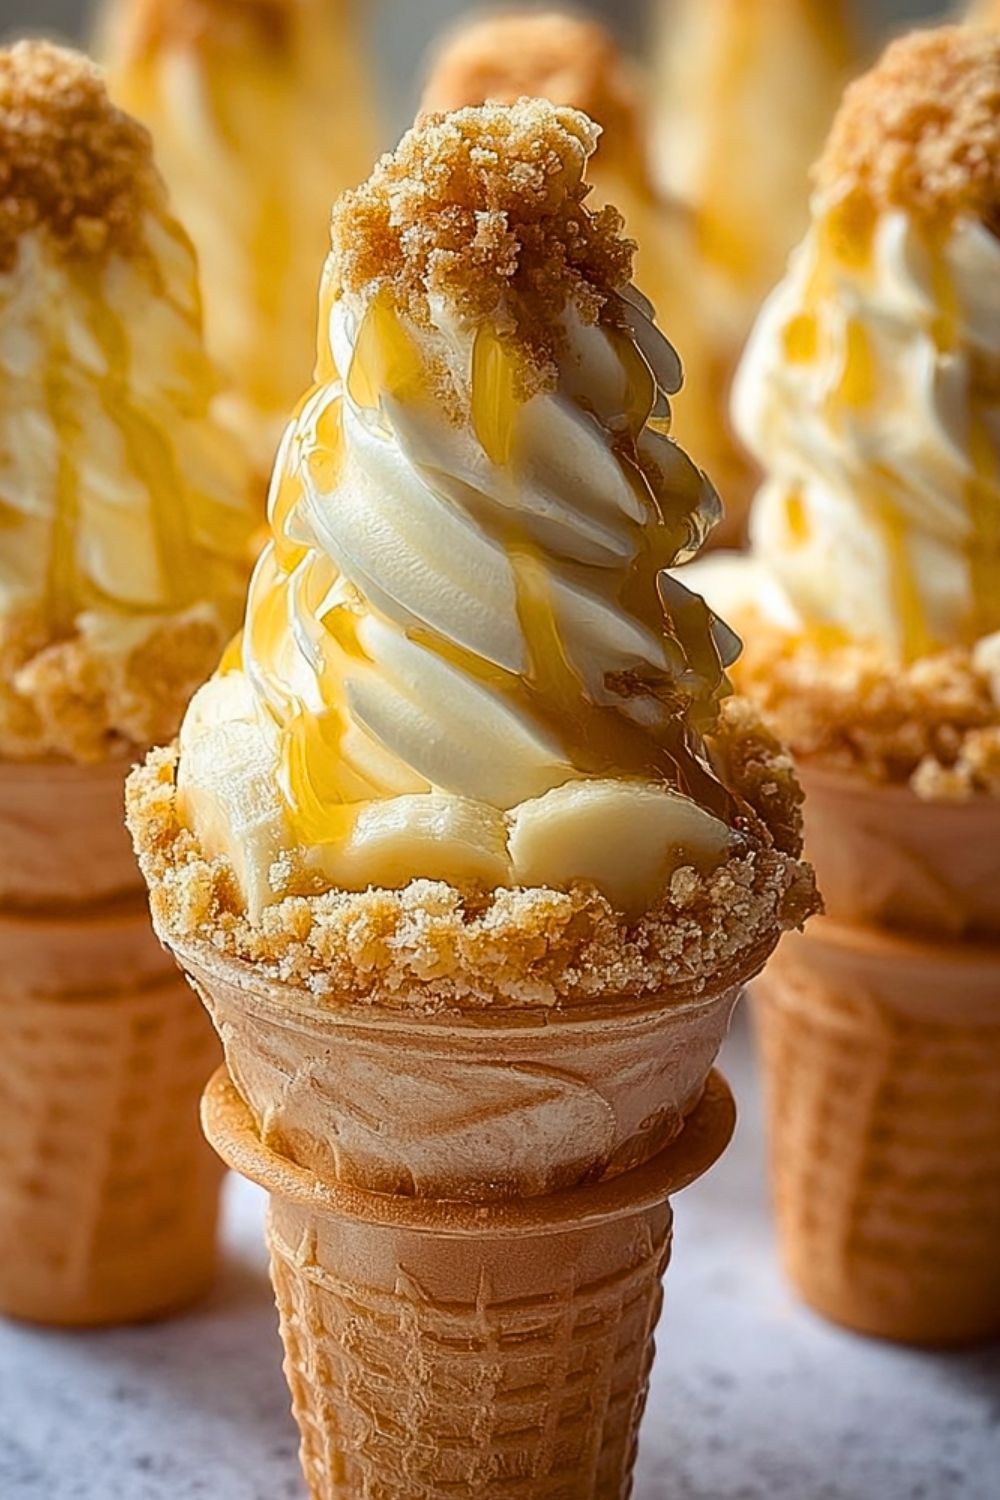
Pipe a generous swirl of the filling on top to create height and a visually appealing finish. This step gives the cones their signature bakery-style look.
Step 8: Add Toppings
Drizzle caramel sauce or honey over the top. Sprinkle additional crumb mixture for texture. If desired, finish with a dollop of whipped cream or even a small cookie piece for extra flair.
Step 9: Chill Before Serving
Place the assembled cones in the refrigerator for about 20–30 minutes. This helps the filling firm up slightly and allows all the flavors to meld together beautifully.
Step 10: Serve and Enjoy
Serve the cones chilled for the best texture and flavor. They are perfect for parties, gatherings, or as a fun personal treat. Each bite delivers layers of creamy, crunchy, and fruity goodness.
Banana Pudding Cheesecake Cones
How Long to Prepare the Banana Pudding Cheesecake Cones
Preparation for this dessert is pleasantly quick, especially since there’s no baking involved. Most of your time goes into mixing the filling and assembling the layers. From start to finish, you can expect about 25–30 minutes of active prep time, depending on how quickly you work and whether your ingredients are already chilled.
If you choose to chill the cones before serving, add an extra 20–30 minutes. This resting time helps the filling firm up slightly and allows the flavors to meld together, giving you a more cohesive and satisfying bite.
Tips for Perfect Banana Pudding Cheesecake Cones
Use fully softened cream cheese to avoid lumps and ensure a silky-smooth filling. Cold cream cheese will make mixing difficult and affect the final texture.
Whip the heavy cream to stiff peaks, but avoid overwhipping. Overwhipped cream can turn grainy and won’t fold as smoothly into the mixture.
Pipe the filling instead of spooning it when possible. This not only looks better but also helps distribute the filling evenly inside the cones.
Choose ripe but firm bananas. Overripe bananas can become mushy, while underripe ones lack sweetness.
Serve shortly after chilling for the best texture. Waiting too long may soften the cones.
Watch Out for These Mistakes While Cooking
Skipping the chilling step can result in a filling that’s too soft and doesn’t hold its shape well.
Overmixing after adding whipped cream can deflate the mixture, making it dense instead of light and airy.
Adding too much liquid to the pudding mix can prevent it from setting properly.
Not stabilizing the cones during assembly can lead to spills or uneven layers.
Using overly ripe bananas may cause excess moisture and affect the overall texture.
What to Serve With Banana Pudding Cheesecake Cones?
Fresh Fruit Salad
A light and refreshing side that balances the richness of the cones.
Iced Coffee or Cold Brew
The slight bitterness of coffee pairs beautifully with the sweet, creamy dessert.
Vanilla Milkshake
For a truly indulgent treat, pair with a classic milkshake.
Lemonade
The citrusy tang cuts through the richness and refreshes your palate.
Chocolate Drizzle Plate
Serve with a plate lightly drizzled with chocolate sauce for dipping or decoration.
Storage Instructions
If you have leftovers, store the filling separately from the cones whenever possible. Keep the cheesecake mixture in an airtight container in the refrigerator for up to 3 days.
Assembled cones are best enjoyed fresh, but they can be stored in the fridge for up to 24 hours. Keep them upright and loosely covered to prevent the cones from becoming too soggy.
Avoid freezing the assembled cones, as the texture of both the filling and the cone may change significantly upon thawing.
Estimated Nutrition
Each cone is an indulgent treat, offering a balance of carbohydrates, fats, and sugars. While exact values depend on portion size and ingredient brands, one serving typically contains moderate calories with a rich, creamy profile.
Expect a higher sugar content due to the pudding mix and toppings, along with fats from cream cheese and whipped cream. For a lighter version, consider reducing sugar or using low-fat alternatives.
Frequently Asked Questions
Can I make Banana Pudding Cheesecake Cones ahead of time?
Yes, you can prepare the filling in advance and store it in the refrigerator. Assemble the cones shortly before serving to keep them crisp.
Can I use homemade banana pudding instead of instant mix?
Absolutely. Homemade pudding can enhance the flavor, though it may require extra time and careful thickening.
How do I keep bananas from browning?
Lightly coat the slices with lemon juice or assemble the cones just before serving to maintain freshness.
Can I make this dessert gluten-free?
Yes, simply use gluten-free cones and cookies for the crumb layer.
What other toppings can I add?
You can experiment with chocolate chips, crushed nuts, toffee bits, or even a drizzle of peanut butter for added flavor.
Conclusion
Banana Pudding Cheesecake Cones bring together everything you want in a dessert—creamy texture, sweet banana flavor, and a satisfying crunch—all in a fun, handheld form. They’re simple to prepare yet impressive enough to serve at gatherings or special occasions.
Once you’ve made them, you’ll see how easy it is to customize and adapt the recipe to your taste. Whether you stick to the classic version or experiment with new toppings and flavors, this dessert is sure to become a staple in your kitchen.
Banana Pudding Cheesecake Cones
- Prep Time: 30 minutes
- Cook Time: 0 minutes
- Total Time: 30 minutes
- Yield: 8 cones
- Category: Dessert
- Method: No-Bake
- Cuisine: American
- Diet: Vegetarian
Description
These Banana Pudding Cheesecake Cones are a fun and irresistible twist on classic desserts, combining creamy cheesecake filling, sweet banana pudding, and crunchy cones into one handheld treat. Perfect as a quick dessert, easy party snack, or creative food idea, this no-bake recipe delivers layers of flavor and texture in every bite.
Ingredients
8 waffle cones
8 oz cream cheese softened
1 cup heavy whipping cream
1/2 cup powdered sugar
1 tsp vanilla extract
1 box instant banana pudding mix
1 1/2 cups cold milk
3 bananas sliced
1 cup graham cracker crumbs
4 tbsp melted butter
1/3 cup caramel sauce or honey
1 cup whipped cream optional
Instructions
1. Mix melted butter with graham cracker crumbs until combined, then dip cone rims into caramel or honey and coat with crumbs.
2. Whisk banana pudding mix with cold milk until thick, then let it set for a few minutes.
3. Beat softened cream cheese with powdered sugar and vanilla extract until smooth.
4. Whip heavy cream to stiff peaks, then gently fold it into the cream cheese mixture.
5. Fold the prepared banana pudding into the cheesecake mixture until smooth and fluffy.
6. Slice bananas evenly and lightly coat with lemon juice if desired.
7. Add banana slices to the bottom of each cone, then pipe or spoon in the filling.
8. Repeat layering bananas and filling until cones are full.
9. Pipe a decorative swirl of filling on top and drizzle with caramel sauce.
10. Add extra crumbs or whipped cream if desired, then chill for 20–30 minutes before serving.
Notes
Use room temperature cream cheese for the smoothest filling texture.
Assemble cones shortly before serving to keep them crisp and prevent sogginess.
For a lighter version, substitute part of the cream cheese with Greek yogurt.
Nutrition
- Serving Size: 1 cone
- Calories: 320
- Sugar: 22g
- Sodium: 180mg
- Fat: 18g
- Saturated Fat: 10g
- Unsaturated Fat: 6g
- Trans Fat: 0g
- Carbohydrates: 35g
- Fiber: 2g
- Protein: 4g
- Cholesterol: 45mg
Keywords: banana pudding cheesecake cones, easy dessert, no bake dessert, quick sweet treat, party dessert, banana dessert