
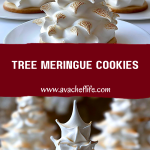
If there’s one holiday treat I look forward to making every single year, it’s these Tree Meringue Cookies. They’re not only adorable and festive, but they also melt in your mouth with the perfect combination of crisp on the outside and marshmallow-soft in the center. Every time I pipe one of these snowy trees, I feel like I’m crafting a piece of edible art, and the best part is — they taste just as magical as they look.
I first made these cookies for a winter gathering, and they quickly became the star of the dessert table. Their elegant shape, snowy white finish, and light texture make them an irresistible centerpiece for any Christmas celebration. They’re also surprisingly easy to make once you master the meringue base, and they hold up beautifully for gifting or decorating a holiday dessert platter.
Why You’ll Love This Tree Meringue Cookies Recipe
These cookies are the perfect combination of pretty and delicious. They’re gluten-free, naturally low-fat, and make a stunning edible decoration for winter parties. You can make them days in advance, and they stay crisp and fresh in an airtight container. Whether you’re a seasoned baker or trying meringue for the first time, this recipe is straightforward and so rewarding.
What Kind of Meringue Should I Use for Tree Meringue Cookies?
For the best results, you’ll want to use a classic French meringue — that’s the version made by whipping egg whites with granulated sugar until they form stiff, glossy peaks. It’s light, airy, and pipes beautifully. Avoid using Italian or Swiss meringue for this recipe, as those are more suited for frostings and fillings due to their higher moisture content.
Options for Substitutions
If you need to make these cookies without refined sugar, powdered erythritol or a fine granulated sugar substitute can work, though the texture may differ slightly. You can also add natural food coloring to tint the meringue for colorful trees — green for a classic holiday vibe, or leave them white for a snowy look. And if you’d like a bit of extra flavor, a few drops of peppermint or almond extract can really elevate the cookies.
Ingredients for This Tree Meringue Cookies Recipe
Egg whites – These are the heart of any meringue. They whip up into a fluffy, airy structure that gives the cookies their signature lightness. Make sure they’re at room temperature for the best volume.
Granulated sugar – Slowly added to the egg whites, it helps stabilize the meringue and creates that shiny, crisp exterior. Superfine sugar works even better if you have it.
Cream of tartar – This acidic ingredient is crucial for stabilizing the egg whites and helps the meringue hold its shape during baking.
Vanilla extract – Adds a delicate, warm flavor to balance the sweetness of the sugar.
Optional food coloring – For those who want to tint their trees festive green or even add a shimmer with edible glitter.
Cookie bases (like vanilla wafers or round shortbread cookies) – These serve as the base of the tree, adding a bit of crunch and making it easier to move the meringues after baking.
Step 1: Prep Your Tools and Ingredients
Start by preheating your oven to 200°F (93°C). Line two baking sheets with parchment paper or silicone baking mats. Make sure your mixing bowl and whisk are completely clean and grease-free — even a trace of fat can ruin your meringue.
Step 2: Whip the Egg Whites
In a stand mixer fitted with a whisk attachment, or using a hand mixer, beat the egg whites on medium speed until they become foamy. Add the cream of tartar and continue mixing.
Step 3: Add Sugar Gradually
Once the egg whites start to form soft peaks, begin adding sugar one tablespoon at a time. This gradual addition ensures the sugar dissolves and the meringue becomes glossy. Keep beating until stiff peaks form.
Step 4: Add Flavor and Color
Once stiff peaks have formed, mix in the vanilla extract. If you’re using food coloring, add it now and gently fold it in until evenly distributed.
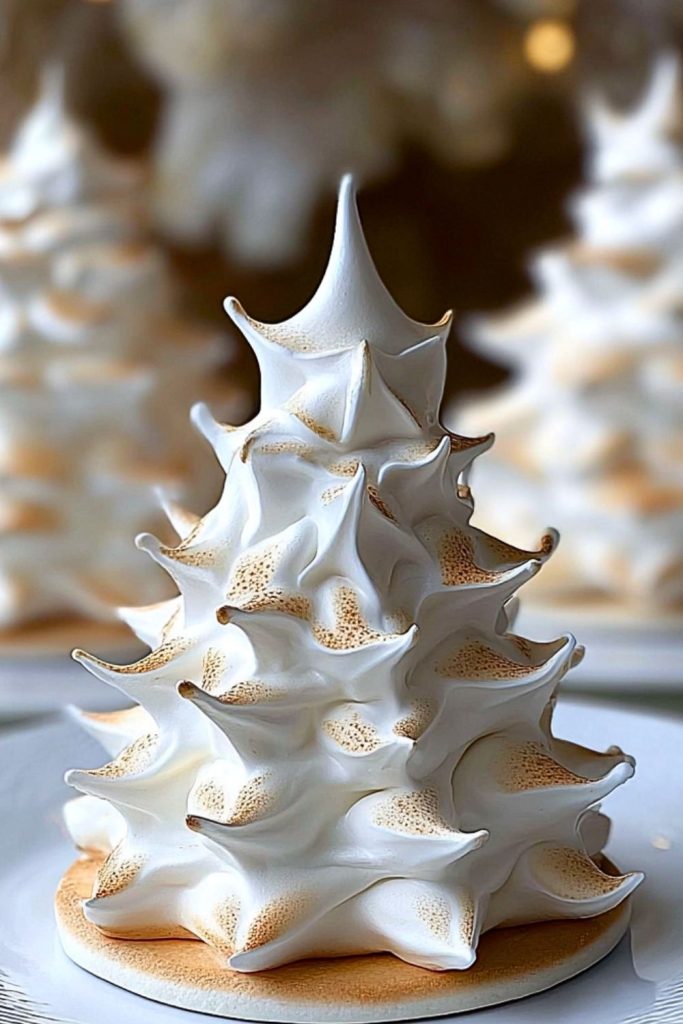
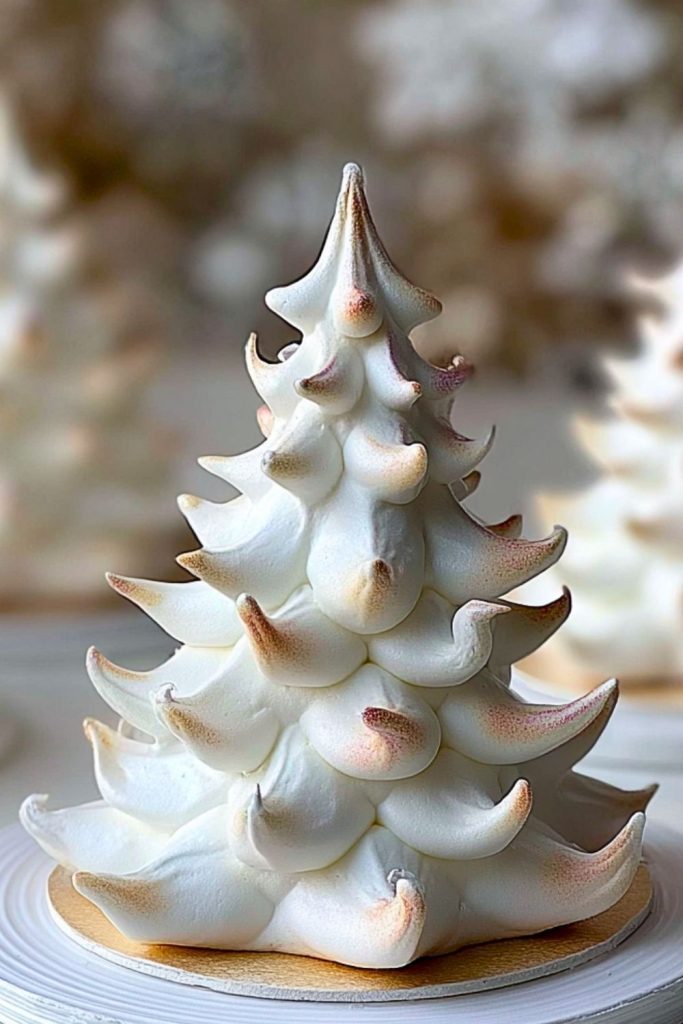
Step 5: Pipe the Trees
Transfer the meringue into a large piping bag fitted with a star tip (like a Wilton 1M or 2D). Pipe the meringue onto the cookie bases in a circular motion, building upward to create a tree shape with defined ridges.
Step 6: Bake Low and Slow
Place the piped meringue trees into the oven and bake for about 90 minutes. Do not open the oven door. After baking, turn off the heat and let the cookies sit in the oven with the door closed for another hour to dry out completely.
Step 7: Cool and Decorate
Once fully dried and cooled, you can optionally decorate the trees with edible glitter, silver dragees, or dusting sugar for a snowy effect. Store in an airtight container immediately to maintain crispness.
How Long to Prepare the Tree Meringue Cookies
Prep Time: Making these cookies from start to finish is not difficult, but it does require a bit of patience. Preparing the meringue and piping the trees takes around 25–30 minutes, especially if you’re doing intricate designs. Coloring and flavoring the meringue, if desired, adds just a couple more minutes.
Baking and Cooling Time: The baking process is slow and gentle — about 90 minutes in a low-temperature oven. After that, it’s crucial to let the cookies sit in the oven for another hour to fully dry out. So while hands-on time is under an hour, the total process will take around 3 hours from start to finish.
Tips for Perfect Tree Meringue Cookies
- Use room-temperature egg whites for maximum volume.
- Ensure your mixing bowl and whisk are completely clean — even a drop of oil can prevent the meringue from forming.
- Add sugar gradually; rushing this step can collapse the structure.
- Bake low and slow — high temperatures will brown the meringue.
- Let them cool in the oven to prevent cracking from sudden temperature change.
Watch Out for These Mistakes While Cooking
- Using plastic bowls: Plastic can hold onto grease; always use metal or glass bowls.
- Adding sugar too quickly: This can cause the meringue to deflate.
- Over-whipping the egg whites: You want stiff peaks, not dry and curdled.
- Opening the oven door while baking: It can cause the cookies to crack or collapse.
- Storing them before they cool completely: Moisture will make them sticky or soggy.
What to Serve With Tree Meringue Cookies?
1. Hot Chocolate
The sweetness and crispness of the cookies pair beautifully with a warm, rich cup of cocoa.
2. Peppermint Bark
This minty treat offers a bold contrast in texture and flavor.
3. Spiced Apple Cider
A cozy beverage that complements the delicate vanilla of the meringues.
4. Chocolate-Dipped Strawberries
The fruity tartness and creamy chocolate enhance the meringue’s lightness.
5. Espresso or Cappuccino
Perfect for adults, the bitterness of coffee cuts the sweetness just right.
Storage Instructions
Short-Term: Store your Tree Meringue Cookies in an airtight container at room temperature. They’ll stay fresh and crisp for about 5–7 days. Add a small packet of silica gel or a bit of uncooked rice in a breathable pouch to help absorb any moisture.
Long-Term: For longer storage, avoid refrigeration (it adds humidity) and consider freezing them if needed. Flash freeze them on a tray and then store in airtight containers layered with parchment paper. Let them come to room temperature naturally before serving.
Estimated Nutrition
(Per one medium-sized cookie)
- Calories: 35
- Fat: 0g
- Carbohydrates: 8g
- Sugar: 8g
- Protein: 1g
- Fiber: 0g
- Sodium: 5mg
Frequently Asked Questions
How do I know when my meringue has reached stiff peaks?
You should be able to lift the whisk and see the peak stand straight up without collapsing. The meringue should be glossy and smooth.
Can I use carton egg whites?
Carton egg whites often don’t whip up as well because they may contain stabilizers. Fresh egg whites are highly recommended.
Do I need to use cream of tartar?
Yes, it helps stabilize the egg whites and prevents the meringue from collapsing. If unavailable, use a small splash of lemon juice or white vinegar.
Can I make these on a humid day?
Humidity is a meringue’s enemy. If you must, use a dehumidifier or bake in the driest part of your home.
Can I color the meringue and still get stiff peaks?
Yes, but add gel-based food coloring at the very end and fold it in gently to avoid deflating the meringue.
Conclusion
Tree Meringue Cookies are more than just a holiday dessert — they’re a festive, edible craft that’s as delightful to make as they are to eat. With their crisp shell, marshmallow-soft centers, and whimsical shape, they bring magic to your dessert table and smiles to anyone who tastes them. Whether you’re making them for a gathering, as a gift, or just to bring the winter spirit into your kitchen, these cookies are a true seasonal treasure.
Tree Meringue Cookies
- Prep Time: 30 minutes
- Cook Time: 90 minutes
- Total Time: 3 hours
- Yield: 6 cookies
- Category: Dessert
- Method: Baking
- Cuisine: American
Description
Create festive magic with these Tree Meringue Cookies — a beautiful, edible centerpiece perfect for winter dessert tables. These light and crisp cookies are piped into elegant tree shapes and baked until perfectly dry. Whether you’re searching for quick holiday treats, easy recipes for edible gifts, or creative Christmas dessert ideas, this stunning, low-fat meringue cookie is a go-to. Ideal for baking with kids or impressing guests, it’s a whimsical take on classic meringue and a delicious way to add sparkle to your seasonal baking.
Ingredients
2 large egg whites
1/2 teaspoon cream of tartar
1/2 cup granulated sugar
1/2 teaspoon vanilla extract
Optional: gel-based food coloring
6 round shortbread cookies or vanilla wafers
Instructions
1. Preheat the oven to 200°F (93°C) and line two baking sheets with parchment paper or silicone mats.
2. In a clean, dry bowl, beat the egg whites on medium speed until foamy. Add cream of tartar and continue mixing.
3. Gradually add sugar one tablespoon at a time, beating on high speed until stiff, glossy peaks form.
4. Mix in the vanilla extract and gently fold in food coloring if using.
5. Transfer meringue to a piping bag fitted with a large star tip (like Wilton 1M or 2D).
6. Pipe the meringue in circular upward spirals onto cookie bases to form tree shapes.
7. Bake for 90 minutes without opening the oven door.
8. Turn off oven and leave cookies inside for another 60 minutes to fully dry.
9. Remove from oven and let cool completely before decorating or storing.
10. Optional: Decorate with edible glitter, dragees, or powdered sugar for a snow-dusted look.
Notes
Use room-temperature egg whites for maximum fluff and volume.
Always pipe meringue on cookie bases to make moving and serving easier.
Avoid humid environments as they can soften and ruin the meringue’s crispness.
Nutrition
- Serving Size: 1 cookie
- Calories: 35
- Sugar: 8g
- Sodium: 5mg
- Fat: 0g
- Saturated Fat: 0g
- Unsaturated Fat: 0g
- Trans Fat: 0g
- Carbohydrates: 8g
- Fiber: 0g
- Protein: 1g
- Cholesterol: 0mg
Keywords: meringue cookies, holiday treats, edible tree, gluten-free cookies, Christmas dessert