

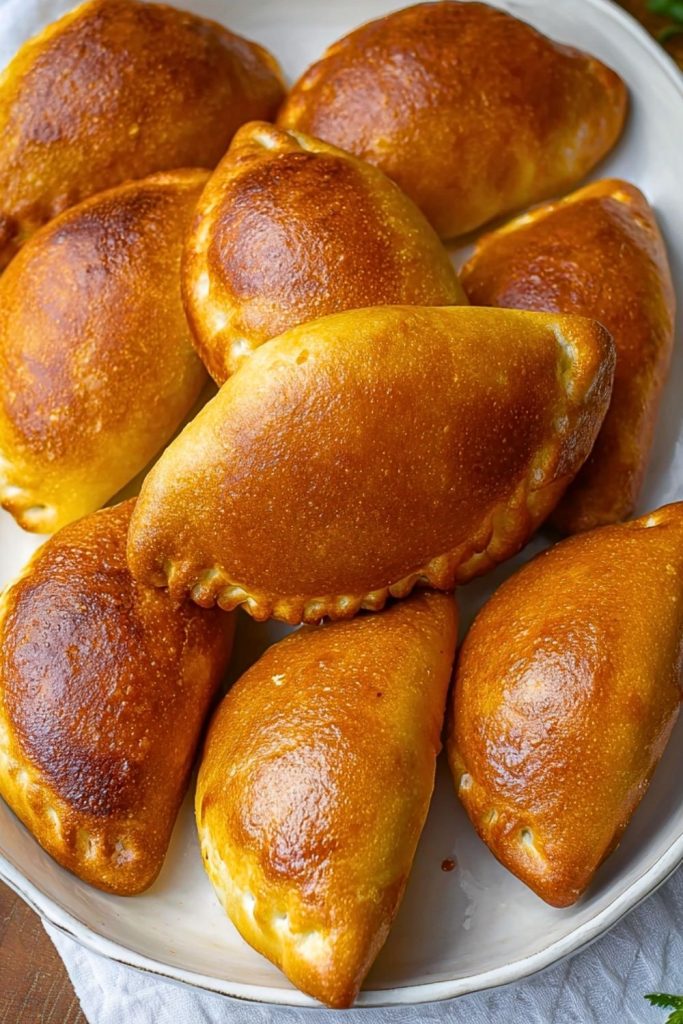
I’ve always had a soft spot for warm, pillowy breads filled with savory or sweet goodness, and piroshki are one of my all-time favorites. These golden, handheld Russian buns are little pockets of comfort. Whether they’re stuffed with meat, mashed potatoes, cabbage, or sweet fillings like fruit or jam, they’re a treat that reminds me of home kitchens and shared meals. The moment I pull them out of the oven and catch that toasty, yeasty aroma, I know I’m in for something special.
What I love about piroshki is their versatility. I can serve them as a snack, a light meal, or even a portable breakfast. Over the years, I’ve tweaked and perfected this dough to be soft yet sturdy, ideal for holding all kinds of fillings. I’m excited to share with you what I truly believe is the best piroshki recipe ever—it’s tender, golden, flavorful, and wonderfully satisfying.
Why You’ll Love This Piroshki Recipe
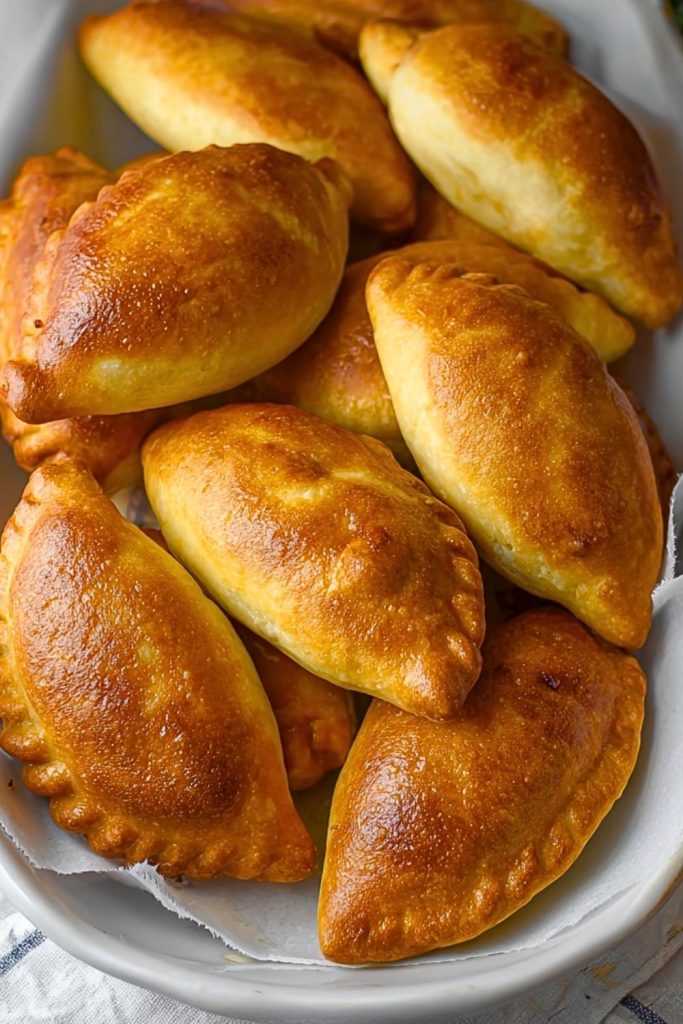
This recipe delivers bakery-quality piroshki with minimal fuss. The dough is light and fluffy on the inside with a crisp, golden crust on the outside. The filling options are endless, and the recipe is forgiving enough for beginners but rewarding enough for seasoned bakers. Whether you’re baking for a cozy family dinner or prepping snacks for a crowd, these piroshki will win everyone over.
What Kind of Filling Works Best in Piroshki?
That’s the beauty of piroshki—almost anything goes! Traditional fillings range from ground beef and onions to creamy mashed potatoes with dill, or tangy sauerkraut and egg. For sweet versions, fruit preserves or sweetened cottage cheese are favorites. Personally, I love a savory ground meat filling with caramelized onions for that rich, classic taste. The key is using a filling that isn’t too wet, so it doesn’t seep into the dough and ruin the texture.
Options for Substitutions
If you’re out of or avoiding certain ingredients, don’t worry—this recipe is flexible.
- Dough: You can swap the classic yeast dough for a quicker baking powder dough, though you’ll miss the soft fluffiness yeast provides.
- Filling: Vegetarian? Use sautéed mushrooms and onions, lentils, or seasoned mashed potatoes. Want it sweet? Swap in thick jam or sweetened ricotta.
- Dairy-free: Use plant-based milk and vegan butter with no issue.
- Gluten-free: Try using a 1:1 gluten-free flour blend, though the texture will differ slightly.
No matter the tweaks, these substitutions keep your piroshki delicious and customizable to your needs.
Ingredients for This Piroshki Recipe
- All-Purpose Flour
This forms the structure of the dough, giving it strength and elasticity. - Active Dry Yeast
Essential for the rise—it creates that light, airy texture inside the piroshki. - Warm Milk
Adds richness and helps activate the yeast. It also makes the dough softer and more tender. - Granulated Sugar
A small amount sweetens the dough slightly and feeds the yeast during proofing. - Salt
Enhances flavor and balances the sweetness of the dough and filling. - Eggs
Used in the dough for richness, color, and moisture, and for brushing the tops to give that golden, shiny finish. - Butter
Adds moisture and a soft, melt-in-your-mouth feel to the dough. - Filling of Choice (e.g., seasoned ground beef and onions)
This is the heart of the piroshki, whether you go savory or sweet. Just be sure your filling isn’t too runny.
Step 1: Prepare the Dough
In a large bowl, combine warm milk, sugar, and yeast. Let it sit for about 10 minutes until foamy. This means the yeast is active and ready. Add eggs, melted butter, and salt, then slowly stir in the flour. Knead until the dough becomes smooth and elastic—this takes about 8–10 minutes by hand or 5 with a stand mixer.
Step 2: Let the Dough Rise
Place the dough in a greased bowl, cover it with a towel or plastic wrap, and let it rise in a warm spot for 1–1.5 hours, or until it doubles in size. This resting period helps create that light, pillowy texture.
Step 3: Prepare the Filling
While the dough rises, cook your filling. For a classic version, sauté onions until golden, add seasoned ground beef, and cook until browned and cooked through. Let the filling cool completely before using—it helps the dough hold its shape better during baking.
Step 4: Shape the Piroshki
Once the dough has doubled, punch it down and divide it into equal pieces (about the size of a golf ball). Roll each into a circle and place a spoonful of filling in the center. Fold the dough over and pinch the edges tightly to seal, forming a half-moon or football shape.
Step 5: Let Them Rise Again
Place the shaped piroshki on a baking sheet lined with parchment paper. Cover loosely and let them rise for another 20–30 minutes. This second rise ensures they stay fluffy inside.
Step 6: Brush and Bake
Preheat the oven to 375°F (190°C). Brush each piroshka with a beaten egg to give them that golden shine. Bake for 18–22 minutes, or until they’re deep golden brown and sound hollow when tapped on the bottom.
How Long to Cook the Piroshki
Baking time for piroshki is typically between 18 to 22 minutes at 375°F (190°C). You’ll know they’re done when the tops are golden brown, and the bottoms are slightly firm to the touch. If you’re using a meat filling, make sure it’s fully cooked before stuffing the dough—this ensures everything is ready at the same time.
Tips for Perfect Piroshki
- Let the dough rise properly. Don’t rush it. A well-risen dough gives you that soft, fluffy bite.
- Cool the filling. Hot filling can make the dough sticky and hard to seal.
- Seal tightly. Pinch the seams well to prevent the filling from leaking during baking.
- Egg wash is key. That shiny, golden-brown crust? All thanks to a generous brushing of beaten egg.
- Don’t overstuff. It’s tempting, but too much filling can cause them to burst in the oven.
- Use parchment paper. It prevents sticking and makes cleanup a breeze.
- Let them rest. After baking, give the piroshki 5–10 minutes to cool slightly—this helps set the structure and enhances flavor.
Watch Out for These Mistakes While Cooking
- Using hot milk with yeast. If your milk is too hot, it can kill the yeast. Aim for warm, not boiling—about 100–110°F.
- Skipping the second rise. It might seem optional, but the second proofing gives piroshki their signature fluffiness.
- Overloading the filling. Too much can cause the dough to tear or leak during baking.
- Underseasoning the filling. A bland filling ruins even the best dough—taste and adjust your seasoning before using.
- Opening the oven too often. This drops the temperature and can lead to uneven baking.
- Not sealing edges properly. If the seams aren’t pinched tightly, the filling can escape and burn.
What to Serve With Piroshki?
Russian Borscht
A hearty beet soup pairs perfectly with savory piroshki for a comforting Eastern European meal.
Simple Cucumber-Dill Salad
Fresh, crisp, and creamy, this salad balances the warmth and richness of the piroshki.
Sour Cream with Fresh Herbs
Serve as a dipping sauce—cool and tangy, it cuts through the richness of the pastry.
Pickled Vegetables
Pickles or pickled cabbage offer a bright, acidic contrast that enhances every bite.
Boiled Potatoes with Butter and Parsley
A simple side that complements the doughy goodness of piroshki without overpowering it.
Hot Tea or Kvass
A warm beverage like strong black tea or a chilled glass of fermented kvass makes the perfect traditional pairing.
Roasted Beets or Carrots
Earthy and sweet, these roasted veggies round out the plate with color and nutrition.
Storage Instructions
Piroshki store beautifully, making them great for meal prep or leftovers.
- Room Temperature: Keep freshly baked piroshki in an airtight container for up to 2 days.
- Refrigerator: Store in the fridge for up to 5 days. Reheat in the oven at 350°F for 10 minutes to restore their crispiness.
- Freezer: Once cooled, wrap each piroshka in plastic wrap or foil, then place in a freezer bag. They’ll keep for up to 2 months. To reheat, thaw overnight in the fridge and bake at 350°F until warmed through.
Estimated Nutrition
(Per one medium-sized savory beef piroshka)
- Calories: ~280
- Protein: 10g
- Carbohydrates: 30g
- Fat: 14g
- Saturated Fat: 6g
- Cholesterol: 55mg
- Sodium: 310mg
- Fiber: 1g
- Sugar: 3g
Nutrition will vary depending on filling and portion size, but this gives a good baseline for a classic meat version.
Frequently Asked Questions
Can I make the dough ahead of time?
Yes! You can prepare the dough, cover it tightly, and store it in the fridge overnight. Let it come to room temperature before shaping.
Can I use store-bought dough?
You can substitute with store-bought pizza or bread dough in a pinch, but the homemade version offers a softer, richer texture.
What’s the best way to seal the piroshki?
Pinch the edges firmly with your fingers, then roll the seam slightly under. You can also crimp with a fork for extra security.
Can I fry piroshki instead of baking?
Absolutely. Fry in neutral oil at 350°F until golden on both sides, about 2–3 minutes per side. It gives them a crispier shell.
What kind of fillings can I try?
Aside from ground meat or potato, try mushrooms and cheese, cabbage and egg, sweetened cottage cheese, or fruit preserves.
Why is my dough not rising?
Your yeast may be expired or the milk too hot. Check the yeast’s freshness and ensure warm—not hot—liquid is used.
Can I make mini piroshki for parties?
Yes! Just divide the dough into smaller portions and reduce the baking time by about 5 minutes. They make great appetizers.
How do I reheat without drying them out?
Wrap in foil and heat in the oven at 325°F for 10–12 minutes, or microwave briefly with a damp paper towel.
Conclusion
Piroshki are more than just a filled pastry—they’re a cozy, nostalgic bite of home cooking. Whether you fill them with savory beef, creamy potatoes, or a sweet surprise, the fluffy golden dough and hearty filling deliver every time. With a little prep and the right technique, you’ll have a tray of piroshki that looks and tastes like they came straight from a bakery. Give this recipe a try, and you might find it becoming a cherished staple in your kitchen, too.

The Best Piroshki Recipe Ever
- Prep Time: 20 minutes
- Cook Time: 20 minutes
- Total Time: 2 hours
- Yield: 12 piroshki
- Category: Baking
- Method: Baked
- Cuisine: Russian
Description
Soft, golden, and filled with your favorite savory or sweet ingredients, these homemade piroshki are a comforting treat perfect for snacks, dinners, or anytime you crave a bite of Eastern European flavor.
Ingredients
All-Purpose Flour
Active Dry Yeast
Warm Milk
Granulated Sugar
Salt
Eggs
Butter
Filling of Choice (e.g., seasoned ground beef and onions)
Instructions
1. In a bowl, mix warm milk, sugar, and yeast. Let it foam for 10 minutes.
2. Add eggs, melted butter, salt, and flour. Knead until smooth.
3. Cover and let the dough rise for 1–1.5 hours until doubled in size.
4. Prepare your filling and let it cool.
5. Divide dough into equal pieces, roll out, and fill.
6. Seal edges tightly, form into shapes.
7. Let shaped piroshki rise for another 20–30 minutes.
8. Brush tops with beaten egg and bake at 375°F for 18–22 minutes.
Notes
Use cooled filling to avoid soggy dough.
Pinch seams well to prevent leaking.
Freeze extras for future meals.
Nutrition
- Serving Size: 1 piroshka
- Calories: 280
- Sugar: 3g
- Sodium: 310mg
- Fat: 14g
- Saturated Fat: 6g
- Unsaturated Fat: 7g
- Trans Fat: 0g
- Carbohydrates: 30g
- Fiber: 1g
- Protein: 10g
- Cholesterol: 55mg
Keywords: piroshki, Russian pastry, stuffed bread