

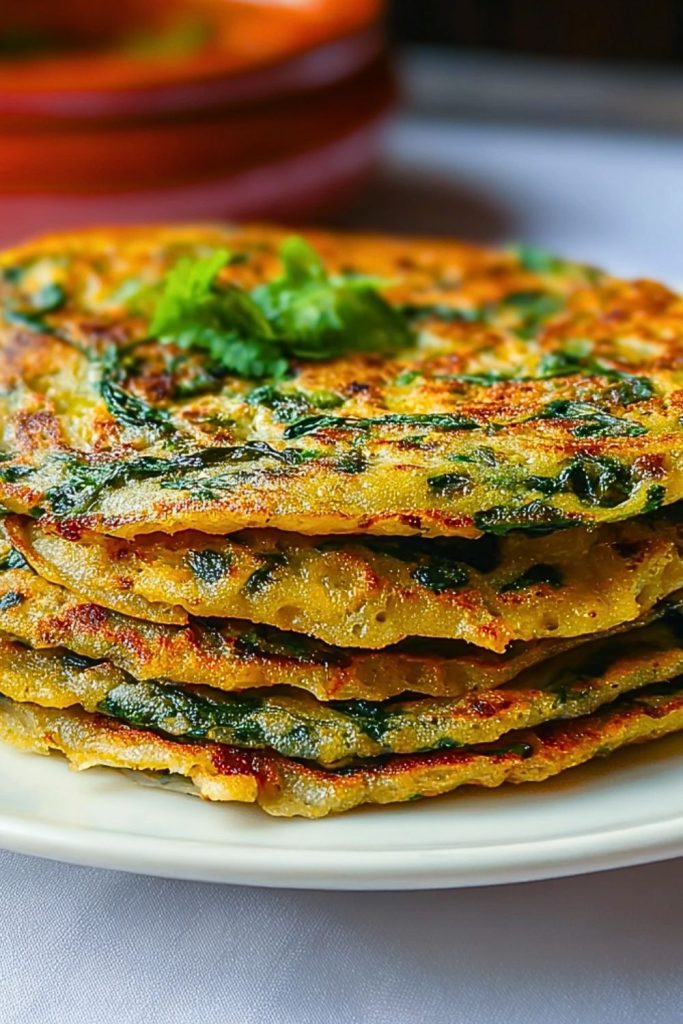
Spinach Puda is a savory, pan-fried Indian flatbread that combines wholesome chickpea flour with fresh spinach and spices to create a delicious, crisp-edged treat. Each bite is a comforting mix of earthy, slightly nutty flavors with bursts of warmth from green chilies, ginger, and herbs. This dish is deeply satisfying while being light on the stomach—perfect for breakfast, brunch, or a tea-time snack.
Its beauty lies in simplicity. No fermentation, no kneading—just mix, pour, and cook. Spinach Puda is one of those underrated gems that delivers maximum flavor with minimal effort. Whether you serve it with chutney, pickle, or even plain yogurt, it brings joy to the table and satisfies both health-conscious eaters and flavor seekers alike.
Why You’ll Love This Spinach Puda
- Naturally gluten-free thanks to the use of besan (chickpea flour).
- Packed with nutrients from fresh spinach, making it a smart choice for any meal.
- Quick and easy—ready in under 30 minutes with no special skills required.
- Customizable with your favorite vegetables and spice levels.
- Perfect for all occasions, from family breakfast to casual entertaining.
- Crispy outside, soft inside—a texture that keeps you coming back for more.
Preparation Phase & Tools to Use (Essential Tools and Equipment, and the Importance of Each Tool)
Getting the Spinach Puda just right doesn’t require fancy gadgets, but a few kitchen basics make all the difference in achieving a crispy, evenly cooked result:
- Mixing Bowl: A medium to large bowl is essential for combining all the ingredients without spills. It allows for even distribution of spices and spinach in the batter.
- Whisk or Spoon: Useful for mixing the chickpea flour with water to avoid lumps. A whisk works best for a smooth, pourable batter.
- Tawa or Non-Stick Pan: The surface where magic happens. A flat, non-stick or cast-iron pan ensures even cooking and that beautiful golden crisp on the outside.
- Flat Spatula: Helps flip the puda without tearing it. A wide, flat spatula also assists in gently pressing down for uniform cooking.
- Ladle or Measuring Cup: To portion out the batter onto the pan so each puda is equal in size and thickness.
- Knife and Chopping Board: For finely chopping spinach, green chilies, ginger, and any other optional add-ins like onions or coriander.
Having these ready before you begin helps streamline the process and ensures consistent results.
Preparation Tips
- Finely chop spinach so it blends well into the batter and cooks evenly within the short time each puda is on the pan.
- Sift the chickpea flour if it’s clumpy—this helps achieve a smooth batter without overmixing.
- Let the batter rest for 5–10 minutes before cooking. This allows the flavors to meld and the spinach to soften slightly.
- Adjust water gradually to control the consistency. The batter should be pourable but not watery.
- Preheat the pan well before pouring the batter. This ensures the puda doesn’t stick and helps form a nice crust.
- Use oil sparingly—just a light brush is enough for a crisp edge without being greasy.
Ingredients for This Spinach Puda
To make these flavorful and nourishing Spinach Puda, you’ll need the following ingredients:
- 1 cup chickpea flour (besan) – the base of the batter, naturally gluten-free and rich in protein.
- 1½ to 2 cups fresh spinach (finely chopped) – adds moisture, nutrition, and color.
- 1 green chili (finely chopped) – optional, but adds a gentle kick of heat.
- 1 teaspoon grated ginger – for a warm, earthy undertone.
- 2 tablespoons finely chopped onion – adds crunch and sweetness (optional but recommended).
- 2 tablespoons fresh coriander leaves (chopped) – brightens up the flavor.
- ½ teaspoon turmeric powder – adds color and a subtle bitterness.
- ½ teaspoon cumin seeds – enhances the nutty flavor of the batter.
- Salt to taste
- Water as needed – to form a pourable batter (approx. ¾ to 1 cup).
- Oil or ghee for cooking – for crisping up each side of the puda on the pan.
These pantry-friendly ingredients come together quickly and offer flexibility. You can easily add grated carrots, shredded cabbage, or even methi (fenugreek leaves) if you want to customize your pudas.
Step 1: Prepare the Batter
In a large mixing bowl, add the chickpea flour. Gradually pour in water while whisking to create a smooth, lump-free batter. Aim for a consistency similar to pancake batter—pourable but not runny.
Step 2: Add the Vegetables and Spices
To the batter, mix in chopped spinach, green chili, ginger, onions, coriander, turmeric powder, cumin seeds, and salt. Stir well until everything is evenly incorporated.
Step 3: Rest the Batter
Let the batter sit for 5–10 minutes. This resting time allows the spinach to soften slightly and the flavors to meld together, resulting in better texture and taste.
Step 4: Preheat the Pan
Place a non-stick or cast-iron pan on medium heat. Once hot, lightly grease it with oil or ghee using a brush or spoon.
Step 5: Cook the Puda
Pour a ladleful of batter onto the center of the pan. Spread it gently in a circular motion to form a medium-thin round (about 6 inches wide). Drizzle a few drops of oil around the edges.
Step 6: Flip and Cook the Other Side
Cook the puda for 2–3 minutes or until the bottom turns golden brown. Flip it gently using a flat spatula and cook the other side for another 2–3 minutes until crisp and golden spots appear.
Step 7: Repeat and Serve
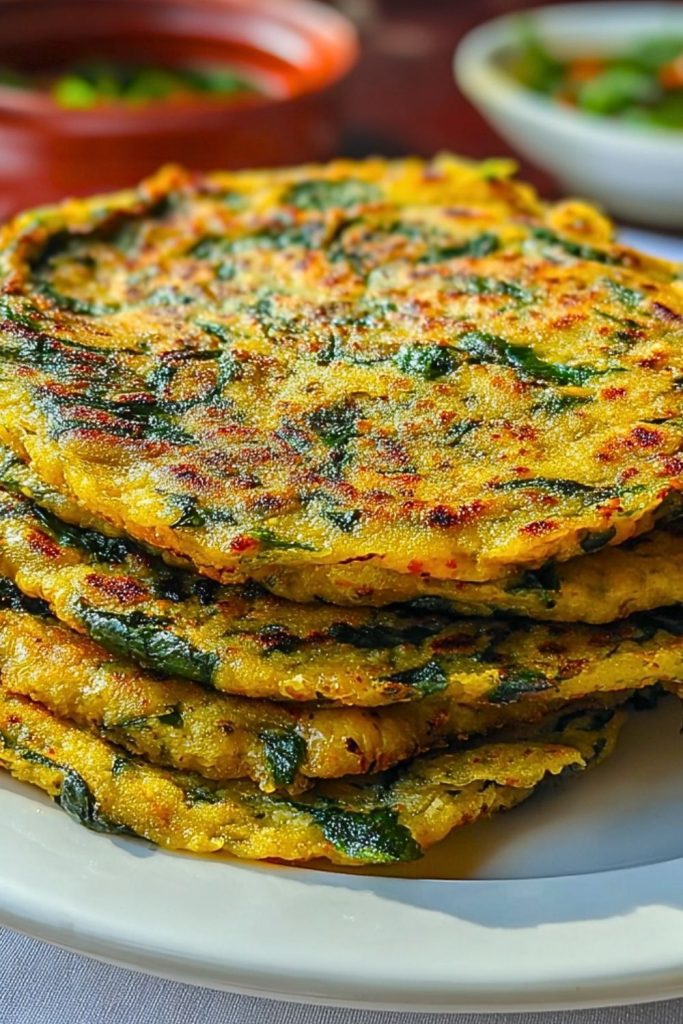
Repeat with the remaining batter, greasing the pan lightly each time. Stack them up or serve hot off the pan with chutney, yogurt, or pickle.
Notes
- The batter consistency is key—too thick, and the puda will be doughy; too thin, and it won’t hold its shape. Aim for a pancake-like texture.
- You can add vegetables like grated carrots, zucchini, or shredded cabbage to make it more hearty.
- For extra crispiness, use a cast iron pan and a few extra drops of oil while cooking.
- These pudas are best enjoyed hot, but they can also be wrapped for lunch boxes or travel meals.
- If you don’t eat onions or garlic, simply skip the onion and the recipe still turns out delicious.
- Besan tends to thicken after resting. Add a spoonful of water and stir before cooking the next batch if needed.
Watch Out for These Mistakes While Cooking
- Skipping the rest time: This can result in a raw flour taste. Letting the batter sit allows the flavors to develop.
- Overcrowding the pan: Don’t cook multiple pudas at once unless you have a large griddle—this can lead to uneven cooking.
- Using high heat: It may burn the exterior before the inside cooks. Keep it at medium for even browning.
- Not preheating the pan: Cold pan = stuck puda. Always start with a hot, greased pan.
- Too much water in the batter: This makes it hard to spread and flip. Add liquid gradually and adjust as needed.
- Inconsistent spreading: Uneven thickness leads to undercooked or overcooked spots. Try to spread the batter gently and evenly.
- Not chopping spinach finely: Large chunks of spinach prevent smooth cooking and flipping.
- Using too much oil: While a little helps crisp up the edges, too much oil makes the pudas greasy rather than crispy.
What to Serve With Spinach Puda?
Spinach Puda is incredibly versatile and pairs well with a range of accompaniments. Whether you’re going for traditional Indian sides or adding a fusion twist, these ideas will elevate your meal.
8 Recommendations
- Green Chutney – A blend of coriander, mint, green chilies, and lemon juice. It adds freshness and a sharp contrast to the savory puda.
- Plain Yogurt or Raita – Cooling and creamy, it balances the mild spice and adds a smooth texture to the meal.
- Mango Pickle or Lime Pickle – For that tangy, spicy punch that complements the earthy flavors of the puda.
- Masala Chai – A comforting cup of Indian spiced tea pairs beautifully with the warmth of Spinach Puda, especially for breakfast or brunch.
- Tomato Chutney – Slightly sweet and spicy, it makes an excellent dipping sauce to bring another layer of flavor.
- Avocado Yogurt Dip – A fusion option with creamy avocado, Greek yogurt, and lemon juice for a modern, nutritious twist.
- Sautéed Mushrooms – Served on the side or even over the puda, mushrooms add a meaty texture and umami depth.
- Paneer Bhurji – A protein-rich Indian scrambled paneer dish that transforms this into a filling, satisfying lunch or dinner combo.
Storage Instructions
Spinach Puda is best enjoyed fresh and hot off the pan, but it also stores quite well for later meals. Here’s how to handle leftovers:
- Refrigerator: Store cooked pudas in an airtight container for up to 2 days. Place parchment or foil between each to prevent sticking.
- Freezer: Wrap each puda individually in foil or parchment paper, then place in a ziplock bag. Freeze for up to 1 month.
- Reheating: Warm in a hot skillet or tawa for 1–2 minutes on each side. Avoid microwaving as it softens the crisp edges.
- Batter Storage: If you want to prep ahead, you can refrigerate the batter (without salt) for up to 24 hours. Add salt just before cooking.
Estimated Nutrition (Per Puda – approx. 6-inch, cooked with minimal oil)
- Calories: 140 kcal
- Protein: 6g
- Carbohydrates: 18g
- Dietary Fiber: 3g
- Fat: 5g
- Saturated Fat: 0.5g
- Unsaturated Fat: 4g
- Trans Fat: 0g
- Cholesterol: 0mg
- Sugar: 2g
- Sodium: 200mg (varies based on salt)
Note: These values may vary based on exact measurements, added vegetables, and the amount of oil used.
Frequently Asked Questions
1. Can I make the batter ahead of time?
Yes, but for best results, store the batter without salt. Add salt right before cooking to prevent spinach from releasing too much water.
2. Is Spinach Puda gluten-free?
Absolutely. It’s made entirely from chickpea flour (besan), which is naturally gluten-free.
3. Can I bake the puda instead of pan-frying?
Yes, you can spoon the batter onto a greased parchment-lined baking tray and bake at 375°F (190°C) until golden. However, the texture will be softer and less crisp.
4. How do I prevent the puda from sticking to the pan?
Always use a well-heated, greased non-stick or cast iron pan. Let the first side cook fully before flipping.
5. Can I use frozen spinach?
Yes, but thaw it completely and squeeze out excess water before adding to the batter. Too much moisture can thin out the batter.
6. What if my batter is too thick or too thin?
Adjust with small amounts of water or chickpea flour. Add water to loosen or flour to thicken, mixing thoroughly each time.
7. What other greens can I use?
You can substitute spinach with finely chopped kale, methi (fenugreek leaves), or even arugula for a peppery twist.
8. Can I make this oil-free?
You can cook it without oil on a good-quality non-stick pan, though it may not be as crisp. A light brush of oil greatly enhances flavor and texture.
Conclusion
Spinach Puda is the perfect blend of taste, nutrition, and simplicity. Whether you’re short on time or just looking for a wholesome plant-based meal, this dish checks every box. Crisp around the edges, packed with flavor in every bite, and endlessly customizable—it’s easy to see why this recipe becomes a go-to in many homes. Serve it hot, pair it smartly, and enjoy the comfort of a hearty homemade flatbread with minimal fuss.
Spinach Puda
- Prep Time: 10 minutes
- Cook Time: 15 minutes
- Total Time: 25 minutes
- Yield: 6 medium pudas
- Category: Breakfast / Snack
- Method: Pan-Fried
- Cuisine: Indian
Description
Spinach Puda is a savory Indian chickpea flour pancake loaded with fresh spinach and warming spices. It’s naturally gluten-free, high in plant-based protein, and takes less than 30 minutes to prepare. Crispy on the outside and soft inside, this nutritious dish makes a perfect breakfast, snack, or light lunch.
Ingredients
1 cup chickpea flour (besan)
1½ to 2 cups spinach finely chopped
1 green chili finely chopped
1 teaspoon grated ginger
2 tablespoons finely chopped onion
2 tablespoons fresh coriander leaves chopped
½ teaspoon turmeric powder
½ teaspoon cumin seeds
Salt to taste
¾ to 1 cup water (adjust as needed)
Oil or ghee for cooking
Instructions
1. In a large mixing bowl, add chickpea flour. Gradually whisk in water until you get a smooth, pourable batter.
2. Add spinach, green chili, ginger, onion, coriander, turmeric, cumin seeds, and salt. Mix well.
3. Let the batter rest for 5–10 minutes to enhance flavor and soften spinach.
4. Heat a non-stick or cast iron pan over medium heat and grease it lightly with oil or ghee.
5. Pour a ladleful of batter into the center and gently spread it into a 6-inch circle. Drizzle a little oil around the edges.
6. Cook for 2–3 minutes on one side until golden brown. Flip and cook the other side for 2–3 more minutes.
7. Repeat with remaining batter. Serve hot with chutney, yogurt, or pickle.
8. Store leftovers in an airtight container or freeze individually wrapped pudas.
Notes
Let the batter rest before cooking to enhance flavor.
Avoid too much water in the batter or it will be hard to flip.
Chop spinach finely for better texture and easy spreading.
Use a non-stick or cast-iron pan for crisp results.
Don’t overcrowd the pan while cooking.
Nutrition
- Serving Size: 1 puda
- Calories: 140
- Sugar: 2g
- Sodium: 200mg
- Fat: 5g
- Saturated Fat: 0.5g
- Unsaturated Fat: 4g
- Trans Fat: 0g
- Carbohydrates: 18g
- Fiber: 3g
- Protein: 6g
- Cholesterol: 0mg
Keywords: spinach puda, chickpea flour pancake, Indian flatbread