
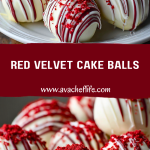
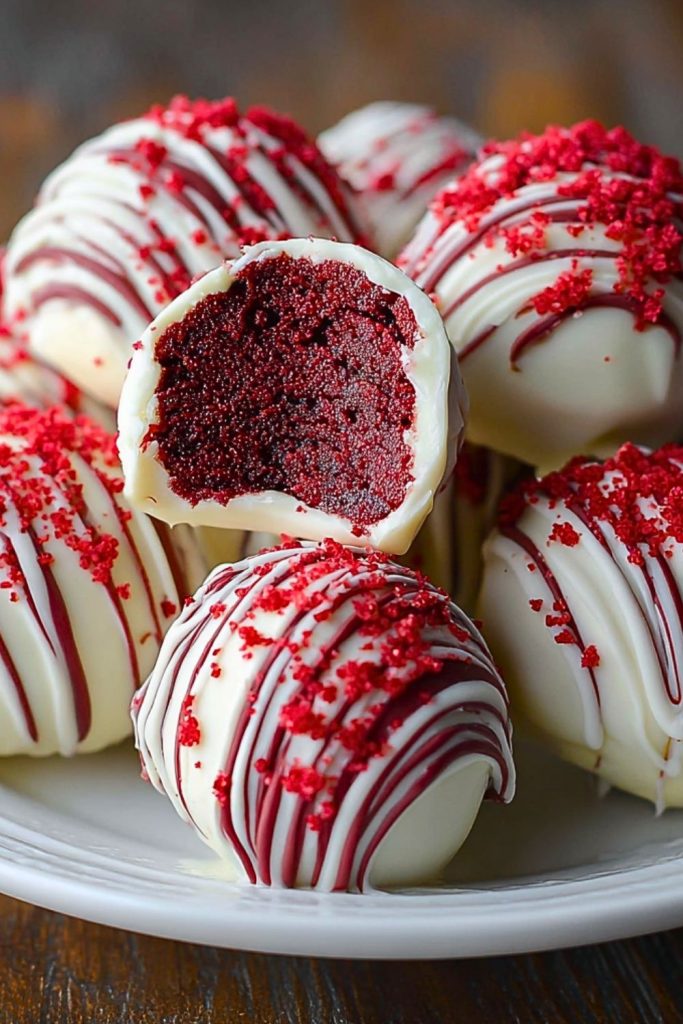
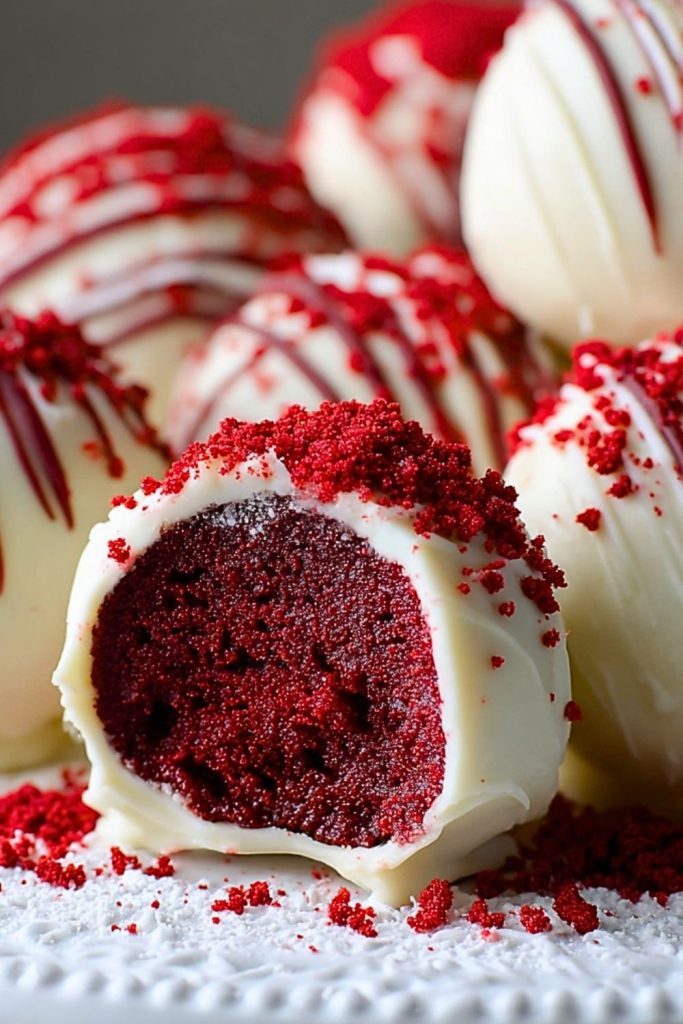
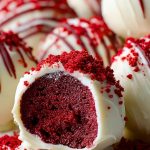
I’ve always had a soft spot for red velvet desserts. There’s something about the deep crimson hue and that signature mild cocoa flavor that feels both indulgent and elegant. These Red Velvet Cake Balls are one of my favorite ways to enjoy red velvet without the fuss of layering and frosting a full cake. Bite-sized, creamy in the center, and coated with a delicate shell of white chocolate—these treats are irresistible from the very first bite.
I first made these for a holiday gathering, and they vanished faster than I expected. Since then, they’ve become my go-to for parties, gift boxes, and even just cozy weekends at home. They require minimal effort but always deliver maximum delight. And the best part? They’re easy to customize, decorate, and flavor to suit the season or your mood.
Why You’ll Love This Red Velvet Cake Balls Recipe
- Perfectly portioned: No slicing or serving utensils needed—just grab and go.
- Make-ahead friendly: They store beautifully, so you can prep days in advance.
- Aesthetic appeal: Gorgeous red centers and decorative coatings make them ideal for gifting or showcasing.
- Simple ingredients: You can even use store-bought cake and frosting for a shortcut.
- Crowd-pleaser: Whether kids or adults, these are always a hit.
What Kind of Cake Should I Use for Red Velvet Cake Balls?
You can go homemade or keep things simple with a boxed mix—either way works beautifully. I’ve tried both options and honestly, it depends on how much time I have. A rich, moist homemade red velvet cake adds a personal touch and deeper flavor. But when I’m in a pinch, I grab a box of red velvet cake mix, and it still yields delicious results. The key is making sure the cake is moist enough to crumble easily and blend well with the frosting.
If you’re using leftovers from a red velvet cake, just make sure it’s not over-frosted—too much icing can make the cake balls overly sweet and soft. And if you’re baking from scratch, give your cake time to cool completely before crumbling it.
Options for Substitutions
If you want to switch things up or adjust to what you have on hand, here are a few ideas:
- Frosting: Cream cheese frosting is traditional, but vanilla or even chocolate frosting can bring a fun twist.
- Chocolate Coating: White chocolate adds contrast, but dark or milk chocolate are great if you prefer a richer flavor.
- Food Coloring: For a natural alternative, beet powder or juice can replace artificial red coloring in homemade cake.
- Vegan/Dairy-Free: Use a dairy-free cake mix, vegan frosting, and plant-based chocolate coating.
- Sprinkles & Toppings: Crushed cookies, festive sprinkles, or cocoa powder can replace red velvet crumbs for topping.
Ingredients for This Red Velvet Cake Balls Recipe
Red Velvet Cake
This is the foundation of your cake balls. You can use a homemade recipe or a boxed mix—what matters most is that the cake is moist and flavorful.
Cream Cheese Frosting
The frosting binds the crumbled cake together and adds richness. Cream cheese pairs beautifully with red velvet, giving that signature tangy finish.
White Chocolate or Candy Melts
Used for coating the cake balls, white chocolate adds a creamy shell and eye-catching contrast to the red interior.
Red Velvet Cake Crumbs or Sprinkles
These are purely decorative but make the cake balls look polished and party-ready. You can reserve a bit of cake before mixing in the frosting, then crumble it finely for garnish.
Vegetable Oil or Shortening (optional)
Sometimes a tiny bit added to the chocolate helps it melt more smoothly and coat evenly.
Step 1: Bake and Cool the Cake
Prepare your red velvet cake according to your recipe or the instructions on a boxed mix. Once baked, allow it to cool completely—this is important to avoid a gummy texture when mixing.
Step 2: Crumble the Cake
Once cool, crumble the cake into fine, even pieces using your hands or a fork. It should resemble coarse crumbs, with no large chunks left behind.
Step 3: Mix in the Frosting
Add a few spoonfuls of cream cheese frosting to the crumbled cake. Start small—you can always add more. Mix until the texture resembles a soft dough that holds together when pressed.
Step 4: Roll into Balls
Scoop out portions of the mixture and roll them between your palms to form smooth, round balls. Aim for about 1-inch in diameter. Place them on a baking sheet lined with parchment paper.
Step 5: Chill the Cake Balls
Transfer the rolled cake balls to the refrigerator or freezer for at least 30 minutes. This step helps them firm up and makes them easier to coat in chocolate.
Step 6: Melt the Chocolate
While the cake balls are chilling, melt your white chocolate or candy melts in a heatproof bowl. You can do this in the microwave in short intervals, stirring frequently, or over a double boiler.
Step 7: Dip and Decorate
Using a fork or toothpick, dip each chilled ball into the melted chocolate, letting the excess drip off. Place them back on the parchment-lined tray and quickly sprinkle with reserved red velvet crumbs or decorations before the coating sets.
Step 8: Let Them Set
Allow the coated cake balls to set completely. You can speed this up by placing them in the fridge for 15–20 minutes.
How Long to Cook the Red Velvet Cake Balls
The actual “cooking” is limited to baking the red velvet cake itself, which typically takes around 25 to 30 minutes depending on your oven and recipe. Once baked, the rest of the process is all about assembly and chilling. Here’s a quick timeline:
- Bake the cake: 25–30 minutes
- Cool the cake: 1 hour
- Form and chill the balls: 30–45 minutes
- Dip and set the coating: 15–20 minutes
All in all, you’re looking at roughly 2.5 to 3 hours from start to finish, with most of that being inactive time.
Tips for Perfect Red Velvet Cake Balls
- Don’t overdo the frosting: Add a little at a time—too much makes the mixture mushy and hard to shape.
- Cool everything properly: Let the cake cool completely before crumbling, and always chill the balls before dipping.
- Use a cookie scoop: For evenly-sized cake balls, a small cookie scoop makes portioning easier.
- Add oil to chocolate: If your melted coating is too thick, a teaspoon of vegetable oil or shortening can make it smoother.
- Work in batches: Only take a few cake balls out of the fridge at a time while dipping to keep them firm.
- Decorate quickly: Add sprinkles or crumbs while the chocolate is still wet so they stick properly.
Watch Out for These Mistakes While Cooking
- Using warm cake: If the cake hasn’t cooled completely, the frosting can melt and create a sticky, hard-to-shape mess.
- Adding too much frosting: This is the most common mistake. The mixture should be moist, not soggy—add frosting gradually and stop when it holds together.
- Skipping the chill time: If you don’t chill the balls before dipping, they may fall apart in the melted chocolate.
- Overheating the chocolate: Chocolate burns easily—melt it slowly and stir often for a smooth finish.
- Not tapping off excess chocolate: Let the excess drip off after dipping to avoid a thick, uneven coating.
What to Serve With Red Velvet Cake Balls?
Coffee or Espresso
The slightly bitter flavor of a strong brew balances out the sweetness beautifully.
Milkshakes or Ice Cream
Vanilla or chocolate milkshakes and scoops of ice cream make an indulgent pairing.
Fruit Platters
Strawberries, raspberries, and sliced pears complement the creamy richness of the cake balls.
Champagne or Sparkling Wine
Perfect for celebrations, the bubbles cut through the richness.
Hot Chocolate or Mocha
A cozy, creamy match—especially during the holidays.
Cheese Platter
Serve as a sweet finish after a savory cheese course for an elegant touch.
Mini Cupcakes or Petit Fours
Great for dessert tables—adds variety and texture.
Flavored Popcorn or Nuts
For a sweet and salty contrast that keeps guests snacking.
Storage Instructions
Red velvet cake balls are wonderfully make-ahead friendly. Here’s how to keep them fresh:
- Refrigerator: Store in an airtight container for up to 7 days. Place parchment paper between layers to prevent sticking.
- Freezer: Freeze for up to 2 months. Wrap each ball individually in plastic wrap or place them in a single layer in a freezer-safe container. Thaw in the refrigerator before serving.
- Room Temperature: If the coating is firm and your kitchen isn’t too warm, they can sit out for a day or two—just keep them in a covered container.
Estimated Nutrition
Keep in mind this is a rough estimate and can vary based on the specific brands and ingredients used:
- Serving Size: 1 cake ball
- Calories: ~120
- Total Fat: 6g
- Saturated Fat: 3g
- Cholesterol: 10mg
- Sodium: 90mg
- Carbohydrates: 15g
- Sugars: 12g
- Protein: 1g
These bite-sized treats are rich, so one or two will satisfy even the strongest sweet tooth!
Frequently Asked Questions
Can I make red velvet cake balls without cream cheese frosting?
Yes, you can use any frosting you like. Vanilla, buttercream, or even chocolate frosting works well depending on your taste.
Do I need a food processor to crumble the cake?
Not at all. Just use clean hands or a fork to break the cake into fine crumbs—it works just as well.
Can I use leftover red velvet cake for this recipe?
Absolutely! Just be mindful of the frosting ratio if your cake is already frosted—too much can make the mixture too soft.
What if my mixture is too dry or too wet?
If it’s too dry, add a bit more frosting, one spoon at a time. If too wet, add more crumbled cake or refrigerate the mix to firm it up before shaping.
How do I prevent the chocolate coating from cracking?
Make sure your cake balls aren’t too cold when dipping, and avoid sudden temperature changes with the melted chocolate.
Can I color the white chocolate coating?
Yes, but use oil-based or candy coloring—water-based food dye can seize the chocolate.
How far ahead can I make these?
You can make them up to a week in advance if refrigerated, or freeze them up to 2 months ahead.
Are these suitable for gifting?
Definitely! Place them in mini cupcake liners and gift boxes for a beautiful presentation.
Conclusion
Red Velvet Cake Balls are more than just a pretty treat—they’re simple to make, easy to customize, and guaranteed to impress. Whether you’re making them for a party, a gift, or a weekend indulgence, they bring that perfect mix of indulgence and fun. I’ve made them dozens of times, and each batch disappears faster than the last. Once you try them, you’ll understand why.
Red Velvet Cake Balls
- Prep Time: 30 minutes
- Chill Time: 45 minutes
- Total Time: 1 hour 15 minutes
- Yield: About 24 cake balls
Description
Red Velvet Cake Balls are bite-sized treats made from crumbled red velvet cake mixed with cream cheese frosting, rolled into balls, and dipped in a creamy white chocolate coating. These festive little sweets are perfect for parties, holidays, or edible gifts.
Ingredients
- 1 box red velvet cake mix (or homemade red velvet cake)
- 1/2 to 3/4 cup cream cheese frosting
- 12 oz white chocolate or candy melts
- 1 tsp vegetable oil or shortening (optional, for melting chocolate)
- Red velvet crumbs or decorative sprinkles (optional)
Instructions
- Bake the red velvet cake according to package or recipe instructions. Let it cool completely.
- Crumble the cooled cake into a large bowl until fine and even.
- Mix in the cream cheese frosting a little at a time until the mixture holds together like dough.
- Roll into 1-inch balls and place on a parchment-lined baking sheet.
- Chill in the refrigerator or freezer for 30–45 minutes.
- Melt the white chocolate in a microwave-safe bowl or over a double boiler. Stir in oil if needed for smoother texture.
- Dip each cake ball into the melted chocolate, letting excess drip off. Place back on the parchment paper.
- While coating is still wet, sprinkle with cake crumbs or decorations.
- Allow to set completely before serving or storing.