
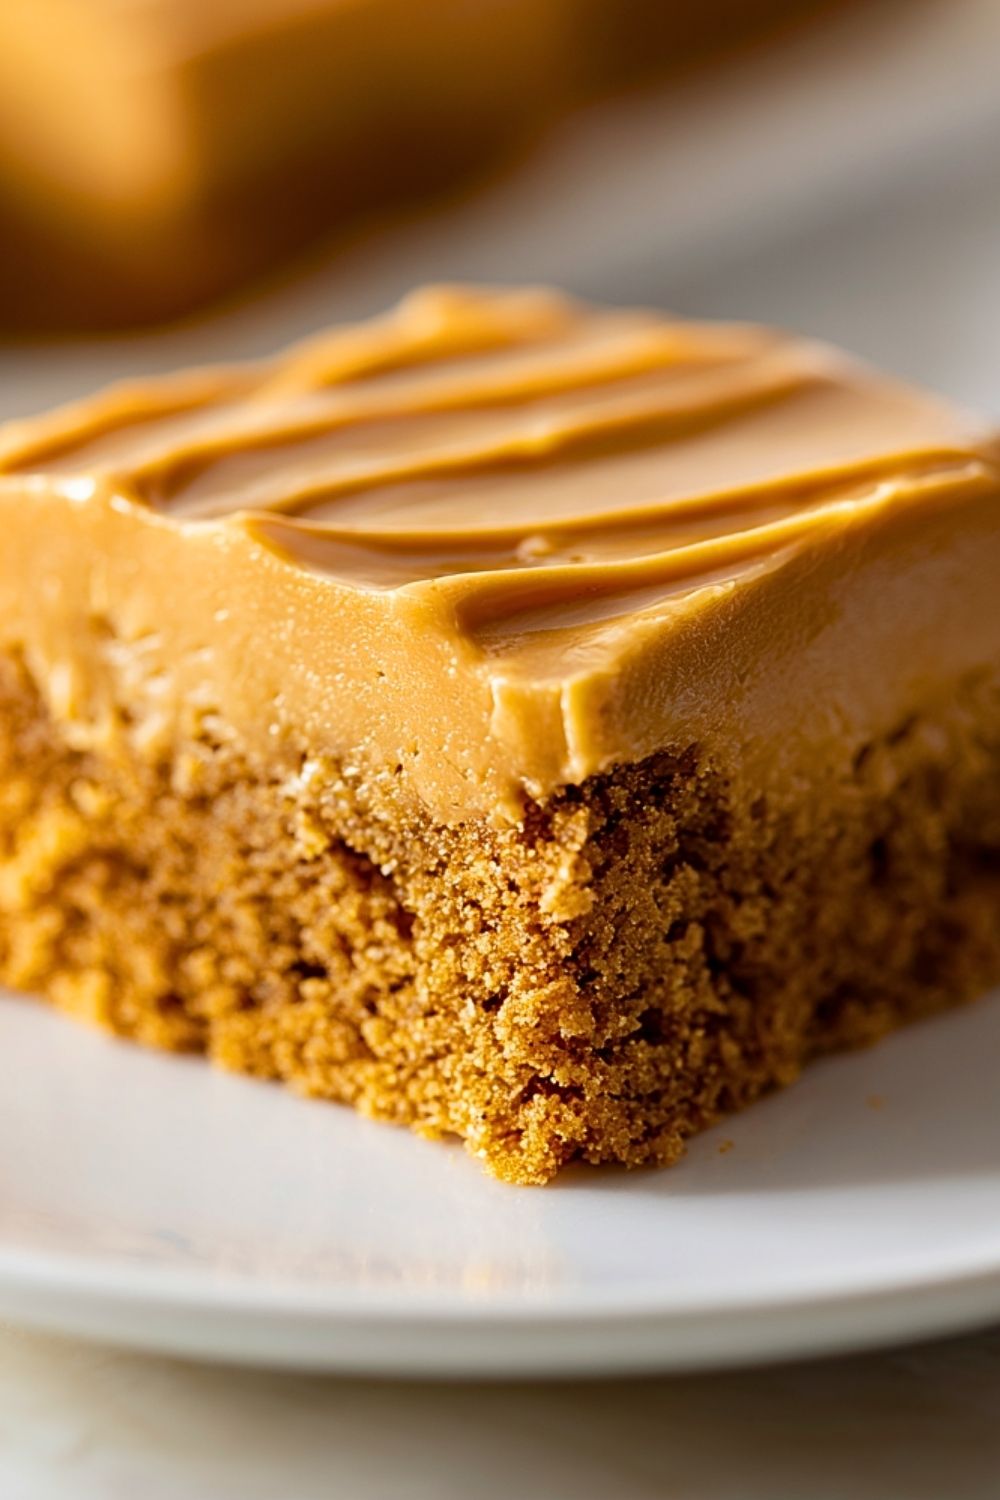
Peanut Butter Lunch Lady Bars are a nostalgic treat that blends the best of school cafeteria memories with indulgent, homemade flavor. These soft, chewy bars are layered with a rich, creamy peanut butter frosting that melts into the tender, golden base. With a texture that’s somewhere between a cookie and a brownie, each bite delivers the perfect balance of sweet, salty, and peanut buttery goodness.
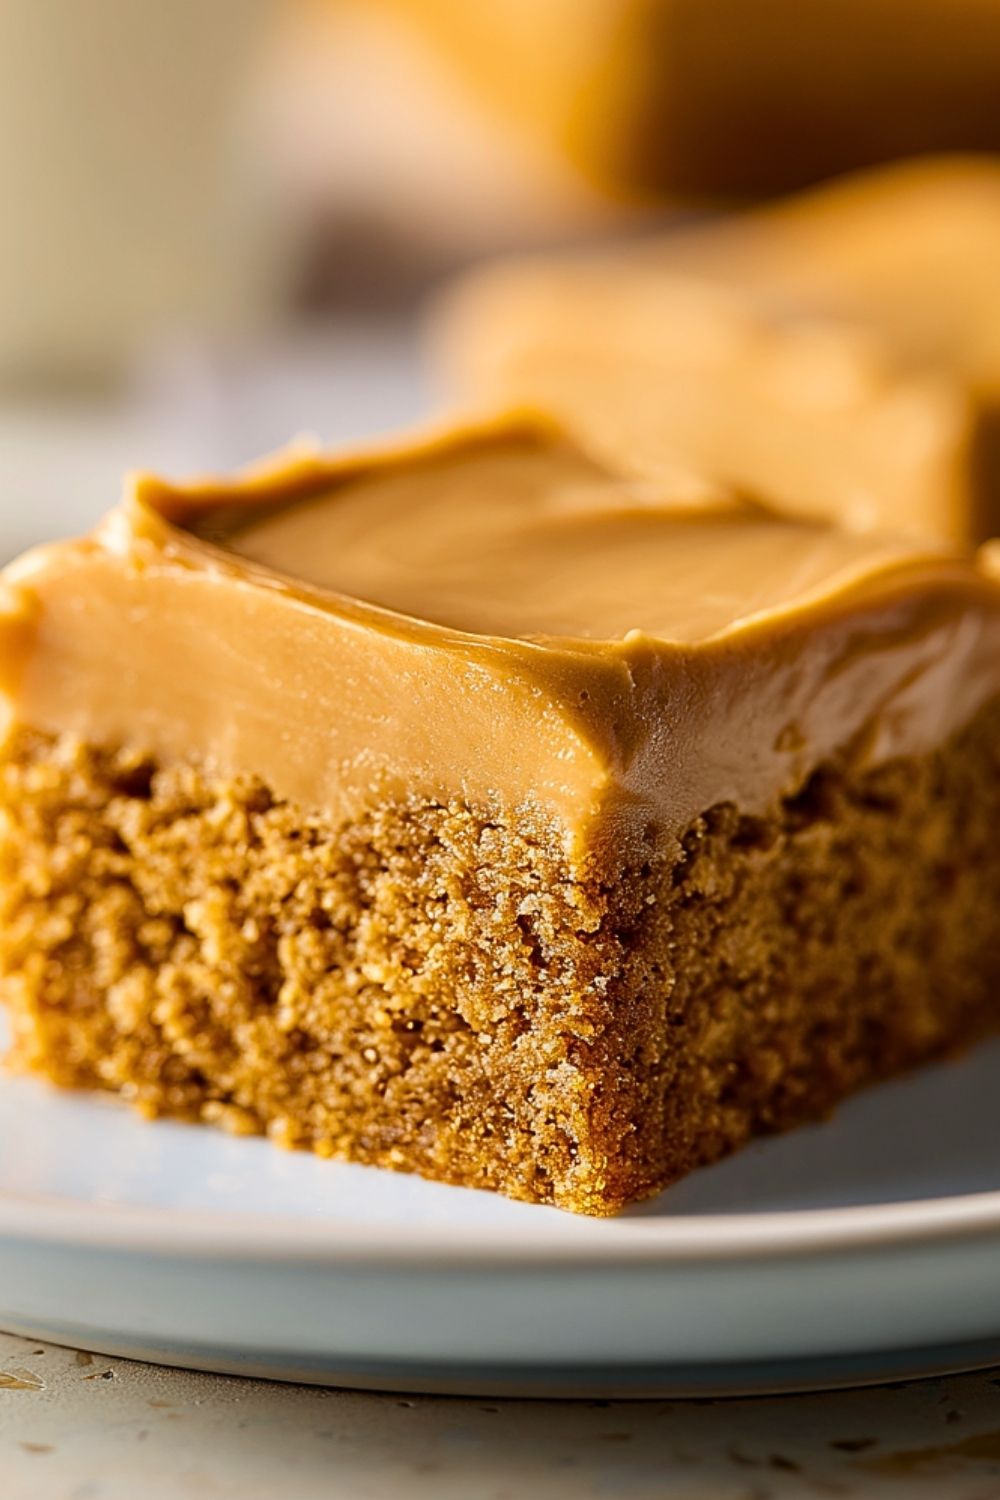
Perfect for potlucks, lunchboxes, or casual weekend baking, these bars are simple to make and even easier to love. Whether you’re baking them for a crowd or keeping a stash at home for late-night cravings, this classic dessert is bound to bring comfort and joy to anyone lucky enough to get a square.
Why You’ll Love This Peanut Butter Lunch Lady Bars Recipe
- Simple ingredients you likely already have on hand
- Soft and chewy texture with a rich peanut butter flavor
- Nostalgic taste that brings back childhood memories
- Perfect for making ahead and storing for days
- Great for sharing (or not!)
Preparation Phase & Tools to Use
To ensure perfect Peanut Butter Lunch Lady Bars, you’ll need a few essential kitchen tools:
- Mixing Bowls: At least two – one for dry and one for wet ingredients. Ensures even mixing.
- Electric Mixer or Stand Mixer: Essential for creaming butter and sugar, and for achieving a fluffy frosting texture.
- 9×13-Inch Baking Pan: This size provides just the right thickness for soft, chewy bars.
- Spatula: Great for folding, smoothing the batter, and spreading frosting evenly.
- Cooling Rack: Allows the bars to cool completely before frosting, ensuring it sets correctly.
Each tool plays a crucial role in getting the texture and consistency just right, so having them ready will make the process smoother and more efficient.
Preparation Tips
Start by bringing your butter to room temperature — it creams better that way, leading to a smoother batter and fluffier frosting. When measuring flour, spoon it into your measuring cup and level it off to avoid compacting it (which can make the bars dry). Use creamy peanut butter for the smoothest result, though chunky works if you like added texture. Don’t rush the cooling process before frosting; warm bars will melt your creamy topping and make it runny. Lastly, slice with a sharp knife for clean edges and that picture-perfect presentation.
Ingredients for this Peanut Butter Lunch Lady Bars Recipe
For the Bars:
- 1 cup unsalted butter, softened
- 1 cup creamy peanut butter
- 1 cup granulated sugar
- 1 cup light brown sugar, packed
- 2 large eggs
- 2 teaspoons vanilla extract
- 2 cups all-purpose flour
- 1 teaspoon baking soda
- 1/2 teaspoon salt
For the Frosting:
- 1/2 cup unsalted butter
- 1/4 cup milk (preferably whole or 2%)
- 1/2 cup creamy peanut butter
- 2 cups powdered sugar (more as needed for desired consistency)
- 1 teaspoon vanilla extract
Step 1: Preheat and Prep
Preheat your oven to 350°F (175°C). Grease a 9×13-inch baking pan or line it with parchment paper for easier removal. This ensures the bars won’t stick and will come out cleanly when sliced.
Step 2: Cream Butter and Sugars
In a large mixing bowl, cream together the softened butter, peanut butter, granulated sugar, and brown sugar using an electric mixer on medium speed until light and fluffy, about 2-3 minutes.
Step 3: Add Eggs and Vanilla
Beat in the eggs, one at a time, ensuring each is fully incorporated. Then add vanilla extract and mix again until combined.
Step 4: Combine Dry Ingredients
In a separate bowl, whisk together the flour, baking soda, and salt. Gradually add the dry mixture to the wet ingredients, mixing just until combined. Do not overmix – this keeps the bars soft and tender.
Step 5: Bake the Bars
Spread the thick batter evenly into the prepared baking dish. Use a spatula to smooth the top. Bake for 22-25 minutes or until the edges are golden and a toothpick inserted in the center comes out mostly clean. Do not overbake.
Step 6: Cool Completely
Allow the bars to cool fully in the pan on a wire rack. This is crucial before frosting so the topping sets correctly.
Step 7: Make the Frosting
In a medium saucepan over medium heat, melt the butter and peanut butter together. Stir until smooth. Remove from heat and stir in the milk and vanilla extract. Gradually whisk in the powdered sugar until smooth and thick but spreadable. If needed, add a bit more powdered sugar for desired consistency.
Step 8: Frost the Bars
Once the bars have completely cooled, spread the warm frosting over the top using an offset spatula or butter knife. Work quickly to create smooth swirls before it begins to set.
Step 9: Slice and Serve
Let the frosting set for about 15 minutes. Then slice into bars or squares with a sharp knife. Clean the knife between cuts for neat edges.
Notes
Peanut Butter Lunch Lady Bars are best enjoyed at room temperature, where the frosting softens just enough to meld with the chewy base. If you prefer a more intense peanut butter flavor, you can add a teaspoon of peanut butter extract to the batter. These bars are also incredibly versatile—feel free to add a handful of mini chocolate chips, a drizzle of melted chocolate on top, or even swirl in a bit of jam before baking for a peanut butter and jelly twist.
Watch Out for These Mistakes While Cooking
- Overbaking: These bars can go from perfectly chewy to dry if left in the oven too long. Keep a close eye after the 20-minute mark.
- Frosting too soon: Don’t rush the cooling phase. Frosting warm bars causes the frosting to melt and lose its structure.
- Using natural peanut butter: While natural peanut butter can be tempting, it often has more oil and less stability than creamy commercial brands, leading to a greasy or separated texture.
- Skipping the parchment paper: This makes removal and clean-up much easier, and prevents bars from sticking.
- Measuring flour incorrectly: Too much flour can make the bars dry. Always spoon flour into the measuring cup and level it off.
Storage Instructions
Store leftover bars in an airtight container at room temperature for up to 4 days. If stacking, place parchment paper between layers to prevent sticking. For longer storage, refrigerate for up to a week. You can also freeze them for up to 2 months—wrap each bar individually and place in a freezer-safe bag. Thaw at room temperature before serving for best texture.
Estimated Nutrition
(Per bar, based on 24 servings — estimates only)
- Calories: 310
- Total Fat: 18g
- Saturated Fat: 6g
- Unsaturated Fat: 10g
- Cholesterol: 35mg
- Sodium: 180mg
- Carbohydrates: 32g
- Sugar: 22g
- Fiber: 1g
- Protein: 5g
Frequently Asked Questions
What type of peanut butter works best?
Use a standard creamy peanut butter like Jif or Skippy for consistent texture and flavor. Natural peanut butters may separate and create oily results.
Can I make these bars gluten-free?
Yes, you can substitute a 1:1 gluten-free baking flour blend. Make sure it includes xanthan gum for structure.
Can I use chunky peanut butter?
Definitely! If you like a little crunch in your bars, chunky peanut butter adds texture and extra nutty flavor.
Can I make the frosting ahead of time?
It’s best to make the frosting fresh so it’s easy to spread. However, you can reheat it gently if made in advance.
Why did my bars turn out dry?
Overbaking or using too much flour is usually the culprit. Use a light hand with flour and don’t exceed the recommended bake time.
How do I know when the bars are done?
The edges should be golden and a toothpick inserted in the center should come out with a few moist crumbs.
Can I freeze these bars with the frosting on?
Yes! The frosting freezes well. Just make sure the bars are completely cooled and set before wrapping tightly for freezing.
Are these good for bake sales or parties?
Absolutely. They slice cleanly, hold their shape well, and have wide crowd appeal thanks to their nostalgic flavor and simple ingredients.
Conclusion
Peanut Butter Lunch Lady Bars are the ultimate fusion of old-school cafeteria charm and homemade deliciousness. Easy to make, rich in flavor, and endlessly comforting, they’re ideal for any occasion. Whether you’re baking for a family gathering, a school event, or just a well-deserved treat at home, these bars deliver a nostalgic punch of peanut butter goodness that satisfies every time.

Peanut Butter Lunch Lady Bars
- Prep Time: 15 minutes
- Cook Time: 25 minutes
- Total Time: 40 minutes
- Yield: 24 bars
- Category: Dessert
- Method: Baking
- Cuisine: American
Description
Looking for the ultimate peanut butter treat? These Peanut Butter Lunch Lady Bars are soft, chewy, and generously frosted with a rich peanut butter icing. Inspired by nostalgic cafeteria desserts, this easy recipe is a go-to for quick breakfast bars, easy dessert ideas, or even a comforting late-night snack. Whether you’re feeding a crowd or keeping a stash for yourself, these bars will deliver the perfect peanut buttery fix every time.
Ingredients
1 cup unsalted butter, softened
1 cup creamy peanut butter
1 cup granulated sugar
1 cup light brown sugar, packed
2 large eggs
2 teaspoons vanilla extract
2 cups all-purpose flour
1 teaspoon baking soda
1/2 teaspoon salt
1/2 cup unsalted butter (for frosting)
1/4 cup milk
1/2 cup creamy peanut butter (for frosting)
2 cups powdered sugar
1 teaspoon vanilla extract (for frosting)
Instructions
1. Preheat your oven to 350°F (175°C) and grease or line a 9×13-inch pan with parchment paper.
2. In a large bowl, cream together the butter, peanut butter, granulated sugar, and brown sugar until fluffy.
3. Add eggs one at a time, then mix in vanilla extract until combined.
4. In a separate bowl, whisk together flour, baking soda, and salt.
5. Slowly add dry ingredients to the wet mixture and stir until just combined.
6. Spread the batter evenly in the pan and bake for 22-25 minutes or until edges are golden.
7. Let the bars cool completely in the pan on a wire rack.
8. In a saucepan, melt butter and peanut butter over medium heat.
9. Remove from heat and stir in milk and vanilla extract.
10. Whisk in powdered sugar gradually until frosting is smooth and spreadable.
11. Spread frosting over completely cooled bars.
12. Let frosting set for 15 minutes, then slice and serve.
Notes
Let bars cool completely before frosting to avoid a runny topping.
For added texture, substitute chunky peanut butter or add mini chocolate chips.
Use commercial creamy peanut butter for best consistency and flavor.
Nutrition
- Serving Size: 1 bar
- Calories: 310
- Sugar: 22g
- Sodium: 180mg
- Fat: 18g
- Saturated Fat: 6g
- Unsaturated Fat: 10g
- Trans Fat: 0g
- Carbohydrates: 32g
- Fiber: 1g
- Protein: 5g
- Cholesterol: 35mg
Keywords: peanut butter bars, lunch lady bars, easy dessert, snack, school recipes