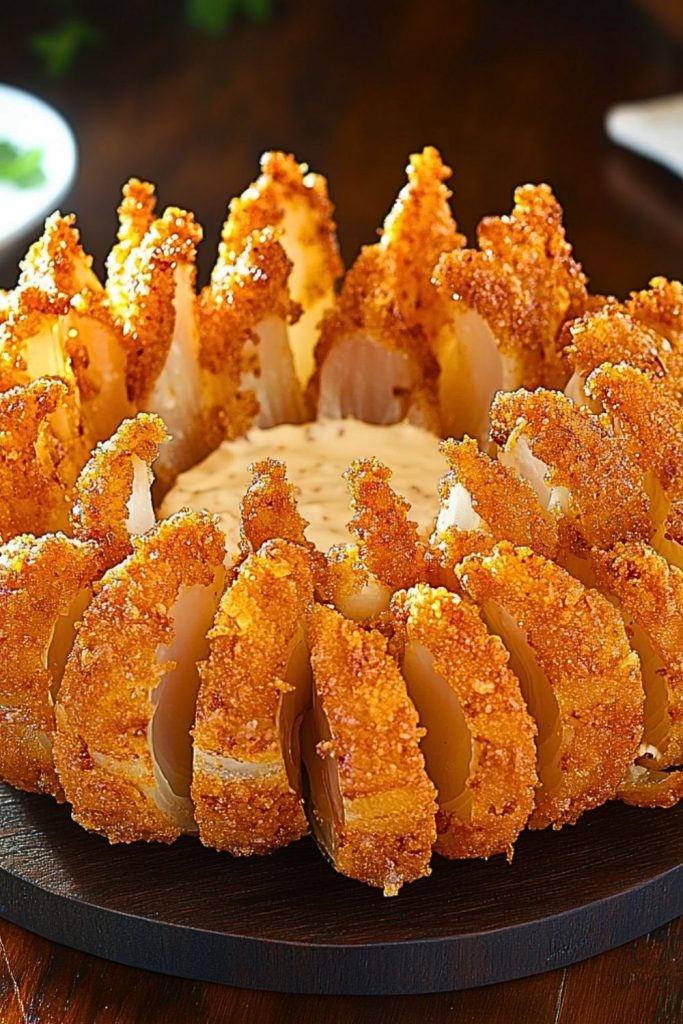
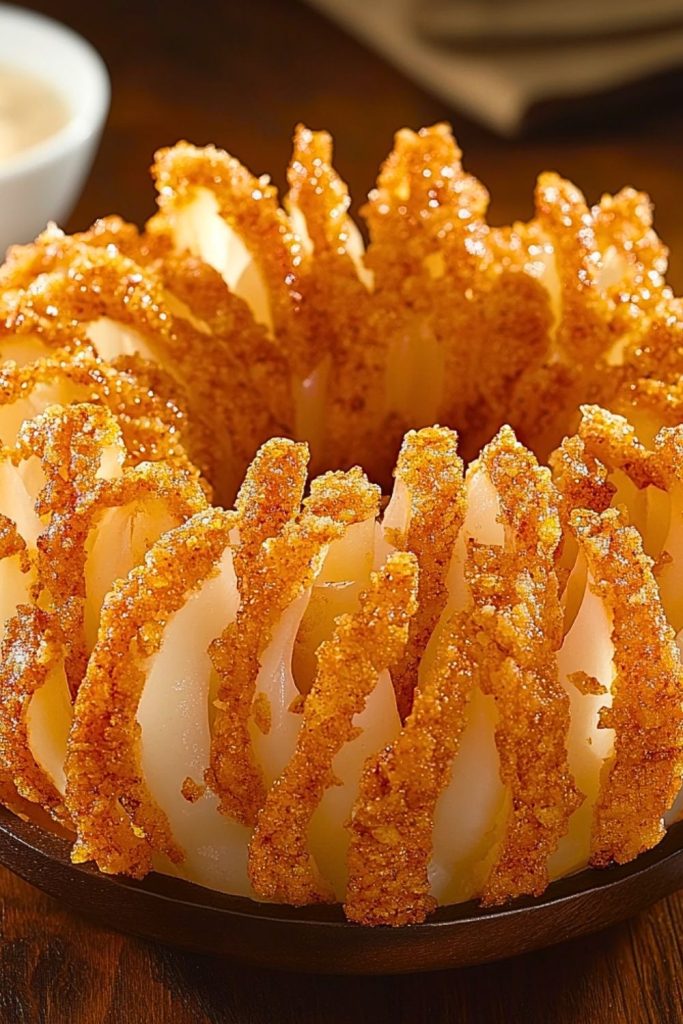
Golden, crispy, and impossible to resist, the Outback Steakhouse Bloomin’ Onion is a masterpiece of savory indulgence. This iconic appetizer isn’t just a fried onion—it’s a blooming tower of deliciously spiced petals, battered and deep-fried to crunchy perfection. Its dramatic presentation makes it a centerpiece-worthy starter that instantly grabs attention and appetite alike.

At the heart of this dish is a colossal sweet onion, meticulously sliced to resemble a flower and coated in a seasoned batter with a hint of Southern spice. When it hits the fryer, it opens up beautifully into a “bloom,” each tender-crisp petal ready to be dipped into a creamy, zesty sauce. Whether you’re hosting game day or just craving a restaurant-style treat at home, this homemade Bloomin’ Onion delivers the same wow factor—with extra flavor and freshness.
Why You’ll Love This Outback Steakhouse Bloomin’ Onion
- Showstopper Appearance: It looks just as stunning as it tastes. The blooming shape adds drama to your appetizer spread.
- Crispy and Flavor-Packed: Every layer is perfectly seasoned and extra crispy, with the tender onion inside offering a juicy bite.
- Dippable Delight: Comes with a creamy, tangy dipping sauce that complements the spices in the crust.
- Great for Sharing: Perfect for parties, family dinners, or impressing guests.
- Satisfies Restaurant-Style Cravings at Home: No need to dine out when you can make this favorite with better ingredients and bold flavor.
Preparation Phase & Tools to Use
Before diving into the deliciousness of crafting your own Bloomin’ Onion, setting up the right tools makes the process smoother and more enjoyable. Here’s what you’ll need and why:
- Large Sweet Onion (like Vidalia): The star of the show. Its size and mild flavor are perfect for blooming.
- Sharp Paring or Chef’s Knife: Precision matters! A sharp knife is essential for creating clean, petal-like cuts that allow the onion to open up like a flower.
- Cutting Board: A stable, spacious surface for safe slicing.
- Deep Fryer or Heavy-Duty Pot: You’ll need this for evenly frying the onion to golden perfection. A deep fryer with a basket makes lifting the onion out easier, but a heavy-bottomed Dutch oven works too.
- Slotted Spoon or Spider Strainer: To safely remove the onion from hot oil without damaging its delicate structure.
- Mixing Bowls (2–3): For dredging flour, mixing batter, and holding your onion before it hits the fryer.
- Paper Towels and Wire Rack: Essential for draining excess oil and keeping your onion crispy.
- Thermometer: Oil temperature is crucial—aim for 375°F (190°C) to ensure an even, golden fry.
Preparation Tips
- Chill the Onion Before Battering: After cutting your onion into petals, refrigerate it for 30 minutes. This helps it keep its shape during the dredging and frying process.
- Soak in Ice Water: After slicing the petals, a quick soak in ice water for 15–20 minutes encourages the petals to “bloom” more naturally.
- Preheat the Oil Thoroughly: Always make sure your oil is at the correct temperature before frying. Too cool and the onion becomes soggy, too hot and the batter burns.
- Double Dredge for Maximum Crunch: Coat the onion in the dry flour mix, then the wet batter, and again in flour. This layering locks in the crispiness.
- Use a Small Bowl to Hold the Onion Upside-Down: When dredging and battering, place the onion cut-side down over a small bowl. This helps the batter get in between all the petals.
- Don’t Overcrowd the Pot: If you’re frying multiple items, do them one at a time. Overcrowding lowers oil temperature and can cause greasy results.
Ingredients for this Outback Steakhouse Bloomin’ Onion
Creating this crispy, golden appetizer at home is easier than you think. Here’s everything you need to recreate the iconic Bloomin’ Onion, complete with a bold, flavorful batter and a creamy dipping sauce.
For the Onion:
- 1 large sweet onion (Vidalia recommended)
- Ice water (for soaking the sliced onion)
For the Seasoned Flour Mixture:
- 1 cup all-purpose flour
- 1 tablespoon paprika
- 1 teaspoon garlic powder
- 1 teaspoon onion powder
- 1/2 teaspoon cayenne pepper
- 1/2 teaspoon salt
- 1/2 teaspoon black pepper
- 1/4 teaspoon dried oregano
- 1/4 teaspoon dried thyme
For the Batter:
- 2 large eggs
- 1 cup milk
- 1/2 cup water
- Optional: 2 tablespoons of cornstarch (for extra crunch)
For Frying:
- Vegetable oil (enough for deep frying, about 4–6 cups depending on pot size)
For the Dipping Sauce:
- 1/2 cup mayonnaise
- 2 tablespoons ketchup
- 2 tablespoons prepared horseradish
- 1/2 teaspoon paprika
- 1/2 teaspoon garlic powder
- 1/4 teaspoon salt
- Dash of cayenne pepper (to taste)

Step 1: Slice and Bloom the Onion
Peel the onion and cut off about ½ inch from the top (pointed end), leaving the root end intact. Place the onion cut-side down on your cutting board. Starting about ½ inch from the root, make 4 vertical cuts down the onion in a cross pattern. Then, make 3 additional cuts between each quarter—ending with 16 evenly spaced sections. Gently turn the onion over and loosen the petals with your fingers to “bloom” it open. For best results, soak the onion in ice water for 15–30 minutes.
Step 2: Prepare the Seasoned Flour
In a large mixing bowl, combine flour, paprika, garlic powder, onion powder, cayenne, salt, pepper, oregano, and thyme. Mix thoroughly so the seasoning is evenly distributed.
Step 3: Make the Batter
In a separate bowl, whisk together eggs, milk, water, and optional cornstarch. The batter should be slightly thick but pourable. If needed, adjust with a bit more flour or milk for the perfect consistency.
Step 4: Dredge and Batter the Onion
Remove the onion from the ice water and pat it dry with paper towels. Dust the entire onion with the seasoned flour, making sure to coat between all the petals. Next, dip the onion into the batter—again ensuring all petals are coated well. Let any excess batter drip off, then dredge once more in the seasoned flour mixture for extra crunch.
Tip: Place the onion upside-down over a small bowl during dredging to help the coatings reach between the petals.
Step 5: Heat and Fry
Heat oil in a deep fryer or heavy pot to 375°F (190°C). Carefully lower the coated onion, cut-side down, into the hot oil using a slotted spoon or spider strainer. Fry for 6–8 minutes until golden brown and crispy. Flip it gently, if needed, for even frying. Remove and place on a paper towel-lined wire rack to drain excess oil.
Step 6: Make the Dipping Sauce
While the onion cools slightly, stir together mayonnaise, ketchup, horseradish, paprika, garlic powder, salt, and cayenne in a small bowl. Adjust spice levels to your liking. Refrigerate until ready to serve.
Step 7: Serve and Impress
Place the Bloomin’ Onion on a serving plate with a ramekin of dipping sauce in the center. Serve immediately while crispy and hot.
Notes
- Use a Sweet Onion: Vidalia onions are ideal because of their mild flavor and large size, making them perfect for blooming.
- Chilling Helps Bloom: Soaking the onion in ice water after slicing encourages the petals to spread beautifully while also toning down any sharpness in flavor.
- Batter Consistency Matters: A batter that’s too thick won’t coat evenly, and one that’s too thin won’t cling. Aim for something like pancake batter.
- Serve Immediately: This dish is best enjoyed fresh from the fryer for ultimate crispiness. Reheating tends to make it soggy.
- Optional Spicy Twist: Add hot sauce to the batter or extra cayenne to the flour for a little heat kick.
Watch Out for These Mistakes While Cooking
- Cutting Too Deep: Slicing through the root will cause the onion to fall apart. Keep the root intact to hold everything together.
- Skipping the Soak: Not soaking the onion means less blooming and a tighter structure—less visual appeal and crispiness.
- Underseasoning the Flour or Batter: Don’t skimp on spices. The seasoning mix is what gives this onion its famous punch.
- Crowding the Fryer: If oil temperature drops due to overcrowding, you’ll get greasy, limp results instead of golden crunch.
- Oil Not Hot Enough: If your oil isn’t at 375°F (190°C), the onion will absorb oil rather than crisp up.
- Skipping the Double Dredge: One round of coating isn’t enough. The double dip ensures a robust, crispy crust.
- Letting the Onion Sit Too Long After Coating: Fry it right after dredging. Waiting too long allows the coating to get soggy.
- Inconsistent Cuts: Uneven petals cook unevenly. Take your time to make uniform slices for a beautiful and balanced bloom.
Storage Instructions
If you happen to have leftovers (rare, but possible!), you’ll want to store them properly to preserve the crunch and flavor of your Bloomin’ Onion.
- Refrigeration: Place the onion in an airtight container lined with paper towels to absorb moisture. Store in the refrigerator for up to 3 days.
- Reheating: To get it crispy again, avoid the microwave. Instead, reheat in an oven at 375°F (190°C) for 10–15 minutes, or air-fry at 350°F for 5–7 minutes. This helps restore the crunchy exterior.
- Freezing: Not recommended. Freezing affects the texture and makes the onion soggy upon thawing.
- Dipping Sauce: Store any leftover sauce separately in a sealed container in the fridge for up to 5 days.
Estimated Nutrition
The nutritional values for one full Bloomin’ Onion (with sauce) will vary slightly based on exact ingredients and frying method, but here’s a general estimate:
- Calories: ~1,660 kcal
- Total Fat: 88g
- Saturated Fat: 15g
- Cholesterol: 135mg
- Sodium: 2,160mg
- Total Carbohydrates: 190g
- Dietary Fiber: 8g
- Sugars: 14g
- Protein: 18g
Frequently Asked Questions
1. Can I make a Bloomin’ Onion without a deep fryer?
Yes! A heavy-bottomed pot like a Dutch oven works perfectly. Just make sure the oil temperature stays around 375°F (190°C) and avoid overcrowding.
2. What type of onion works best for this recipe?
Sweet onions, especially Vidalia, are ideal because of their large size and mild, sweet flavor. They hold up well during frying and taste great.
3. How do I make the petals bloom better?
Soaking the sliced onion in ice water for 15–30 minutes helps the petals separate more easily and “bloom” beautifully during frying.
4. Can I make this gluten-free?
Absolutely! Just substitute the flour with a 1:1 gluten-free flour blend and ensure the batter ingredients and seasonings are gluten-free too.
5. How do I prevent the coating from falling off?
Use the double dredge method (flour → batter → flour) and make sure the onion is completely dry before coating. Fry immediately after coating for best results.
6. What oil is best for frying?
Neutral oils with a high smoke point, like canola, vegetable, or peanut oil, work best. Avoid olive oil, which can burn at high temps.
7. Can I bake or air fry this instead?
You can air fry the Bloomin’ Onion for a lighter version. It won’t be quite as crispy but still delicious. Baking isn’t recommended—it tends to result in a soggy texture.
8. Is the dipping sauce necessary?
While not essential, the zesty dipping sauce brings everything together. It balances the richness of the fried onion with creamy, spicy tang.
Conclusion
The Outback Steakhouse Bloomin’ Onion is more than just a fun appetizer—it’s a culinary showpiece that delivers bold flavor, crisp texture, and a touch of nostalgia. With the right tools, a little patience, and the flavorful seasoning mix, you can recreate this iconic dish in your own kitchen. Perfect for parties, family nights, or treating yourself to a homemade indulgence—it’s an experience worth the effort. Dip, share, and enjoy every crunchy bite!

Outback Steakhouse Bloomin’ Onion
- Prep Time: 20 minutes
- Cook Time: 10 minutes
- Total Time: 30 minutes
- Yield: 1 large Bloomin’ Onion (4-6 servings)
Description
Craving a restaurant-style appetizer that wows both in looks and flavor? This Outback Steakhouse Bloomin’ Onion is the ultimate party starter and comfort food indulgence. Featuring a massive sweet onion sliced to bloom like a flower, coated in a zesty seasoned batter, and deep-fried to crispy, golden perfection—this dish is everything you love about classic American appetizers. Whether you’re searching for a quick party snack, a fun dinner idea, or a showstopping appetizer, this homemade Bloomin’ Onion with its creamy dipping sauce checks all the boxes. It’s flavorful, crunchy, satisfying, and best of all—easy to make with basic ingredients.
Ingredients
For the Onion:
- 1 large sweet onion (Vidalia recommended)
- Ice water for soaking
- Seasoned Flour Mixture:
- 1 cup all-purpose flour
- 1 tbsp paprika
- 1 tsp garlic powder
- 1 tsp onion powder
- ½ tsp cayenne pepper
- ½ tsp salt
- ½ tsp black pepper
- ¼ tsp dried oregano
- ¼ tsp dried thyme
Batter:
- 2 large eggs
- 1 cup milk
- ½ cup water
- (Optional) 2 tbsp cornstarch
For Frying:
- 4–6 cups vegetable oil (canola or peanut oil preferred)
- Dipping Sauce:
- ½ cup mayonnaise
- 2 tbsp ketchup
- 2 tbsp prepared horseradish
- ½ tsp paprika
- ½ tsp garlic powder
- ¼ tsp salt
- Dash of cayenne pepper
Instructions
- Slice and Bloom Onion: Cut ½ inch off the top, peel, and make vertical slices to create petals, keeping the root intact. Soak in ice water for 15–30 minutes.
- Mix Seasoned Flour: Combine flour and all spices in a large bowl.
- Prepare Batter: Whisk eggs, milk, water, and cornstarch in a separate bowl.
- Coat Onion: Dry onion well. Dredge in flour mix, then batter, then flour again.
- Heat Oil: Bring oil to 375°F (190°C) in a deep fryer or heavy pot.
- Fry: Carefully lower onion into oil, cut-side down. Fry for 6–8 minutes until golden and crisp.
- Drain and Cool: Use a slotted spoon to remove the onion, drain on a paper towel-lined rack.
- Make Dipping Sauce: Mix all sauce ingredients in a small bowl.
- Serve: Place onion on a plate with sauce in the center. Enjoy immediately!

