
This dessert is pure joy in every bite. I first made Oreo Sushi Rolls on a lazy Sunday afternoon when I had a serious sweet craving but didn’t feel like baking. It only took a few ingredients I already had in my pantry—and the result looked like something straight out of a dessert café. These rolls are rich, creamy, chocolaty, and completely no-bake. You can slice them up just like sushi, and every bite delivers that nostalgic cookies-and-cream magic with a fun, playful twist.
The best part? They’re ridiculously easy to make and always a crowd-pleaser. Whether I’m serving them at a birthday party, holiday gathering, or just sneaking a late-night treat, Oreo Sushi Rolls never fail to impress. Kids love them, adults devour them, and they look way more complicated than they actually are. If you’re looking for a new go-to dessert that’s as fun to make as it is to eat, this is it.
Why You’ll Love This Oreo Sushi Rolls Recipe
These Oreo Sushi Rolls check all the boxes: no baking required, minimum ingredients, and maximum flavor. They come together quickly, and they’re versatile enough for casual snacking or festive occasions. If you love Oreos and cream-based desserts, this is your dream combo.
What Kind of Oreos Should I Use?
Classic Oreos are the gold standard for this recipe. Their balanced chocolate flavor and firm texture make them ideal for forming the “rice” of the roll. However, if you want to switch things up, try Golden Oreos for a twist, or use Double Stuf for extra creaminess—just be aware they can make the dough a bit softer, so you’ll need to adjust slightly.
Options for Substitutions
You can get creative with Oreo Sushi Rolls without compromising their core flavor. Swap regular cream cheese with a dairy-free alternative for a vegan-friendly version. Want to go nutty? Add a thin layer of peanut butter or Nutella inside the roll before spreading the filling. You can also try flavored sandwich cookies, like mint or birthday cake Oreos, for a fun variation. Just keep the structure firm so your rolls don’t fall apart.
Ingredients for this Oreo Sushi Rolls Recipe
- Oreos: These are the star of the show. You’ll crush them into a fine crumb to create the “rice” portion of the sushi. The cookie part forms the base that holds everything together.
- Cream Cheese: This adds creaminess to the crushed Oreos, helping bind them into a pliable dough that’s easy to roll out.
- Powdered Sugar: Mixed with the cream cheese for a sweeter, smoother filling.
- Vanilla Extract: Just a splash enhances the cream cheese mixture with a warm, sweet aroma.
- Heavy Cream or Whipping Cream: Optional but adds fluffiness and lightness to the filling if you want something airier.
- Mini Oreos or Oreo Crumbs (for garnish): These give the finished sushi a polished, irresistible look.
- Chocolate Drizzle and/or White Chocolate: Optional but great for presentation and added richness.
Step 1: Crush the Oreos
Add your Oreos (cream included) to a food processor and pulse until they become a fine crumb. You want it to resemble coarse sand—uniform and slightly sticky thanks to the filling. This will become the base of your sushi roll.
Step 2: Make the Dough
Transfer the crushed Oreos into a mixing bowl. Add softened cream cheese and mix until a thick dough forms. If it’s too dry, add a bit more cream cheese; if it’s too wet, a spoonful of crushed Oreos will help.
Step 3: Flatten the Dough
Place the dough between two sheets of parchment paper and roll it out into a thin, even rectangle using a rolling pin. Aim for about 1/4 inch thickness. Pop it into the fridge for 10–15 minutes to firm up.
Step 4: Make the Filling
While the dough chills, beat together cream cheese, powdered sugar, vanilla extract, and heavy cream (if using) until light and fluffy. This will be your creamy sushi filling.
Step 5: Assemble the Roll
Spread the cream filling evenly over the chilled Oreo sheet. Be gentle to avoid tearing. Leave a small border around the edges to prevent overflow when rolling.
Step 6: Roll it Up
Using the parchment paper to guide you, gently roll the dough into a tight log, just like a sushi roll. Seal the edge and place the roll back in the fridge for at least 30 minutes to firm up.
Step 7: Slice and Decorate
Slice your roll into bite-sized pieces using a sharp knife. Wipe the blade between cuts for clean slices. Garnish with mini Oreos, crushed cookie crumbs, or a drizzle of chocolate for extra flair.
How Long to Prepare the Oreo Sushi Rolls
Prep Time: Most of the effort goes into mixing and rolling. Crushing the Oreos, making the dough, and assembling the roll should take about 20 minutes. If you’re meticulous with presentation, add another 5-10 minutes.
Chill Time: For best results, the roll should be chilled twice—once after flattening the dough (about 10–15 minutes) and again after assembling (at least 30 minutes). This ensures the roll slices cleanly and holds its shape.
Tips for Perfect Oreo Sushi Rolls
- Use a food processor to get an even crumb. If you’re doing it by hand, place Oreos in a zip-top bag and crush them thoroughly with a rolling pin.
- Don’t overfill the cream layer. A thin, even layer ensures the roll stays neat and easy to slice.
- Chill adequately. Cold rolls cut cleaner and are easier to handle.
- Use parchment paper or plastic wrap to assist in rolling. It keeps everything tight and minimizes mess.
- Wipe your knife between slices for a professional presentation.
Watch Out for These Mistakes While Cooking
- Skipping the chilling steps: The dough will be too soft to roll or slice properly.
- Using too much cream cheese in the dough: This makes it sticky and hard to work with.
- Spreading the filling too thick: It’ll ooze out when rolling.
- Rushing the process: Let it chill fully before slicing, or you’ll get a messy result.
- Not sealing the roll tightly: Loose rolls fall apart when cut.
What to Serve With Oreo Sushi Rolls?
1. Fresh Strawberries
The tartness of strawberries balances the sweetness of the rolls and adds a pop of color.
2. Whipped Cream
A dollop on the side complements the creamy filling and adds lightness.
3. Hot Coffee or Espresso
The bitterness of coffee cuts through the sugar perfectly.
4. Vanilla Ice Cream
Serve a couple of slices with a scoop for an ultra-indulgent dessert plate.
5. Chocolate-Dipped Fruit
Enhances the dessert spread while keeping the theme fun and flavorful.
Storage Instructions
Refrigerator: Store leftover Oreo Sushi Rolls in an airtight container in the fridge for up to 4 days. The chill helps maintain their structure and flavor.
Freezer: You can freeze the assembled, unsliced roll for up to 1 month. Wrap it tightly in plastic wrap and then foil. Thaw in the fridge before slicing and serving.
Note: Once sliced, they may lose a bit of texture after thawing, so for the best presentation, freeze the full roll and slice fresh after thawing.
Estimated Nutrition (per slice, based on 12 servings)
- Calories: ~160
- Fat: 9g
- Saturated Fat: 4.5g
- Carbohydrates: 18g
- Sugar: 13g
- Protein: 2g
- Fiber: <1g
- Sodium: 85mg
Frequently Asked Questions
How do I keep the roll from cracking?
Make sure the dough is slightly chilled but still pliable when rolling. If it’s too cold or dry, it may crack.
Can I make this ahead of time?
Yes! It actually slices better when chilled overnight, so it’s a great make-ahead dessert.
Can I use store-bought Oreo crumbs?
Absolutely. Just be sure to add a bit more cream cheese to bind them since they don’t include the filling.
Is this recipe kid-friendly?
Totally! No heat, no knives (aside from slicing), and kids love helping with the rolling.
Can I use low-fat cream cheese?
Yes, but it may be slightly less creamy. Full-fat gives the best flavor and texture.
Conclusion
Oreo Sushi Rolls are a quick, no-bake treat that turns a classic cookie into a visually stunning dessert. With just a few simple ingredients and easy steps, you get a rollable, sliceable delight that looks fancy but takes minimal effort. Whether you’re making them for kids, parties, or just for fun, they’re sure to satisfy every sweet craving with their perfect blend of crunch, cream, and chocolatey goodness.

Oreo Sushi Rolls
- Prep Time: 20 minutes
- Cook Time: 45 minutes
- Total Time: 1 hour 5 minutes
- Yield: 12 slices
- Category: Dessert
- Method: No-Bake
- Cuisine: American
Description
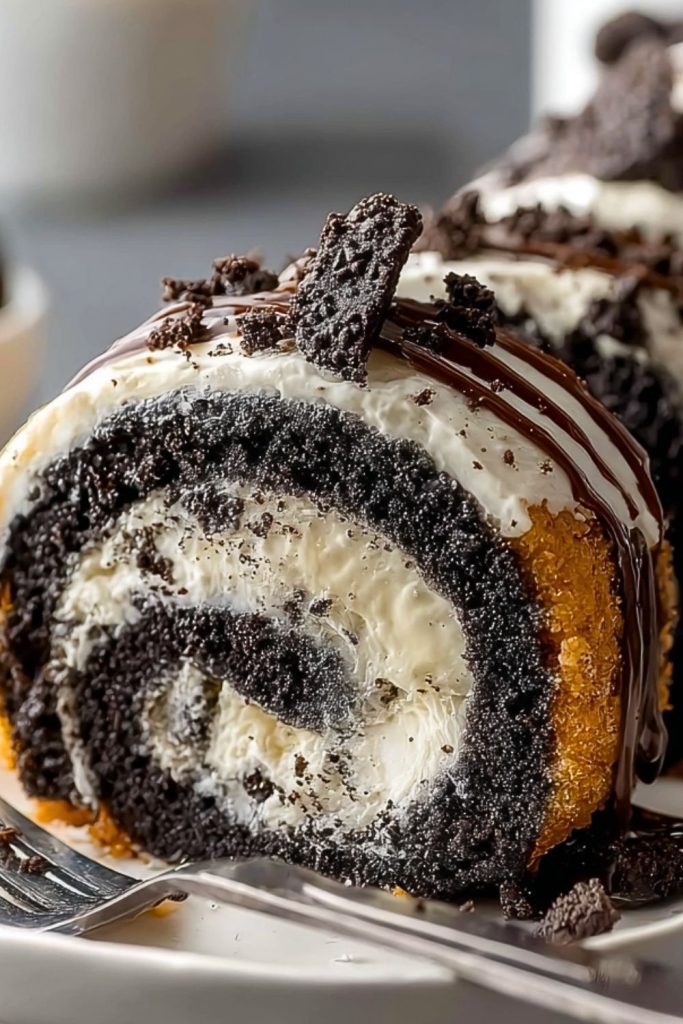
Want a dessert that’s no-bake, eye-catching, and bursting with cookies-and-cream goodness? These Oreo Sushi Rolls are your next favorite sweet treat. With crushed Oreo cookies forming the “rice” and a creamy vanilla filling rolled inside, this dish is playful, delicious, and shockingly easy. Perfect for quick breakfast ideas, party treats, healthy snack swaps, or just fun food ideas for any time of day. Whether you’re looking for an easy recipe or unique dessert for the holidays, this one will impress without the stress.
Ingredients
24 Oreos
4 oz cream cheese (for the dough)
3 oz cream cheese (for the filling)
2 tablespoons powdered sugar
1/2 teaspoon vanilla extract
2 tablespoons heavy cream (optional)
2 tablespoons Oreo crumbs or mini Oreos for garnish
2 tablespoons chocolate drizzle or melted white chocolate (optional)
Instructions
1. Crush the Oreos (with cream filling) in a food processor until finely ground.
2. Mix 4 oz of softened cream cheese with the Oreo crumbs to form a soft dough.
3. Place the dough between parchment paper sheets and roll it into a thin rectangle (about 1/4 inch thick).
4. Chill the dough in the refrigerator for 10–15 minutes.
5. In a bowl, beat together 3 oz cream cheese, powdered sugar, vanilla extract, and heavy cream (if using) until smooth and fluffy.
6. Spread the filling evenly over the chilled dough, leaving a small border around the edges.
7. Roll the dough tightly into a log using the parchment to guide you.
8. Chill the rolled log for at least 30 minutes to firm up.
9. Slice the log into sushi-style rounds using a sharp, clean knife.
10. Garnish with Oreo crumbs, mini Oreos, and drizzle with chocolate if desired.
Notes
Chill the dough twice to ensure clean slices and proper structure.
Don’t overfill the cream layer or it may leak during rolling.
Use parchment or plastic wrap for a neater rolling process.
Nutrition
- Serving Size: 1 slice
- Calories: 160
- Sugar: 13g
- Sodium: 85mg
- Fat: 9g
- Saturated Fat: 4.5g
- Carbohydrates: 18g
- Fiber: <1g
- Protein: 2g
Keywords: oreo sushi, no-bake dessert, cookies and cream roll, fun party treat, easy recipe