
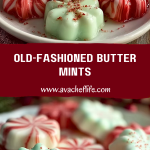
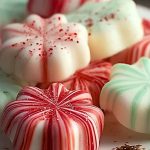
These delicate, melt-in-your-mouth Old-Fashioned Butter Mints are a sweet nod to vintage charm and simplicity. With their soft pastel hues and creamy texture, they’re more than just a candy—they’re a nostalgic treat that instantly elevates any holiday platter, wedding table, or baby shower spread. Each piece offers a gentle burst of buttery sweetness balanced with just the right hint of peppermint, making them both refreshing and indulgent.
Homemade butter mints aren’t just tastier than store-bought versions—they’re incredibly fun to make. From the soothing process of kneading and shaping to the beautiful presentation in glass bowls or jars, these mints bring an old-fashioned elegance to modern celebrations. Plus, with minimal ingredients and no baking required, they’re perfect for beginners or those looking to whip up a quick sweet fix with a classic twist.
Why You’ll Love This Old-Fashioned Butter Mints Recipe
- They require only a handful of basic ingredients.
- No baking involved—just mix, roll, and dry.
- They make a charming edible gift or party favor.
- Great for holidays, weddings, showers, or any special gathering.
- You can easily customize the colors and flavors.
Preparation Phase & Tools to Use
Making Old-Fashioned Butter Mints is simple, but using the right tools makes all the difference. Here’s what you’ll need:
- Mixing Bowl – Essential for blending your butter, sugar, and flavorings evenly.
- Electric Mixer or Hand Mixer – Creaming the butter until smooth ensures the perfect texture.
- Silicone Spatula – Ideal for scraping down the bowl and mixing without sticking.
- Bench Scraper or Knife – Helps cut the dough into even pieces before shaping.
- Parchment Paper or Wax Paper – Great for laying out the mints to dry without sticking.
- Airtight Containers – For storing once they’ve dried, keeping them fresh and soft.
Each of these tools plays a key role in achieving that smooth, creamy texture and beautifully shaped finish.
Preparation Tips
Soften your butter to room temperature before starting—cold butter won’t cream properly. Use powdered sugar, not granulated, as it creates that smooth, melt-in-your-mouth feel. When adding peppermint extract, start small and taste before increasing, as it’s very strong. If the dough feels too sticky, add a bit more sugar while kneading. Use gel food coloring sparingly to achieve soft pastel tones without altering the texture. Allow the mints to dry uncovered for several hours or overnight to firm up before storing.
Ingredients for this Old-Fashioned Butter Mints Recipe
- 1/2 cup (1 stick) unsalted butter, softened
- 4 cups powdered sugar (plus more for kneading if needed)
- 1 tablespoon heavy cream or milk
- 1/2 teaspoon pure peppermint extract (or to taste)
- Pinch of salt
- Gel food coloring (optional – pastel shades work best)
Step 1: Cream the Butter
In a large mixing bowl, beat the softened butter using an electric or hand mixer until it’s smooth and fluffy. This step ensures your mints will have a silky, melt-in-the-mouth texture.
Step 2: Add Flavor and Cream
Mix in the peppermint extract, pinch of salt, and heavy cream (or milk). Beat again until fully incorporated. Taste and adjust peppermint if needed—remember, a little goes a long way.
Step 3: Add the Sugar Gradually
Add the powdered sugar one cup at a time. Mix on low speed to prevent sugar clouds, then increase to medium speed. As the dough thickens, you may need to switch to hand mixing. The result should be a soft, pliable dough, similar to playdough.
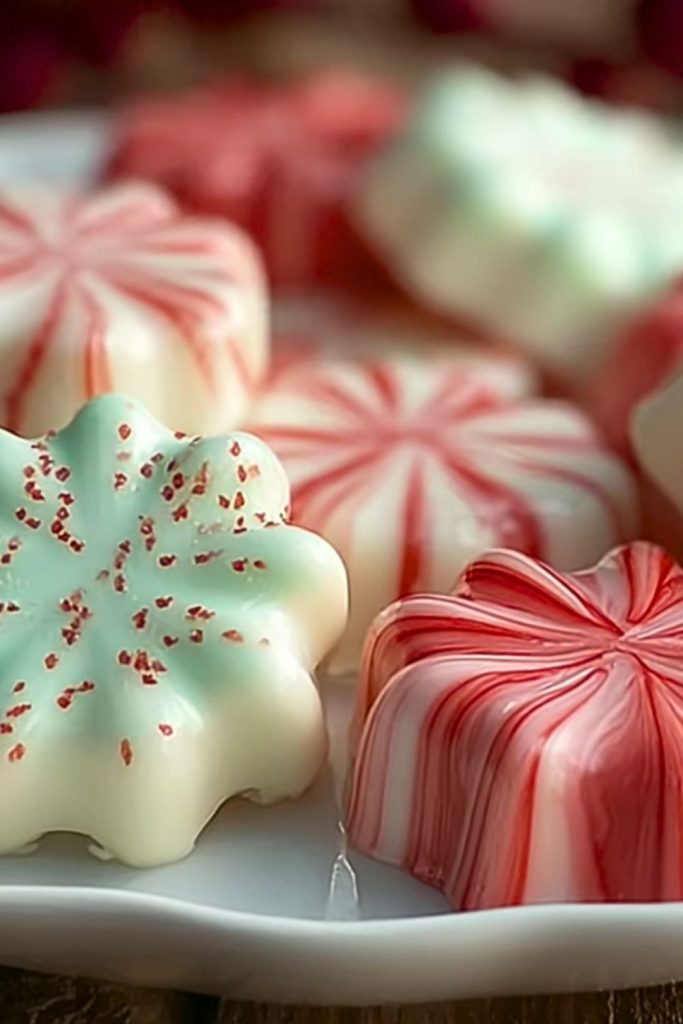
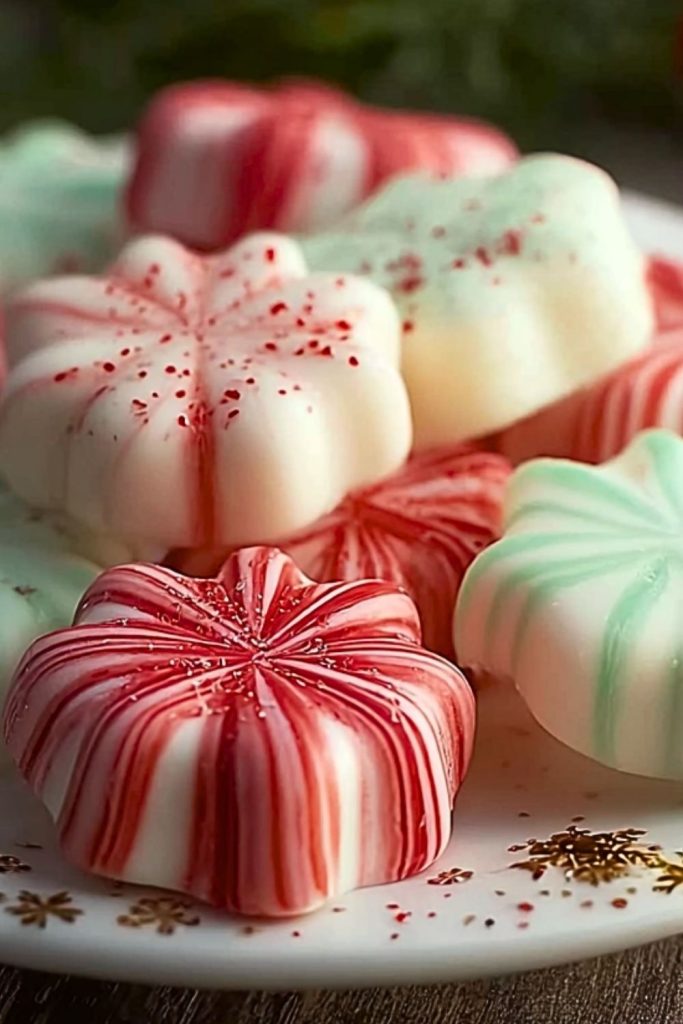
Step 4: Divide and Tint (Optional)
If using food coloring, divide the dough into separate portions. Add a small drop of gel food coloring to each and knead until evenly colored. Pastel shades like pink, yellow, green, and blue are traditional for butter mints.
Step 5: Roll into Ropes
Dust your work surface with powdered sugar. Roll each portion into thin ropes about 1/2 inch thick. If the dough is too sticky, knead in a bit more sugar.
Step 6: Cut and Shape
Using a bench scraper or sharp knife, cut each rope into small bite-sized squares or pillows. You can also use mini candy molds or gently roll them into balls for a round shape.
Step 7: Dry the Mints
Line a tray or surface with parchment or wax paper. Spread the cut mints in a single layer, not touching each other. Let them air-dry at room temperature for at least 8 hours, preferably overnight. This helps them develop a firm outer shell while staying soft inside.
Notes
Old-Fashioned Butter Mints are a wonderfully customizable candy. You can play with different extracts like vanilla, almond, or lemon for a unique twist. If you’re making them for a themed event, match the food coloring to the occasion. These mints are also a fun activity to do with kids—they’ll love rolling and cutting the dough. Just remember to keep them in a cool, dry place while drying to avoid any stickiness from humidity.
Watch Out for These Mistakes While Cooking
- Using cold butter: This prevents the dough from achieving the smooth, creamy consistency.
- Adding too much peppermint extract: A heavy hand with mint can make the mints overwhelming—always start small.
- Not using enough powdered sugar while kneading: If the dough remains sticky, your shapes won’t hold.
- Skipping the drying time: Without it, the mints will be too soft and won’t develop that signature outer shell.
- Storing them too early: Moisture can ruin the texture, so ensure they’re fully dry before sealing.
Storage Instructions
After the mints have dried completely, transfer them to an airtight container. Store in a cool, dry place away from sunlight. They keep well at room temperature for up to 2 weeks and can be refrigerated for longer freshness (up to 1 month). For even longer storage, freeze them in a sealed container for up to 3 months. Just be sure to let them come to room temperature before serving so they regain their creamy texture.
Estimated Nutrition (Per Serving – Approx. 4-5 mints)
- Calories: 120
- Fat: 5g
- Saturated Fat: 3g
- Carbohydrates: 19g
- Sugar: 18g
- Sodium: 5mg
- Protein: 0g
- Fiber: 0g
Frequently Asked Questions
What kind of butter should I use?
Always use unsalted butter to control the flavor and prevent the mints from tasting overly salty.
Can I use natural food coloring?
Yes! Powdered or gel-based natural dyes are great options. Just avoid liquid ones—they can make the dough sticky.
How long do these butter mints need to dry?
At least 8 hours is ideal, but overnight is best to get that perfect texture.
Can I freeze butter mints?
Absolutely. Just use a freezer-safe airtight container and let them thaw completely before serving.
Can I make these ahead of time for events?
Yes, they’re perfect for prepping a week or more in advance as they store very well.
Why is my dough too sticky?
It may be due to warm butter or insufficient sugar. Add more powdered sugar a little at a time while kneading.
Can I use a stand mixer instead of a hand mixer?
Definitely. A stand mixer works well, especially when adding the sugar gradually.
Do I have to use peppermint extract?
Not at all! Try almond, lemon, orange, or vanilla extracts for variety.
Conclusion
Old-Fashioned Butter Mints bring a timeless elegance and burst of nostalgia to any table. With their smooth, creamy texture and refreshing flavor, they’re a joy to both make and share. Whether you’re crafting them for a wedding, shower, or simply as a charming homemade gift, these delightful confections never go out of style. Take your time with the process, personalize the colors and flavors, and enjoy the sweet rewards of this simple yet classic treat.
Old-Fashioned Butter Mints
- Prep Time: 20 minutes
- Cook Time: 0 minutes
- Total Time: 8 hours
- Yield: About 100 mints
- Category: Dessert / Candy
- Method: No-Bake
- Cuisine: American
Description
Sweet, creamy, and nostalgic—these Old-Fashioned Butter Mints are the perfect bite-sized treat for any celebration. Whether you’re looking for a quick holiday candy, easy party favor, or vintage dessert idea, these mints check all the boxes. With a melt-in-your-mouth texture and just a kiss of peppermint, they bring back fond memories of family gatherings and dessert tables. No baking required, minimal ingredients, and customizable colors—ideal for anyone looking for a quick dessert or easy recipe to impress.
Ingredients
1/2 cup unsalted butter, softened
4 cups powdered sugar
1 tablespoon heavy cream or milk
1/2 teaspoon peppermint extract
1 pinch salt
gel food coloring (optional)
Instructions
1. Beat the softened butter in a large mixing bowl until smooth and creamy.
2. Add peppermint extract, salt, and cream. Mix well.
3. Gradually mix in powdered sugar until a soft dough forms.
4. If using coloring, divide dough and knead in gel food coloring.
5. Roll dough into thin ropes on a powdered sugar surface.
6. Cut ropes into bite-sized pieces using a scraper or knife.
7. Spread mints on parchment and allow to dry at room temperature for 8 hours or overnight.
Notes
Always soften your butter for smooth blending.
Add food coloring sparingly for delicate pastel tones.
Don’t rush the drying process—it’s key to the texture.
Nutrition
- Serving Size: 4-5 mints
- Calories: 120
- Sugar: 18g
- Sodium: 5mg
- Fat: 5g
- Saturated Fat: 3g
- Unsaturated Fat: 2g
- Trans Fat: 0g
- Carbohydrates: 19g
- Fiber: 0g
- Protein: 0g
- Cholesterol: 10mg
Keywords: easy candy recipe, vintage butter mints, quick dessert, no-bake holiday treat, edible gifts, pastel candies, wedding mints, party favor candy