
I’ve always had a soft spot for the combination of mint and chocolate. It’s cool, creamy, and rich all at once—like a winter breeze wrapped in a warm blanket. That’s exactly what inspired me to create this Mint Chocolate Fudge. With its smooth, velvety texture and a perfect balance between refreshing mint and decadent cocoa, this treat feels indulgent without being over the top.
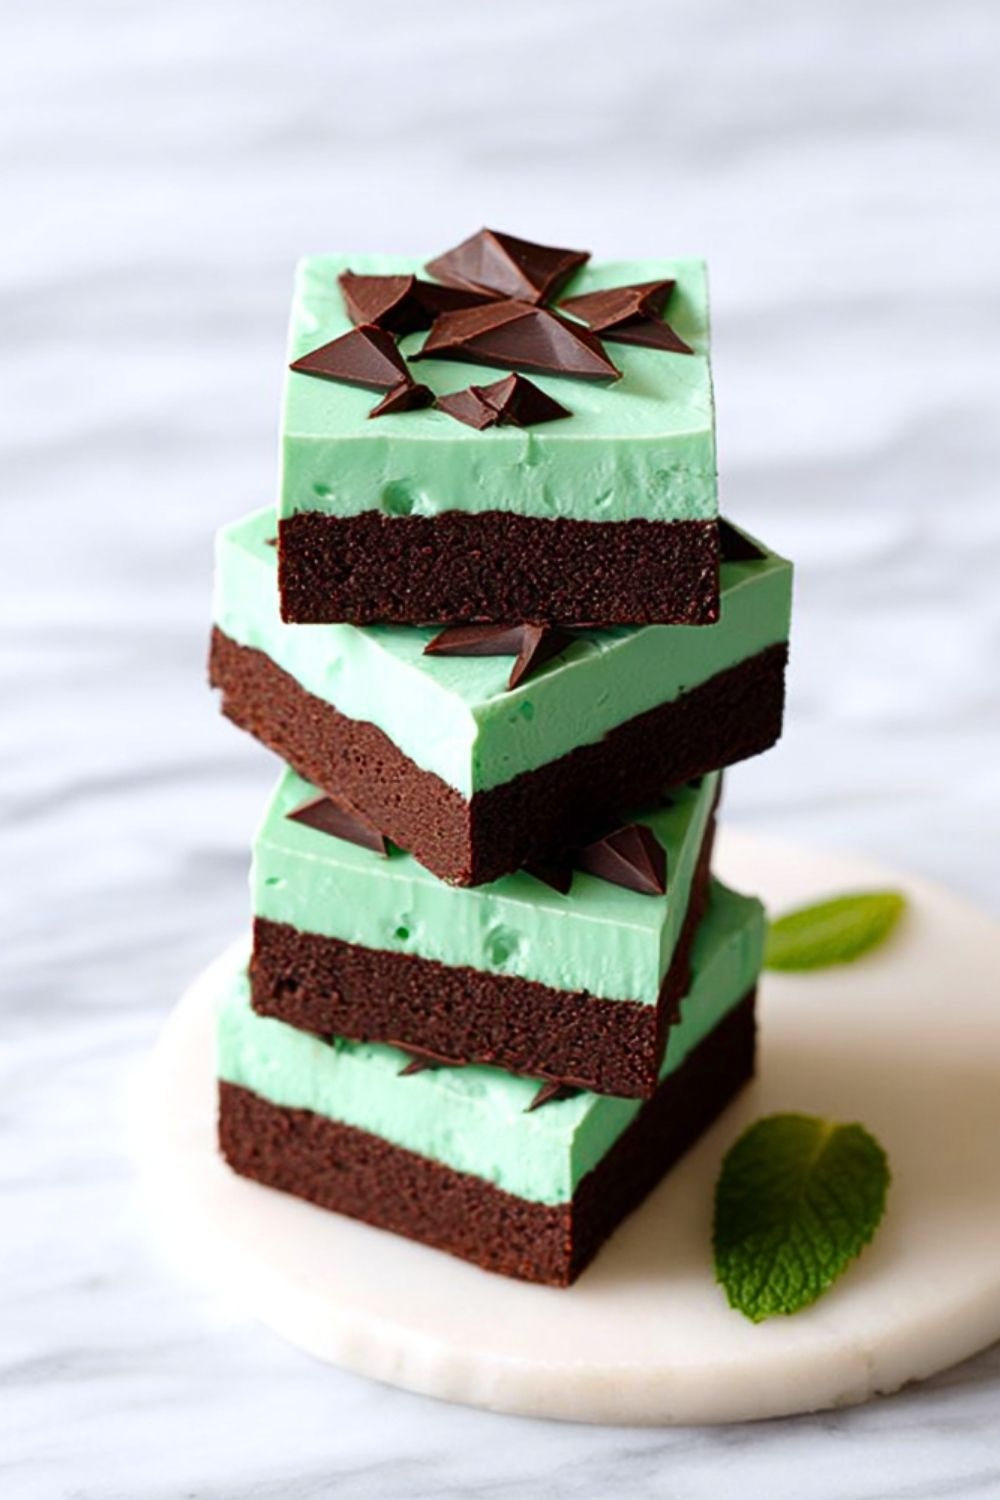
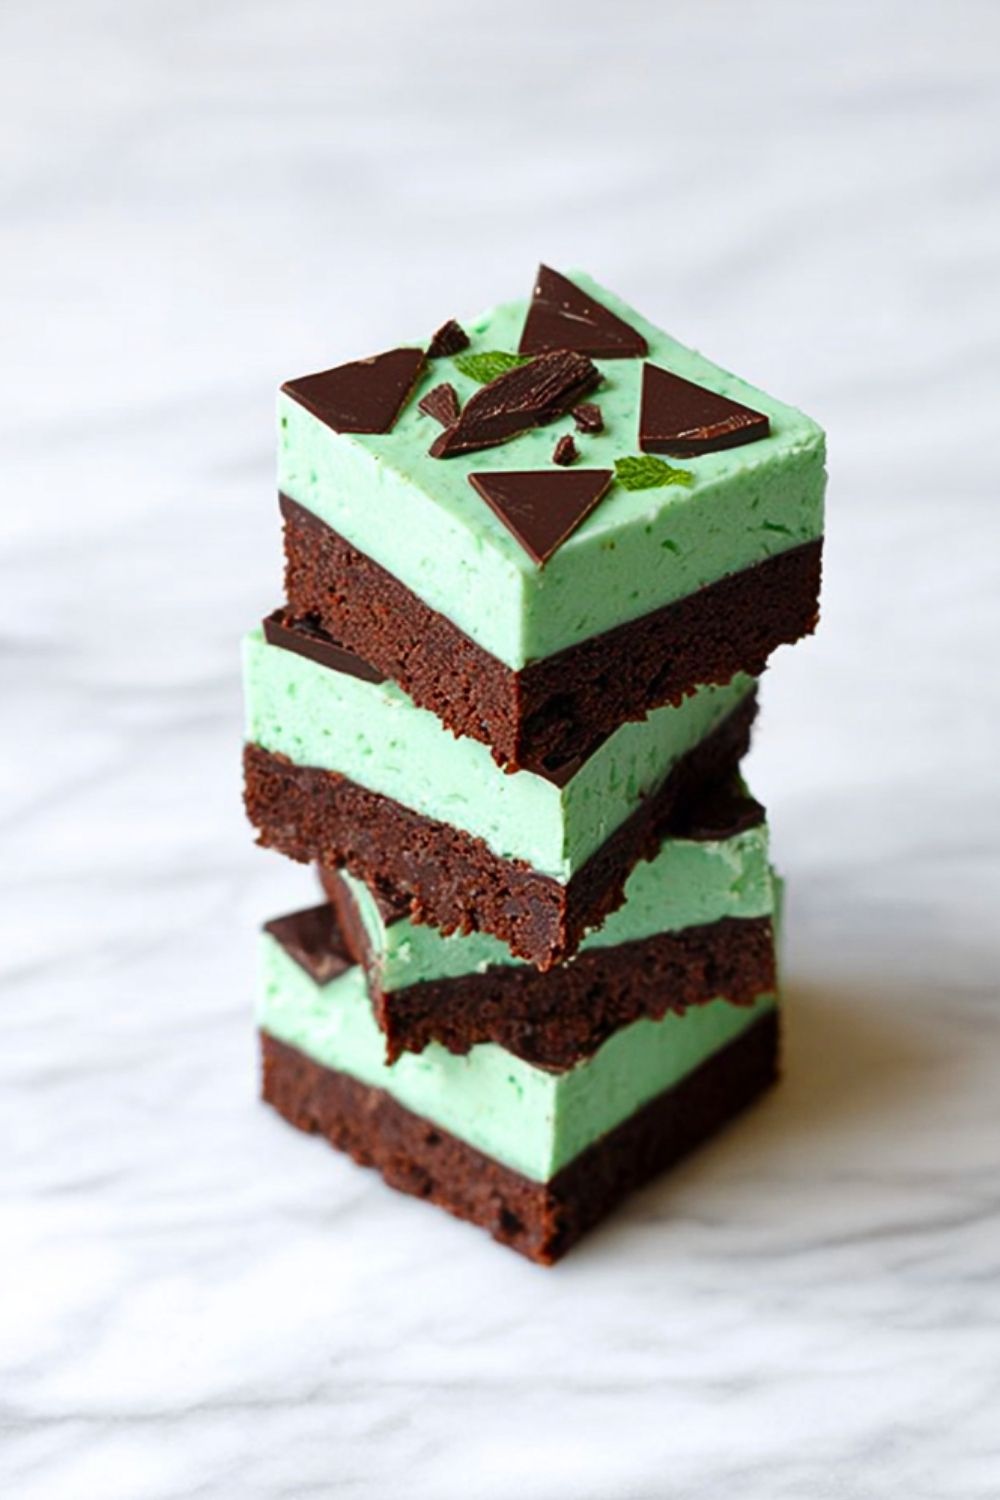
The vibrant green layer is not only eye-catching but delivers a clean burst of mint flavor that contrasts beautifully with the dark, fudgy base. Whether you’re hosting a holiday party, looking for a unique dessert idea, or simply need a new sweet fix, this recipe delivers. It’s easy enough to whip up in under an hour and makes for a striking presentation every single time.
Why You’ll Love This Mint Chocolate Fudge
This fudge isn’t just pretty—it’s packed with flavor and comes together with minimal effort. You’ll love how the mint cream layer melts smoothly into the rich chocolate base, offering a texture that’s somewhere between a truffle and a brownie. Perfect for gifting or snacking, it stores well and tastes even better the next day. Plus, it’s one of those foolproof recipes you can rely on for any occasion.
What Kind of Chocolate Should I Use?
For the richest taste, I recommend using semi-sweet or dark chocolate chips. Milk chocolate tends to make the fudge too sweet and can compete with the mint flavor. High-quality baking chocolate or chocolate bars work beautifully if chopped finely. Just make sure it melts easily and complements the mint layer without overpowering it.
Options for Substitutions
If you want to tweak the recipe, you have a few great options. Swap out the peppermint extract for spearmint or even vanilla if mint isn’t your thing. You can also use white chocolate in place of dark for a different kind of richness. Dairy-free alternatives like coconut condensed milk and vegan chocolate chips work well if you’re keeping it plant-based. And for a little crunch, crushed Oreos or chopped nuts can be sprinkled between the layers or on top.
Ingredients for this Mint Chocolate Fudge
Dark Chocolate Chips – These create the base of the fudge, providing deep, rich cocoa flavor and that perfect melt-in-your-mouth texture.
Sweetened Condensed Milk – Essential for binding the fudge together and adding sweetness without the graininess of regular sugar.
Butter – Adds creaminess and helps smooth out the chocolate as it melts, making the base fudgy and luscious.
Peppermint Extract – This gives the signature cool, refreshing flavor that pairs so beautifully with chocolate.
White Chocolate Chips – Used for the mint layer to contrast the dark base and provide a creamy top that takes on the mint flavor perfectly.
Green Food Coloring – Totally optional, but it gives that classic minty green appearance that makes this fudge visually stunning.
Chopped Andes Mints or Mint Chocolate Squares – Used for garnish and added texture, offering an extra burst of mint with each bite.
Step 1: Prepare Your Pan
Line an 8×8-inch baking dish with parchment paper, leaving a bit of overhang on the sides so it’s easy to lift the fudge out later. Lightly grease the paper for extra ease.
Step 2: Make the Chocolate Fudge Base
In a medium saucepan over low heat, melt together the dark chocolate chips, half of the sweetened condensed milk, and 1 tablespoon of butter. Stir constantly until the mixture is fully smooth and thick.
Once fully melted and combined, pour the chocolate mixture into the prepared pan and smooth it into an even layer. Place it in the fridge to firm up while you prepare the mint layer.
Step 3: Make the Mint Layer
In a clean saucepan, melt the white chocolate chips with the remaining condensed milk and 1 tablespoon of butter. Stir gently until everything is melted and creamy.
Remove from heat, then stir in the peppermint extract and a drop or two of green food coloring (if using). Mix until the color is evenly distributed.
Step 4: Assemble the Layers
Pour the mint layer gently over the chilled chocolate base. Use a spatula to spread it evenly without disturbing the layer underneath. Tap the pan gently to eliminate any bubbles and ensure a smooth top.
Step 5: Garnish and Chill
While the mint layer is still warm and unset, sprinkle chopped Andes mints or mint chocolate pieces on top. Lightly press them into the surface so they stick.
Transfer the pan back to the refrigerator and chill for at least 2 hours, or until fully set.
Step 6: Slice and Serve
Once firm, lift the fudge out using the parchment overhang. Use a sharp knife to cut it into squares. For cleaner cuts, run the knife under warm water and wipe it between slices.
Serve immediately or store in an airtight container to enjoy later!
How Long to Prepare the Mint Chocolate Fudge
Prep Time: You’ll need about 15–20 minutes to prepare both the chocolate and mint layers. Most of this time involves melting and stirring the ingredients together, so it’s pretty hands-on but simple.
Chill Time: The fudge needs at least 2 hours in the refrigerator to fully set. You can also let it sit overnight for even cleaner slices and a firmer texture. No baking required, which makes this a low-effort, high-reward recipe!
Tips for Perfect Mint Chocolate Fudge
- Use quality chocolate – The better the chocolate, the richer and smoother your fudge will taste.
- Don’t overheat – Always melt your chocolate slowly over low heat or use a double boiler to avoid burning.
- Let each layer set – Give the chocolate base 10–15 minutes in the fridge before pouring the mint layer on top so they don’t mix.
- Color control – A tiny amount of green food coloring goes a long way. Start with one drop and build if needed.
- Cut with care – Use a sharp knife dipped in hot water for neat, clean cuts.
Watch Out for These Mistakes While Cooking
- Skipping parchment paper – Without it, the fudge may stick to the pan and be hard to remove.
- Over-stirring – Stirring too aggressively can introduce air bubbles, making the top layer uneven.
- Using mint oil instead of extract – Mint oil is much stronger and can overwhelm the flavor. Stick with peppermint extract.
- Pouring layers too quickly – Letting the first layer set slightly prevents mixing or sinking.
- Not chilling long enough – Cutting too early will leave you with a gooey mess. Patience pays off.
What to Serve With Mint Chocolate Fudge?
1. Hot Coffee or Espresso
The bitterness of coffee beautifully balances the sweetness of the fudge.
2. Vanilla Ice Cream
Serve a cube of fudge alongside a scoop of vanilla for a decadent dessert combo.
3. Fresh Berries
Strawberries or raspberries add a pop of freshness and tartness that contrasts well with the richness.
4. Whipped Cream
A light dollop on the side turns a square of fudge into a plated dessert.
5. Sparkling Water with Lime
A simple and refreshing drink that cleanses your palate between bites.
Storage Instructions
Room Temperature: Store the fudge in an airtight container in a cool, dry place for up to 3 days. Keep out of direct sunlight to avoid melting.
Refrigerator: For longer storage, keep it in the fridge. It’ll stay fresh for up to 10 days. Make sure it’s tightly covered to prevent it from absorbing fridge odors.
Freezer: You can freeze the fudge in layers separated by wax paper inside a sealed container. It keeps well for up to 2 months. Thaw in the fridge overnight before serving.
Estimated Nutrition (Per Square, Approx. Based on 16 Pieces)
- Calories: 210
- Fat: 12g
- Saturated Fat: 7g
- Sugar: 21g
- Sodium: 45mg
- Carbohydrates: 25g
- Fiber: 1g
- Protein: 2g
Frequently Asked Questions
How do I make this fudge vegan?
Use dairy-free condensed milk and vegan chocolate chips. Also, make sure your butter substitute is plant-based.
Can I double the recipe?
Yes! Use a 9×13-inch pan if you’re doubling. Just be sure to give it extra chill time.
Does this fudge need to be refrigerated?
Not necessarily, but refrigeration helps it stay firm and last longer, especially in warm weather.
Can I skip the food coloring?
Absolutely. The fudge will still taste great, just without the minty green look.
Can I use milk chocolate instead of dark?
You can, but the result will be much sweeter and may overpower the mint layer.
Conclusion
Mint Chocolate Fudge is one of those desserts that never fails to impress. It’s got that perfect contrast of rich and refreshing, with layers that not only taste incredible but look gorgeous too. Whether you’re making it for a special occasion or just because, it’s easy, quick, and guaranteed to satisfy any sweet tooth. With just a few ingredients and no baking required, this fudge recipe is a keeper in any kitchen.
Mint Chocolate Fudge
- Prep Time: 20 minutes
- Cook Time: 0 minutes
- Total Time: 2 hours 20 minutes
- Yield: 16 squares
- Category: Dessert
- Method: No-bake
- Cuisine: American
- Diet: Vegetarian
Description
Craving something rich, minty, and utterly satisfying? This **Mint Chocolate Fudge** is the perfect no-bake treat for holidays, parties, or just an indulgent snack. With a luscious dark chocolate base and a cool, creamy mint layer, each square delivers the ultimate flavor combo. It’s a fast, fuss-free dessert you can whip up in minutes and enjoy for days. Ideal for quick desserts, holiday treats, or simple food ideas when you’re short on time. Keywords: quick dessert, holiday treats, easy recipe, chocolate mint dessert, no-bake fudge, party food.
Ingredients
1 ½ cups dark chocolate chips
1 can (14 oz) sweetened condensed milk, divided
2 tablespoons unsalted butter, divided
½ teaspoon peppermint extract
1 cup white chocolate chips
2–3 drops green food coloring (optional)
½ cup chopped Andes mints or mint chocolate squares (for topping)
Instructions
1. Line an 8×8-inch baking dish with parchment paper and lightly grease it.
2. In a saucepan over low heat, melt dark chocolate chips, half the condensed milk, and 1 tablespoon butter until smooth.
3. Pour the chocolate mixture into the prepared dish and spread evenly. Chill for 15 minutes.
4. In a clean saucepan, melt white chocolate chips, the remaining condensed milk, and 1 tablespoon butter.
5. Stir in peppermint extract and food coloring. Mix until evenly colored.
6. Pour the mint layer over the chilled chocolate base. Smooth evenly with a spatula.
7. Sprinkle chopped Andes mints on top and lightly press them in.
8. Chill for at least 2 hours or until fully set.
9. Lift fudge from pan using parchment, slice into squares, and serve.
10. Store in an airtight container at room temperature or refrigerate for longer shelf life.
Notes
Use a hot knife for clean slices—run it under warm water and wipe between cuts.
Let the bottom layer chill partially before adding the mint layer to keep clean layers.
You can freeze the fudge for up to 2 months—just thaw in the fridge overnight.
Nutrition
- Serving Size: 1 square
- Calories: 210
- Sugar: 21g
- Sodium: 45mg
- Fat: 12g
- Saturated Fat: 7g
- Unsaturated Fat: 4g
- Trans Fat: 0g
- Carbohydrates: 25g
- Fiber: 1g
- Protein: 2g
- Cholesterol: 10mg
Keywords: mint chocolate fudge, easy dessert, no-bake fudge, chocolate mint bars