
I can still remember the first time I made these Krispies Easter Egg Nests—it was a spontaneous project with my niece, and what started as a quick treat turned into a full afternoon of laughter, sticky fingers, and colorful creativity. These adorable little nests have now become a staple every spring in my home, and they’re more than just a sweet—they’re a memory in the making.
What I love most about this recipe is its simplicity and joy. With just a few pantry ingredients and a muffin tin, you can create the cutest Easter-themed treat that looks like it came from a bakery. The crunch of the marshmallow-coated Krispies, paired with the smooth candy eggs in the center, is irresistibly fun to eat. And the best part? You don’t even need to turn on the oven.
Why You’ll Love This Krispies Easter Egg Nests Recipe
- Kid-Friendly & Fun: Kids love shaping the nests and decorating them with candy eggs.
- No-Bake Simplicity: Perfect for quick, low-effort preparation—no oven required!
- Festive and Adorable: They bring charm to any Easter table or spring party.
- Make-Ahead Friendly: Great for prepping in advance and storing for a few days.
- Customizable: Use any mini candies or even fruit for a twist.
What Kind of Cereal Works Best for Krispies Easter Egg Nests?
Classic Rice Krispies are my go-to for this recipe because of their light, crisp texture that holds its shape beautifully when mixed with marshmallows. However, you’re not limited to the traditional option. Any puffed rice cereal will do the trick, just make sure it’s fresh for that perfect crunch. I’ve also tried using cocoa-flavored rice cereal for a chocolaty twist, and it worked like a charm—especially with pastel eggs on top.
Options for Substitutions
Whether you’re working with food allergies, picky eaters, or just what’s available in your pantry, this recipe is wonderfully adaptable.
- Marshmallows: Swap with mini vegan marshmallows or marshmallow fluff for a gelatin-free version.
- Butter: You can use vegan butter or even coconut oil if you prefer a dairy-free option.
- Cereal: As mentioned, any puffed rice cereal works. You could even try crushed cornflakes or Cheerios for a different texture.
- Candy Eggs: Mini chocolate eggs are traditional, but jelly beans, pastel M&Ms, or even dried fruit can make adorable alternatives.
- Add-ins: Want to level up the flavor? Stir in a splash of vanilla or almond extract into the melted marshmallow mixture.
Ingredients for Krispies Easter Egg Nests
Each ingredient in this recipe plays a simple but essential role in bringing these cute little nests to life. Here’s what you’ll need and why:
- Rice Krispies Cereal
This is the structure of the nest—light, crispy, and perfect for holding its shape once molded. - Mini Marshmallows
These melt down into a sticky, sweet binder that holds the cereal together while adding that signature chewy texture. - Unsalted Butter
Butter gives richness and flavor to the marshmallow mixture and prevents it from being overly sticky. - Candy-Coated Chocolate Eggs
These little eggs turn each nest into a mini Easter basket. Their pop of pastel color adds visual charm, and they taste delicious too. - Nonstick Cooking Spray (or a little extra butter)
Essential for greasing your muffin tin and hands—so the sticky mixture doesn’t cling when you’re shaping the nests.
Step 1: Prepare Your Muffin Tin
Lightly grease a standard muffin tin with nonstick cooking spray or a dab of butter. This helps the nests release easily after they’ve set.
Step 2: Melt the Butter and Marshmallows
In a large saucepan over medium-low heat, melt the butter. Once melted, add the mini marshmallows and stir constantly until smooth and fully melted. Remove from heat immediately to avoid overcooking.
Step 3: Stir in the Cereal
Quickly pour in the Rice Krispies cereal and stir until every piece is well coated in the gooey marshmallow mixture.
Step 4: Shape the Nests
Working while the mixture is still warm, scoop portions into the muffin tin. Grease your hands and gently press the center of each scoop to form a shallow nest shape.
Step 5: Let Them Set
Allow the nests to cool completely in the tin—about 30 minutes at room temperature—until they’re firm and hold their shape.
Step 6: Add the Candy Eggs
Once the nests are set, gently remove them from the tin and place 2–3 candy eggs in the center of each one. Press lightly to secure.
How Long to Cook the Krispies Easter Egg Nests
The beauty of this recipe is that there’s no actual cooking involved—just melting and setting.
Here’s the simple breakdown:
- Melt time: 5–7 minutes to melt the butter and marshmallows.
- Shaping time: About 10 minutes once mixed.
- Setting time: Let them rest in the muffin tin for at least 30 minutes to firm up.
In under an hour, you’ve got a full batch of adorable, ready-to-eat nests.
Tips for Perfect Krispies Easter Egg Nests
- Work Quickly: Once the cereal is mixed in, the marshmallow mixture begins to set fast—have your muffin tin prepped and ready.
- Grease Your Hands: Lightly butter or spray your hands before shaping to avoid a sticky mess.
- Don’t Overheat the Marshmallows: Melt them gently to keep the mixture smooth and pliable—too much heat can make the mixture hard and brittle.
- Use Fresh Cereal: Stale cereal will make the nests chewy instead of crispy.
- Press Gently: Form the nests with care—pressing too hard can make them dense and tough instead of light and airy.
Watch Out for These Mistakes While Cooking
Even a no-bake treat can have its pitfalls. Keep an eye out for these common missteps:
- Overheating the Marshmallows: Too much heat can cause the sugar to crystallize, leading to a hard, gritty texture. Melt slowly and stir constantly.
- Not Working Fast Enough: Once the cereal is added, the mixture sets quickly. Have everything ready so you can shape the nests before they stiffen.
- Using Stale Cereal: Always check the freshness of your cereal. Soft or old cereal will result in soggy, chewy nests.
- Forgetting to Grease: Both the muffin tin and your hands need a little nonstick help to prevent frustration during shaping.
- Overfilling the Muffin Tin: Keep the portions moderate; oversized nests can be harder to remove and shape.
What to Serve With Krispies Easter Egg Nests?
These sweet, crunchy nests are perfect on their own but also pair well with a festive spread. Here are a few complementary treats and beverages:
Lemon Bars
The tangy brightness of lemon bars contrasts beautifully with the sweetness of the nests.
Deviled Eggs
A savory bite to balance the dessert table, and they stick with the egg theme.
Mini Carrot Cupcakes
Add some warm spice and color to the mix with these bite-sized seasonal favorites.
Spring Fruit Salad
Fresh berries, pineapple, and mint add a refreshing, juicy element to the spread.
Pastel Macarons
These delicate cookies look beautiful beside the nests and offer a melt-in-your-mouth texture.
Sparkling Lemonade
A bubbly drink that’s light, citrusy, and kid-friendly.
Vanilla Bean Ice Cream
Cool and creamy, it’s the perfect scoop to serve alongside warm-weather treats.
Hot Cross Buns
A traditional Easter bread that adds cozy flavor and texture variety to the table.
Storage Instructions
Krispies Easter Egg Nests store wonderfully, making them a great make-ahead option for your spring celebrations.
- Room Temperature: Store in an airtight container for up to 3 days. Keep them away from heat or direct sunlight to prevent melting or softening.
- Layering Tip: If stacking, place wax or parchment paper between layers to keep them from sticking together.
- Freezing: While technically you can freeze them, I don’t recommend it. The texture of the cereal gets soft once thawed and loses that perfect crispy bite.
Estimated Nutrition
Here’s a general estimate based on one nest (assuming 12 nests total in the batch):
- Calories: 130
- Total Fat: 3g
- Saturated Fat: 2g
- Trans Fat: 0g
- Cholesterol: 8mg
- Sodium: 70mg
- Total Carbohydrates: 25g
- Dietary Fiber: 0g
- Total Sugars: 14g
- Protein: 1g
Note: These values may vary slightly depending on the type and quantity of candy used.
Frequently Asked Questions
Can I make these ahead of time?
Yes! They stay fresh for up to 3 days in an airtight container at room temperature, making them perfect for prepping before a party or Easter brunch.
Can I use large marshmallows instead of mini?
Absolutely. Just chop them up a bit so they melt evenly. About 10 oz of large marshmallows will work just like the mini ones.
What if I don’t have a muffin tin?
No problem. You can shape the nests by hand on a parchment-lined baking sheet, though they might not be as uniformly shaped.
How can I make this recipe gluten-free?
Use certified gluten-free puffed rice cereal and check your marshmallows to ensure they’re gluten-free. Most are, but it’s good to double-check the label.
Can I color the marshmallow mixture?
Yes! Add a few drops of food coloring to the melted marshmallow before stirring in the cereal to give the nests a pastel hue.
What kind of candy eggs should I use?
Mini Cadbury eggs, pastel M&Ms, or even jelly beans all work great. Pick what you enjoy most or mix them for color variety.
How do I keep the nests from sticking to the pan?
Make sure to grease your muffin tin well with butter or nonstick spray. You can also use silicone muffin cups for easier removal.
Can I make these with kids?
Definitely! This is a fun, safe, no-bake recipe that’s perfect for little hands—just make sure an adult handles the hot marshmallow part.
Conclusion
Krispies Easter Egg Nests are the kind of treat that brings both joy and nostalgia to the kitchen. They’re easy to make, festive to look at, and endlessly customizable. Whether you’re preparing a batch for a spring celebration, filling Easter baskets, or just indulging in some creative kitchen time with your family, these little nests deliver big charm and even bigger smiles. Once you make them, they’re sure to become a seasonal tradition in your home—just like they did in mine.

Krispies Easter Egg Nests
- Prep Time: 15 minutes
- Cook Time: 5 minutes
- Total Time: 50 minutes
- Yield: 12 nests
- Category: Dessert
- Method: No-Bake
- Cuisine: American
- Diet: Vegetarian
Description
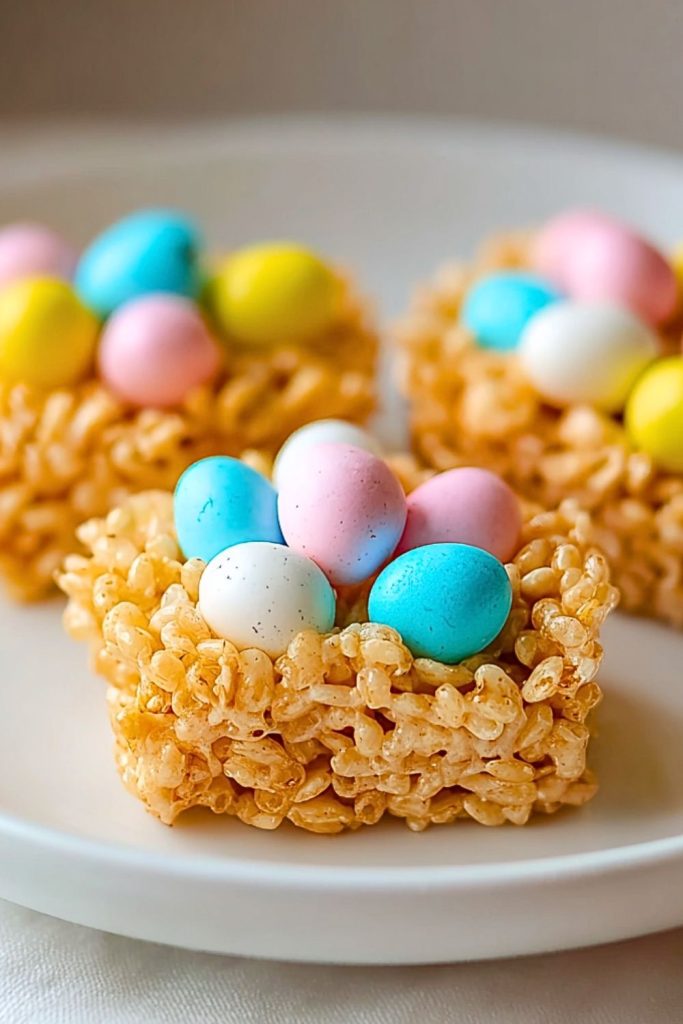
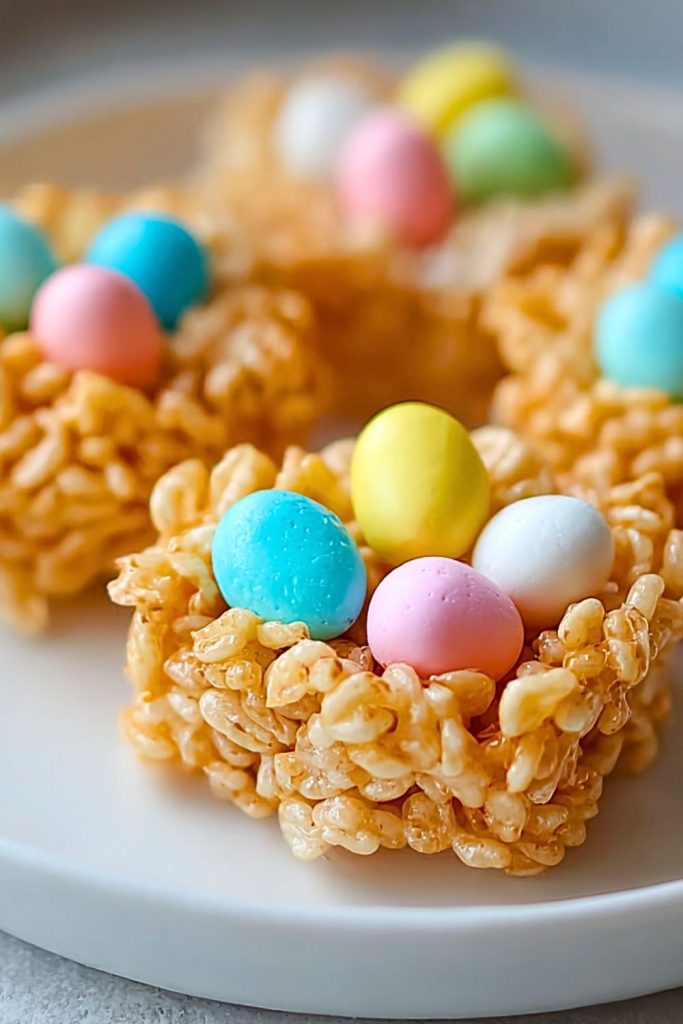
Krispies Easter Egg Nests are festive, no-bake springtime treats made with crispy rice cereal, gooey marshmallows, and colorful candy eggs. They’re fun to make, adorable to serve, and perfect for Easter celebrations with kids or family gatherings. Ready in under an hour, these sweet nests are easy to customize and irresistibly cute.
Ingredients
3 tablespoons unsalted butter
1 package (10 oz) mini marshmallows
6 cups Rice Krispies cereal
36 mini candy-coated chocolate eggs
Nonstick cooking spray or additional butter for greasing
Instructions
1. Lightly grease a 12-cup muffin tin with nonstick spray or butter.
2. In a large saucepan over medium-low heat, melt the butter.
3. Add the mini marshmallows and stir constantly until completely melted and smooth.
4. Remove from heat and quickly stir in the Rice Krispies cereal until evenly coated.
5. Scoop the mixture into the muffin cups, pressing gently in the center of each to form a nest shape. Grease your hands to avoid sticking.
6. Let the nests set at room temperature for about 30 minutes, until firm.
7. Carefully remove from the tin and place 2–3 candy eggs in the center of each nest.
8. Serve immediately or store in an airtight container.
Notes
Nutrition Info (per nest):
Calories: 130
Total Fat: 3g
Saturated Fat: 2g
Trans Fat: 0g
Cholesterol: 8mg
Sodium: 70mg
Total Carbohydrates: 25g
Dietary Fiber: 0g
Total Sugars: 14g
Protein: 1g
Nutrition
- Serving Size: 1 nest
- Calories: 130
- Sugar: 14g
- Sodium: 70mg
- Fat: 3g
- Saturated Fat: 2g
- Unsaturated Fat: 1g
- Trans Fat: 0g
- Carbohydrates: 25g
- Fiber: 0g
- Protein: 1g
- Cholesterol: 8mg
Keywords: Easter, kids treat, no-bake, spring dessert