
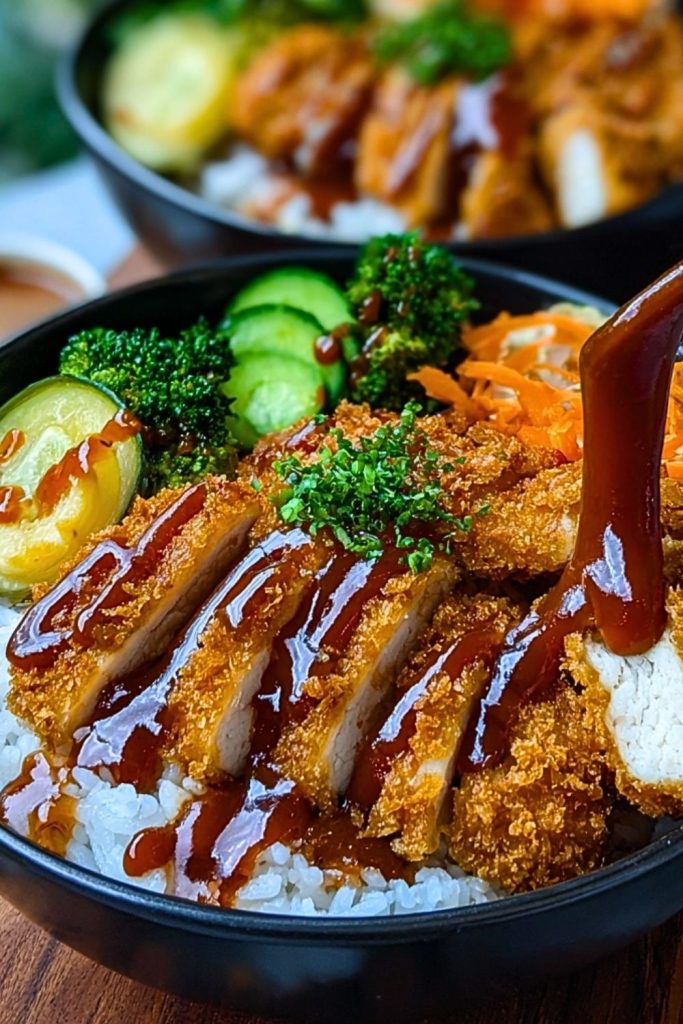
Crispy, juicy, and drenched in flavor—Japanese Katsu Bowls with Tonkatsu Sauce are the perfect comfort food when you’re craving a hearty, satisfying meal with just the right balance of texture and umami. The golden-brown breaded chicken cutlet (also known as “chicken katsu”) sits proudly on a fluffy bed of steamed white rice, topped with a sweet, tangy, and slightly smoky tonkatsu sauce. Drizzles of creamy mayo or spicy sriracha-mayo, a sprinkle of parsley or green onion, and a side of pickled veggies turn this humble dish into a restaurant-worthy bowl.
The crispy coating gives way to tender chicken inside, and when paired with the rich sauce and soft rice, each bite becomes an explosion of contrasting sensations. Whether you’re planning a quick weeknight dinner or impressing guests at your next dinner party, this katsu bowl delivers on both flavor and presentation. It’s comforting, kid-friendly, and endlessly customizable.
Why You’ll Love This Japanese Katsu Bowls with Tonkatsu Sauce
- Crispy & Juicy: The chicken stays incredibly moist inside while the panko crust adds that addicting crunch.
- Flavor-Packed Sauce: Tonkatsu sauce brings deep umami, sweet, and tangy notes that elevate the entire dish.
- Fast & Weeknight-Friendly: Ready in under 30 minutes if you’re organized—perfect for those busy evenings.
- Great for Meal Prep: Components can be stored and assembled later, making it a strong contender for lunch boxes.
- Versatile: Swap in pork, tofu, or even shrimp—this bowl is flexible to dietary needs or cravings.
- Visually Stunning: That drizzle of sauce, crisp katsu, and fluffy rice? It’s Instagram-worthy every time.
Preparation Phase & Tools to Use (Essential Tools and Equipment + Why They Matter)
Before diving into the magic of making Japanese Katsu Bowls with Tonkatsu Sauce, gather the right tools to make prep seamless and the final result top-tier. Having the correct equipment not only saves time but also ensures even cooking and presentation.
- Meat Mallet or Rolling Pin: Used to pound the chicken evenly, ensuring tender meat and uniform thickness for consistent frying.
- Sharp Knife: For slicing chicken and trimming any excess fat. A clean, sharp cut helps the chicken cook evenly.
- Cutting Board: Designate one for raw meats to keep things safe and hygienic.
- Mixing Bowls (3 total): One for flour, one for egg, and one for panko breadcrumbs for a smooth dredging station.
- Deep Frying Pan or Skillet: A heavy-bottomed pan like cast iron helps maintain oil temperature for a golden, crisp crust.
- Tongs: Ideal for flipping and lifting the chicken safely while frying.
- Wire Rack with Tray: Lets your katsu rest without getting soggy after frying by allowing oil to drip off.
- Rice Cooker or Saucepan: For preparing fluffy, properly steamed white rice—essential to the bowl base.
- Whisk or Spoon: For mixing your tonkatsu sauce to the perfect consistency.
Preparation Tips
- Use Panko, Not Regular Breadcrumbs: Japanese panko breadcrumbs give that signature airy crunch. Toast lightly before coating if you want extra golden results.
- Pound Chicken Evenly: Not too thin or it’ll dry out, but not too thick or it’ll undercook inside. Aim for around ½ inch thickness.
- Set Up a Dredging Station: Organize flour, egg, and breadcrumbs in a row—dry hand for flour and breadcrumbs, wet hand for egg—to stay neat and efficient.
- Don’t Overcrowd the Pan: Fry the chicken in batches. Overcrowding drops the oil temperature and results in soggy katsu.
- Let it Rest Before Slicing: Resting the fried cutlet helps retain its juices. Slice just before serving to keep that crunch.
- Use Fresh Oil: If frying multiple batches, switch oil if it darkens too much or develops burnt particles—this affects both flavor and texture.
- Warm the Tonkatsu Sauce: A slightly warm sauce blends better and brings out deeper flavor notes when drizzled over the hot katsu.
Ingredients for This Japanese Katsu Bowls with Tonkatsu Sauce
Here’s everything you’ll need to make this mouthwatering dish at home:
For the Chicken Katsu:
- 2 boneless, skinless chicken breasts (butterflied and pounded to ½ inch thick)
- ½ cup all-purpose flour
- 2 large eggs (beaten)
- 1½ cups panko breadcrumbs (preferably Japanese-style)
- ½ teaspoon salt
- ½ teaspoon black pepper
- Vegetable oil (for frying)
For the Tonkatsu Sauce:
- ¼ cup ketchup
- 2 tablespoons Worcestershire sauce
- 1 tablespoon soy sauce
- 1 tablespoon mirin (or honey as a substitute)
- 1 teaspoon Dijon mustard
- 1 teaspoon sugar
- ½ teaspoon garlic powder
For the Bowl:
- 2 cups cooked short-grain white rice (sushi rice or jasmine works too)
- 1 tablespoon chopped parsley or green onions (for garnish)
- Japanese mayo or spicy sriracha mayo (optional, for drizzling)
Optional Add-ons:
- Pickled ginger or radish (for freshness)
- Steamed or sautéed vegetables like broccoli or bok choy
- Toasted sesame seeds (for extra crunch)
Everything above contributes to the bowl’s beautiful balance—crispy protein, soft rice, bold sauce, and fresh garnish.
Step 1: Prepare the Chicken
Start by butterflying the chicken breasts if they’re thick, then gently pound them to about ½ inch thickness using a meat mallet or rolling pin. This ensures even cooking and tenderness. Season both sides with salt and black pepper.
Step 2: Set Up the Breading Station
In three shallow bowls, place flour in the first, beaten eggs in the second, and panko breadcrumbs in the third. Coat each chicken cutlet in flour (shake off excess), dip into the egg mixture, then firmly press into the panko breadcrumbs until fully coated.
Step 3: Fry the Chicken Katsu
Heat ½ inch of vegetable oil in a large skillet over medium heat. Once the oil reaches 350°F (175°C), carefully place the chicken into the pan. Fry for 3–4 minutes on each side or until golden brown and cooked through. Transfer to a wire rack or paper towels to drain.
Step 4: Make the Tonkatsu Sauce
In a small bowl, whisk together ketchup, Worcestershire sauce, soy sauce, mirin, Dijon mustard, sugar, and garlic powder. Taste and adjust seasoning if needed. Warm it gently on the stove or microwave for a richer flavor.
Step 5: Cook the Rice
While the chicken rests, cook your rice if it’s not already made. Use a rice cooker or saucepan according to the rice package instructions. Fluff once done.
Step 6: Assemble the Katsu Bowls
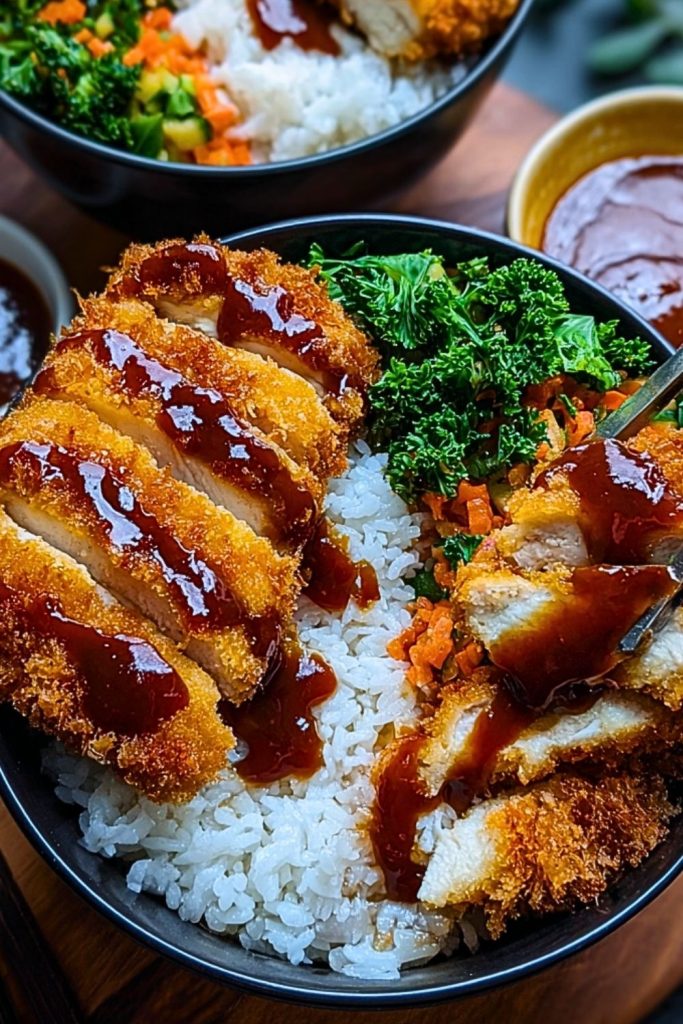
Scoop hot rice into serving bowls. Slice the chicken katsu into strips and arrange over the rice. Drizzle generously with the tonkatsu sauce and optional spicy mayo. Finish with chopped parsley, green onions, or sesame seeds.
Step 7: Serve & Enjoy
Serve immediately while the chicken is hot and crispy. Optionally, add pickled veggies or a side of miso soup for the full Japanese comfort food experience.
Notes
- Make it Gluten-Free: Use gluten-free panko and tamari instead of soy sauce for a delicious gluten-free variation.
- Tonkatsu Sauce Short on Time? You can use store-bought Bulldog brand tonkatsu sauce—it’s authentic and packed with flavor.
- Tofu Option: For a vegetarian version, press firm tofu, slice it into cutlets, and follow the same breading and frying steps.
Watch Out for These Mistakes While Cooking
- Skipping the Chicken Pound Step: Uneven chicken thickness leads to overcooked edges and raw centers. Always flatten for even results.
- Oil Not Hot Enough: If the oil isn’t at the right temperature (350°F / 175°C), the panko will absorb too much oil and become soggy instead of crispy.
- Overcrowding the Pan: This drops the oil temp and steams the chicken rather than frying it. Fry in batches.
- Not Letting the Katsu Rest Before Slicing: Cutting too soon causes juices to run out, drying the meat. Let it rest 3–5 minutes.
- Undermixing Tonkatsu Sauce: Blend thoroughly to avoid overpowering bites of mustard or ketchup.
- Using Regular Breadcrumbs: You’ll lose that signature airy, flaky crunch. Panko is essential.
- Burning the Breadcrumbs: Panko browns fast—keep a close eye on heat and flip carefully.
- Cold Rice in the Bowl: Lukewarm or cold rice dulls the experience. Keep it fresh and steamy when serving.
What to Serve With Japanese Katsu Bowls with Tonkatsu Sauce?
A well-rounded katsu bowl shines even more with complementary sides and drinks. Whether you want something refreshing, rich, or traditional, here are great pairings to complete the meal.
8 Recommendations
1. Miso Soup
Classic, comforting, and quick to make—miso soup with tofu, wakame, and scallions pairs beautifully with the savory katsu flavors.
2. Pickled Daikon or Ginger
These sharp, tangy pickles cleanse the palate between bites and balance out the richness of fried chicken.
3. Edamame with Sea Salt
Lightly steamed edamame is a protein-packed, finger-friendly snack to nibble alongside the main bowl.
4. Japanese Potato Salad
Creamy, mildly sweet, and textured with crunchy veggies—it’s a familiar side in Japanese home-cooked meals.
5. Steamed Broccoli or Bok Choy
Adds a green element and a nutritional boost, plus it soaks up the tonkatsu sauce like a dream.
6. Seaweed Salad
Its refreshing umami and sesame flavors offer a great contrast to the crispy chicken and soft rice.
7. Green Tea or Iced Matcha
A light, earthy drink like green tea helps cut through the richness of the dish and refresh the palate.
8. Gyoza or Dumplings
A plate of pan-fried or steamed dumplings makes for an indulgent add-on if you’re feeding a crowd or craving variety.
Storage Instructions
Japanese Katsu Bowls are best enjoyed fresh, but you can store the components separately to maintain quality.
- Chicken Katsu: Store leftovers in an airtight container in the fridge for up to 3 days. To reheat and keep it crispy, use an oven or air fryer at 350°F (175°C) for 8–10 minutes.
- Tonkatsu Sauce: Keeps well in the fridge for up to 1 week in a sealed jar or container.
- Cooked Rice: Store rice in a microwave-safe container for up to 3 days. Add a splash of water before reheating to restore softness.
- Freezing Tip: You can freeze the cooked chicken katsu (uncut) for up to 1 month. Reheat in the oven or air fryer directly from frozen until hot and crisp.
Estimated Nutrition
(Per serving – approximate based on 1 chicken breast + rice + sauce)
- Calories: 650 kcal
- Protein: 35g
- Fat: 28g
- Saturated Fat: 5g
- Unsaturated Fat: 18g
- Trans Fat: 0g
- Carbohydrates: 58g
- Fiber: 2g
- Sugar: 9g
- Sodium: 980mg
- Cholesterol: 135mg
- Serving Size: 1 bowl
These values will vary based on portion size and added toppings like mayo or sides.
Frequently Asked Questions
1. Can I use pork instead of chicken for the katsu?
Yes! Pork loin or pork cutlet (tonkatsu) is actually the traditional version of this dish. Just follow the same steps—pound thin, bread, and fry.
2. Is there a baked version of chicken katsu?
Absolutely. For a lighter version, bake at 425°F (220°C) for 20–25 minutes, flipping halfway. Use a wire rack on your baking sheet for better crispiness.
3. What type of rice is best for katsu bowls?
Short-grain white rice like sushi rice is ideal. It’s sticky enough to hold together in a bowl and complements the saucy katsu perfectly.
4. How do I make it spicy?
Mix sriracha or chili garlic sauce into your tonkatsu sauce or drizzle spicy mayo over the top. You can also add sliced jalapeños or chili flakes as garnish.
5. Can I air fry the chicken katsu?
Yes, air frying works great! Spray both sides with oil and cook at 375°F (190°C) for about 12–15 minutes, flipping halfway through.
6. Can I prepare it ahead of time?
Yes. Fry the chicken in advance and store it separately. Reheat in the oven or air fryer to crisp it up before assembling the bowl.
7. Is tonkatsu sauce vegetarian?
Most homemade versions are! Store-bought ones sometimes contain anchovies or fish sauce, so check the label if needed.
8. What’s the best oil for frying the katsu?
Neutral oils like vegetable, canola, or peanut oil are ideal. Avoid olive oil due to its low smoke point and strong flavor.
Conclusion
Japanese Katsu Bowls with Tonkatsu Sauce bring together comfort, crunch, and bold flavor in one irresistible meal. Whether you’re trying it for the first time or it’s already in your rotation, the balance of juicy fried chicken, fluffy rice, and rich sauce never gets old. With simple ingredients and a fast prep time, it’s a dish that turns any dinner into something memorable. Don’t be surprised if it becomes your go-to “better-than-takeout” favorite.
Japanese Katsu Bowls with Tonkatsu Sauce
- Prep Time: 15 minutes
- Cook Time: 15 minutes
- Total Time: 30 minutes
- Yield: 2 servings
- Category: Dinner
- Method: Frying
- Cuisine: Japanese
Description
Craving a quick dinner that delivers comfort and crunch? Japanese Katsu Bowls with Tonkatsu Sauce hit all the right notes. Juicy chicken is coated in crispy panko, fried to perfection, and served on a warm bed of fluffy rice. The star? A rich, tangy-sweet tonkatsu sauce that ties everything together. Whether you’re looking for easy dinner ideas, better-than-takeout food ideas, or a bold, satisfying meal, this easy recipe is sure to become a household favorite.
Ingredients
2 boneless, skinless chicken breasts
0.5 cup all-purpose flour
2 large eggs
1.5 cups panko breadcrumbs
0.5 teaspoon salt
0.5 teaspoon black pepper
Vegetable oil (for frying)
0.25 cup ketchup
2 tablespoons Worcestershire sauce
1 tablespoon soy sauce
1 tablespoon mirin or honey
1 teaspoon Dijon mustard
1 teaspoon sugar
0.5 teaspoon garlic powder
2 cups cooked short-grain white rice
1 tablespoon chopped parsley or green onions
Japanese mayo or spicy sriracha mayo (optional)
Instructions
1. Prepare the chicken by butterflying and pounding to 1/2 inch thickness. Season with salt and pepper.
2. Set up a breading station with flour, beaten eggs, and panko in separate bowls.
3. Dredge each chicken piece in flour, then egg, then panko, pressing firmly to coat.
4. Heat oil in a skillet to 350°F and fry chicken 3–4 minutes per side until golden and cooked through.
5. Transfer chicken to a wire rack to drain. Let rest before slicing.
6. In a bowl, whisk together ketchup, Worcestershire, soy sauce, mirin, mustard, sugar, and garlic powder. Warm slightly.
7. Cook rice according to package instructions. Fluff and divide into bowls.
8. Slice chicken, place over rice, and drizzle with tonkatsu sauce and optional mayo. Garnish with parsley or green onions.
Notes
Use Japanese-style panko for the best crispy texture.
Let the chicken rest before slicing to keep it juicy.
Warm the tonkatsu sauce for deeper flavor.
Nutrition
- Serving Size: 1 bowl
- Calories: 650
- Sugar: 9g
- Sodium: 980mg
- Fat: 28g
- Saturated Fat: 5g
- Unsaturated Fat: 18g
- Trans Fat: 0g
- Carbohydrates: 58g
- Fiber: 2g
- Protein: 35g
- Cholesterol: 135mg
Keywords: easy dinner, chicken katsu, Japanese recipes, tonkatsu bowl, comfort food