

When I first moved to a high-altitude town, I quickly realized baking wasn’t going to be the same. My favorite cookie recipes fell flat—literally. But after many (many!) test batches, I finally nailed it. These High Altitude Peanut Butter Blossom Cookies are soft in the center, just the right amount of chewy on the edges, and hold their beautiful shape every time. And of course, that iconic chocolate kiss on top seals the deal.
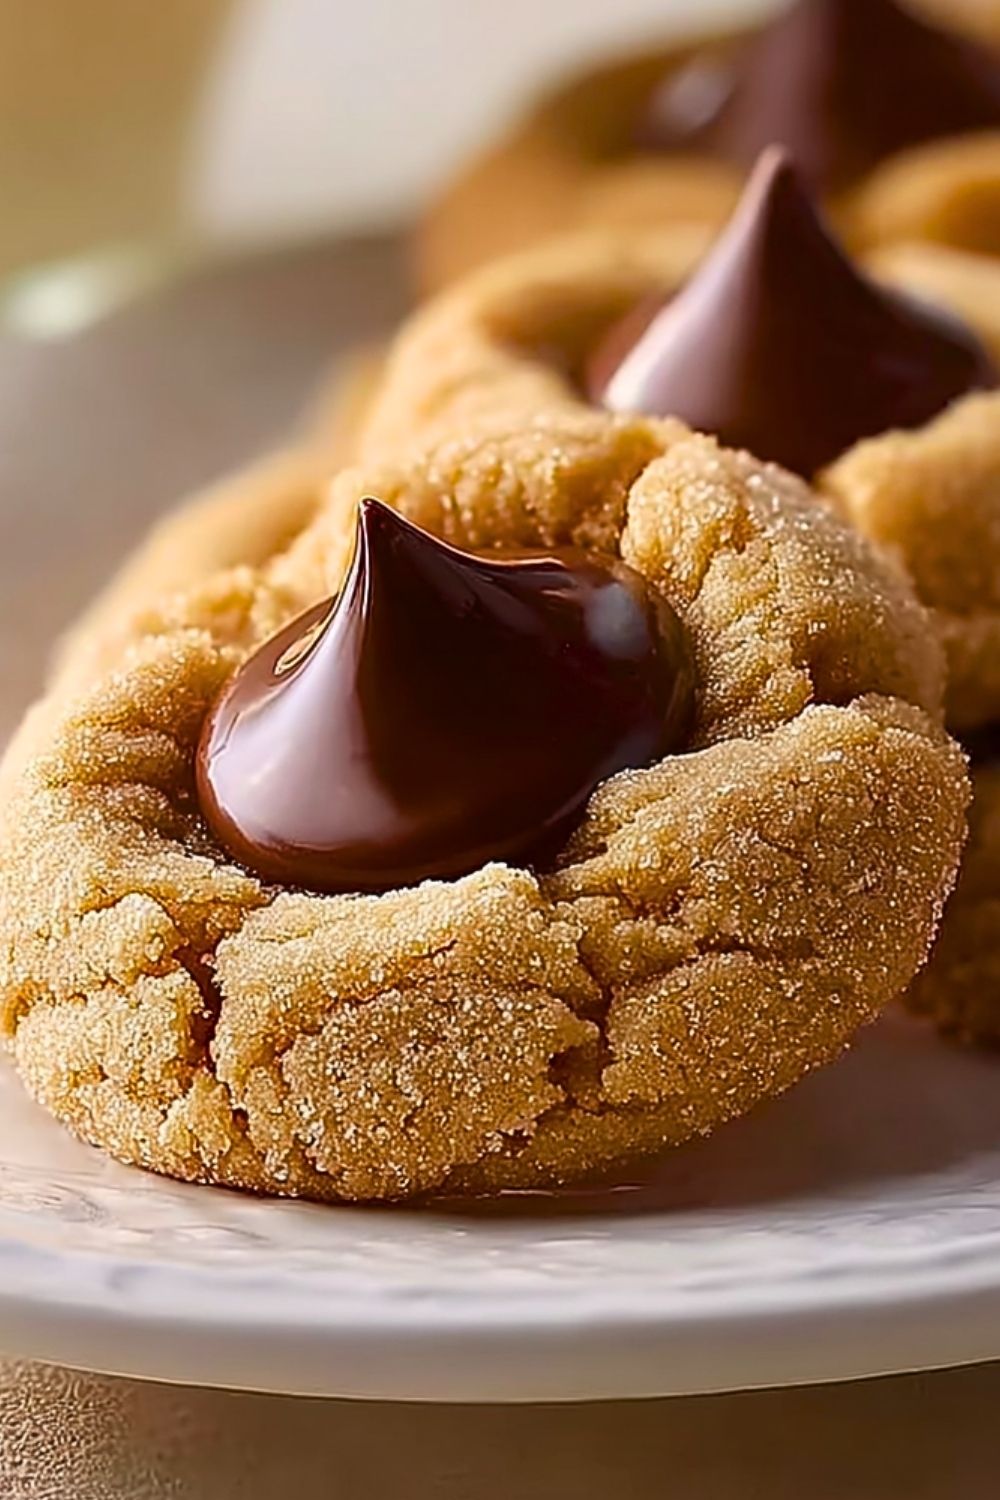
This version takes into account all the pesky high-altitude issues—like dough spreading too much or sugar crystallizing wrong—so you can bake with confidence no matter how high up you are. The peanut butter flavor shines, and the sugar-coated exterior adds the perfect light crunch. These are the cookies I bring to every holiday party, and they disappear in minutes.
Why You’ll Love This Peanut Butter Blossom Cookies Recipe
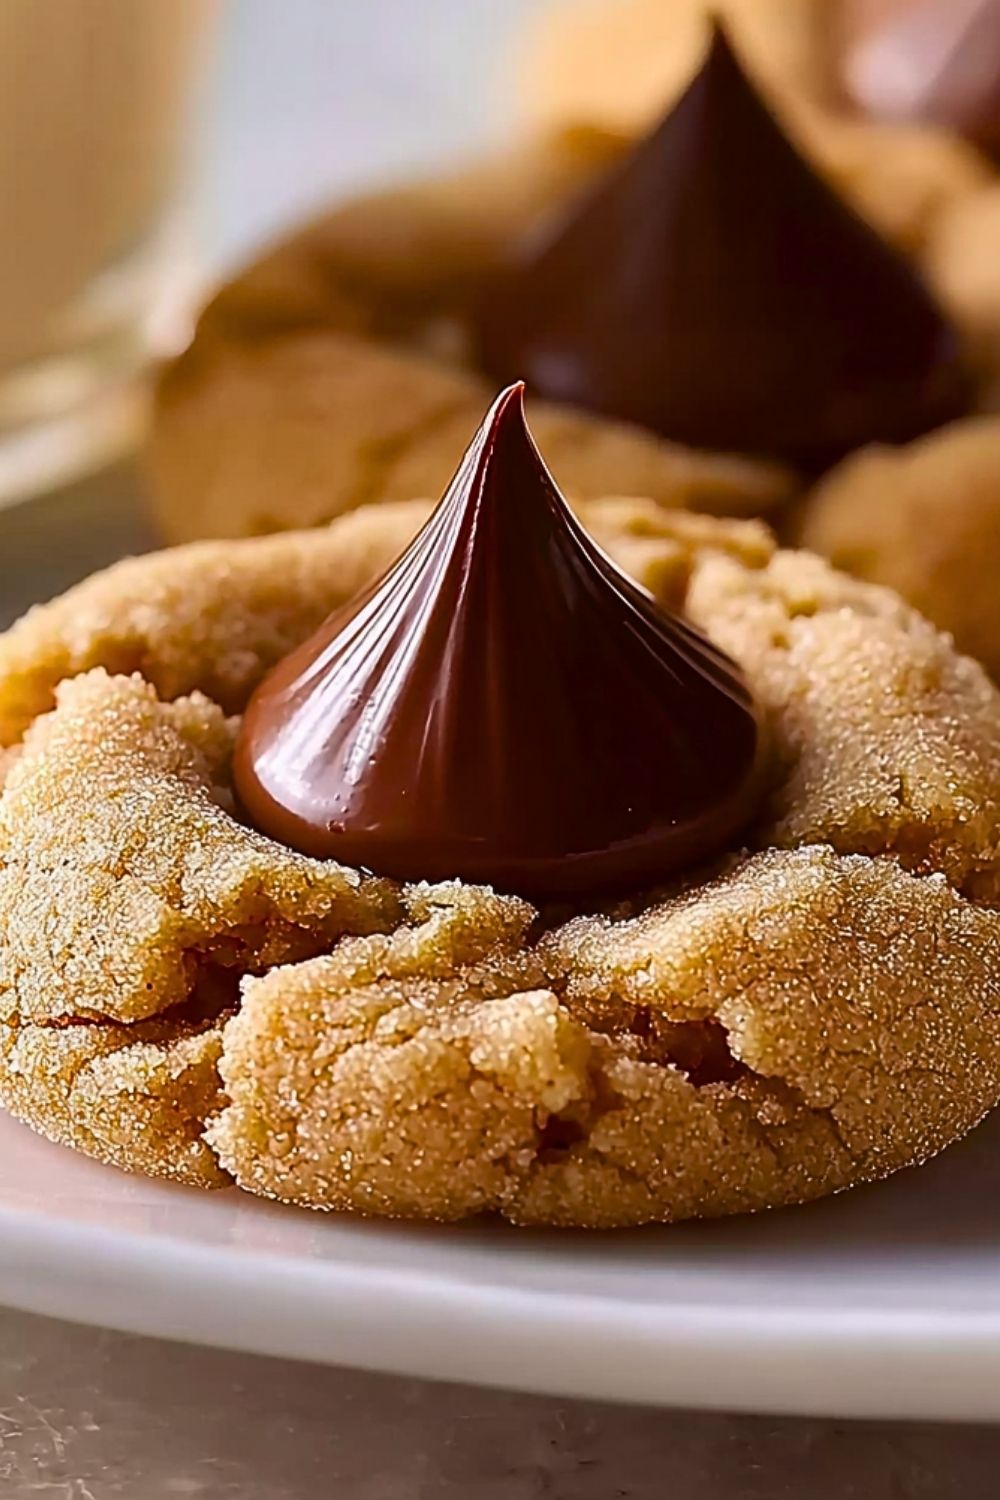
These cookies are a nostalgic favorite, and this high-altitude version means you don’t have to sacrifice taste or texture just because you live above sea level. You’ll love how easy the dough is to work with, how perfectly the cookies puff and crackle, and how the chocolate kiss stays nestled right where it should. Whether you’re baking for a cookie swap or just want a sweet treat, these blossoms deliver every single time.
What Kind of Peanut Butter Works Best?
Stick with a classic, shelf-stable peanut butter like Jif or Skippy. Natural or oil-separated peanut butters don’t mix as evenly into the dough, and you’ll risk cookies that fall apart or bake unevenly. The creamy kind is best for a smoother, uniform dough, but chunky peanut butter can work if you want extra texture.
Options for Substitutions
- Chocolate Kiss: Swap it with a square of chocolate, a mini peanut butter cup, or a drizzle of melted dark chocolate for a twist.
- Flour: Use a high-protein all-purpose flour, or if you’re gluten-free, try a 1:1 baking flour blend (just watch your moisture levels).
- Butter: Salted butter works if you omit added salt; dairy-free butter substitutes can also be used successfully.
- Sugar Coating: While traditional sugar works best, you can roll the dough in turbinado sugar for more crunch or cinnamon sugar for a flavor boost.
Ingredients for this Peanut Butter Blossom Cookies Recipe
All-Purpose Flour – The structure of your cookie depends on it. For high-altitude, a little extra flour helps prevent over-spreading.
Baking Soda – Helps with proper lift and browning. At high altitude, we reduce it slightly to avoid overly puffy cookies.
Salt – Enhances the peanut butter and chocolate flavors. If using salted butter, you can reduce the added salt.
Unsalted Butter – Softened to room temperature; it gives richness and helps create that soft, tender crumb.
Granulated Sugar – Used in the dough and also to roll the cookie balls for a crisp sugary coating.
Brown Sugar – Adds moisture and a deep, caramelly flavor that balances the peanut butter beautifully.
Peanut Butter – Smooth, shelf-stable peanut butter works best to create a consistent, spread-resistant dough.
Egg – Acts as a binder and gives structure to the cookies. One large egg is all you need.
Vanilla Extract – Adds warmth and rounds out the sweetness.
Milk – Just a tablespoon adds the perfect bit of moisture for softness.
Hershey’s Kisses – The iconic topping that makes these cookies so memorable. Add them after baking so they keep their shape.
Step 1: Preheat and Prep
Preheat your oven to 350°F (177°C). Line two baking sheets with parchment paper or silicone baking mats. This keeps the cookies from sticking and ensures even baking.
Step 2: Mix Dry Ingredients
In a medium bowl, whisk together the flour, baking soda, and salt. Set aside. This ensures even distribution and prevents clumps.
Step 3: Cream the Butter and Sugars
In a large mixing bowl, use an electric mixer to cream together the butter, granulated sugar, and brown sugar until light and fluffy, about 2-3 minutes. This step builds air into the dough for better rise.
Step 4: Add Peanut Butter, Egg, and Vanilla
Mix in the peanut butter, egg, vanilla extract, and milk until fully combined and smooth. The dough will be thick and creamy.
Step 5: Combine Wet and Dry
Gradually add the dry ingredients to the wet mixture, mixing on low speed until just combined. Don’t overmix; you want the dough soft but not sticky.
Step 6: Shape and Roll
Scoop out 1-inch portions of dough and roll them into balls. Roll each ball in granulated sugar to coat.
Step 7: Bake the Cookies
Place dough balls 2 inches apart on the prepared baking sheets. Bake for 8-10 minutes or until the edges are just starting to turn golden and the tops are cracked.
Step 8: Add the Chocolate Kiss
Immediately after removing from the oven, press a chocolate kiss into the center of each cookie. Let them cool on the baking sheet for 5 minutes, then transfer to a wire rack to cool completely.
How Long to Prepare the Peanut Butter Blossom Cookies
Prep Time: The preparation will take about 15-20 minutes. That includes creaming the butter and sugars, mixing the dough, shaping the cookie balls, and rolling them in sugar. If you’re baking multiple trays, give yourself a few more minutes.
Bake Time: Each batch needs 8–10 minutes in the oven. For best results, bake one sheet at a time in the center rack to avoid uneven baking.
Cooling Time: After baking, allow cookies to cool on the tray for 5 minutes before transferring to a wire rack. This gives them time to set without breaking.
Tips for Perfect Peanut Butter Blossom Cookies
- Use a cookie scoop for uniform cookie sizes, which helps them bake evenly.
- Don’t overbake! Remove cookies just as the tops start to crack—they’ll finish setting as they cool.
- Press the chocolate kiss in immediately after baking while the cookies are hot, but be gentle so they don’t split.
- Let the kisses set at room temperature. Don’t refrigerate too soon or they may get cloudy.
- Make sure your butter is at true room temperature—not too soft or melted—for best texture.
Watch Out for These Mistakes While Cooking
- Overmixing the dough: This can make the cookies tough and dense.
- Using natural peanut butter: The oils separate and ruin the dough consistency.
- Skipping the sugar roll: It adds the perfect texture contrast and helps with that classic sparkle.
- Crowding the pan: Give cookies space so they can spread and crackle properly.
- Adding the kiss too late: If you wait too long, the cookies will firm up and crack awkwardly.
What to Serve With Peanut Butter Blossom Cookies?
1. A Glass of Cold Milk
Nothing complements a warm, chewy cookie better than a tall glass of milk.
2. Hot Chocolate
Especially during the holidays, these cookies are amazing with a rich, creamy mug of cocoa.
3. Vanilla Ice Cream
Sandwich two cookies around a scoop for a delicious frozen treat.
4. Coffee or Espresso
Their nutty-sweet flavor pairs well with the bitterness of black coffee or a strong shot of espresso.
5. Holiday Cookie Tray
These cookies are great as part of a festive cookie assortment with sugar cookies, thumbprints, and gingerbread.
Storage Instructions
Room Temperature: Store the cookies in an airtight container at room temperature for up to 5 days. To maintain softness, you can place a slice of bread in the container to help retain moisture.
Freezing Baked Cookies: Layer cookies between parchment in a freezer-safe container and freeze for up to 2 months. Thaw at room temp before serving.
Freezing Dough: You can also freeze the dough balls (before rolling in sugar). When ready to bake, roll them in sugar and bake straight from frozen—just add 1-2 extra minutes.
Estimated Nutrition
Per Cookie (based on standard-sized batch)
- Calories: ~120
- Fat: 6g
- Saturated Fat: 2.5g
- Carbohydrates: 14g
- Sugar: 9g
- Protein: 2g
- Fiber: 0.5g
- Sodium: 85mg
- Cholesterol: 10mg
Frequently Asked Questions
How do I keep the chocolate kiss from melting?
Add the kiss immediately after baking, then let the cookies cool completely at room temperature. Avoid moving them too soon or placing them in the fridge.
Can I make the dough ahead of time?
Yes! You can refrigerate the dough for up to 3 days. Let it come to room temperature before shaping into balls.
What adjustments are needed for high altitude?
Slightly more flour and slightly less sugar and leavening agents (like baking soda) help the cookies hold shape and avoid over-expansion.
Can I double the recipe?
Absolutely! It doubles well—just mix in batches to avoid overworking the dough.
Can I use crunchy peanut butter?
You can, but the texture will be a little more rustic. Stick to smooth if you want classic blossoms.
Conclusion
These Irresistible High Altitude Peanut Butter Blossom Cookies are a timeless favorite that’s been thoughtfully adjusted for bakers living up where the air is thinner. With the perfect peanut butter-to-chocolate ratio and a fail-proof texture, these cookies are guaranteed to shine at your next gathering. Whether it’s a holiday tradition or a weekend bake, they’ll win hearts every time!
Irresistible High Altitude Peanut Butter Blossom Cookies
- Prep Time: 20 minutes
- Cook Time: 10 minutes
- Total Time: 30 minutes
- Yield: 24 cookies
- Category: Dessert
- Method: Baking
- Cuisine: American
Description
If you’ve struggled to bake cookies that turn out just right at higher elevations, these *Irresistible High Altitude Peanut Butter Blossom Cookies* are exactly what you need. With their chewy peanut butter base, crackled sugar tops, and classic chocolate kiss in the center, they’re a nostalgic favorite adjusted for altitude success. Whether you’re looking for quick breakfast treats, easy dessert ideas, or holiday cookie recipes, these blossoms are an ideal addition to your go-to food ideas. Easy to make and impossible to resist, this easy recipe delivers perfect results every time.
Ingredients
1 3/4 cups all-purpose flour
1 teaspoon baking soda
1/4 teaspoon salt
1/2 cup unsalted butter, softened
1/2 cup granulated sugar (plus extra for rolling)
1/2 cup brown sugar, packed
3/4 cup creamy peanut butter
1 large egg
1 tablespoon milk
1 teaspoon vanilla extract
24 Hershey’s Kisses (unwrapped)
Instructions
1. Preheat oven to 350°F (177°C) and line two baking sheets with parchment paper or silicone mats.
2. In a medium bowl, whisk together flour, baking soda, and salt. Set aside.
3. In a large bowl, cream together the butter, granulated sugar, and brown sugar until light and fluffy.
4. Add peanut butter, egg, milk, and vanilla extract. Mix until smooth.
5. Gradually add dry ingredients to the wet mixture, mixing just until combined.
6. Shape dough into 1-inch balls and roll each in granulated sugar.
7. Place balls 2 inches apart on baking sheets.
8. Bake for 8–10 minutes until edges are set and tops are cracked.
9. Immediately press a chocolate kiss into the center of each cookie.
10. Cool on baking sheet for 5 minutes, then transfer to a wire rack to cool completely.
Notes
Make sure your butter is at true room temperature for best texture.
Use a cookie scoop to keep sizes consistent and ensure even baking.
Always press the chocolate kiss in right after baking for the perfect look and melt.
Nutrition
- Serving Size: 1 cookie
- Calories: 120
- Sugar: 9g
- Sodium: 85mg
- Fat: 6g
- Saturated Fat: 2.5g
- Unsaturated Fat: 2.5g
- Trans Fat: 0g
- Carbohydrates: 14g
- Fiber: 0.5g
- Protein: 2g
- Cholesterol: 10mg
Keywords: peanut butter cookies, high altitude baking, easy dessert, holiday cookies, blossom cookies