
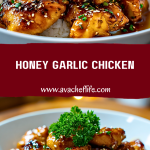
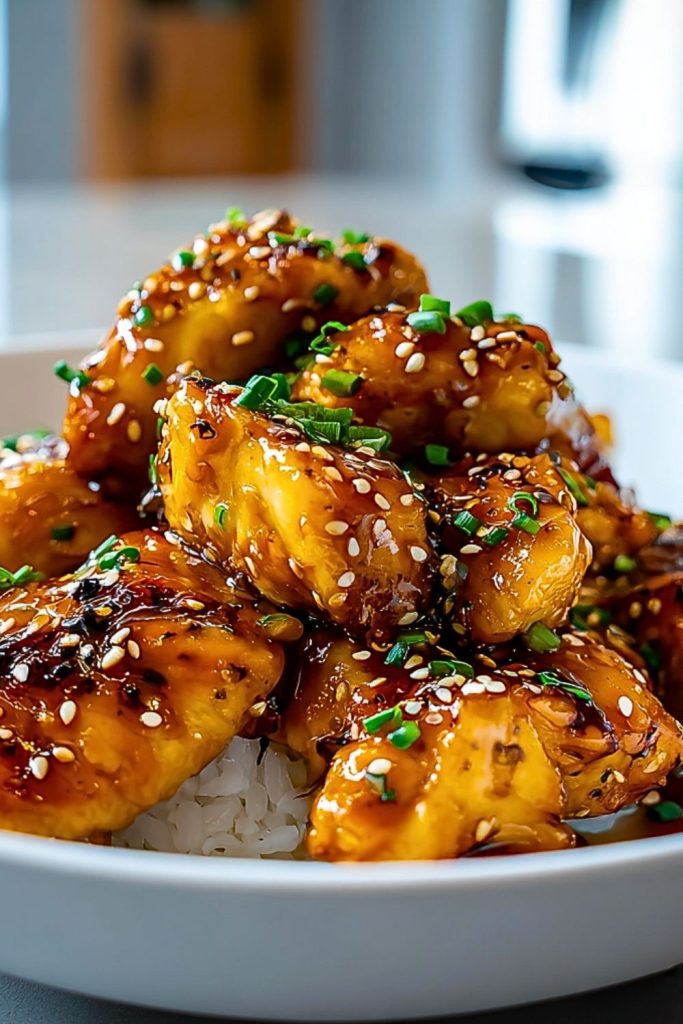
Golden, crispy on the outside and tender on the inside, Honey Garlic Chicken is an irresistible fusion of sweet and savory. Each bite is coated in a glossy glaze made from honey, soy sauce, garlic, and a hint of ginger — delivering flavor that’s rich, sticky, and deeply satisfying. Whether you’re planning a comforting family dinner or looking to impress guests, this dish hits every note with ease.
Served over a bed of fluffy rice or paired with steamed vegetables, Honey Garlic Chicken is a crowd-pleaser that takes minimal effort for maximum reward. It’s one of those recipes that feels like takeout — but better, because it’s made fresh in your own kitchen. With simple ingredients and bold flavor, this dish earns a permanent spot in your weeknight dinner rotation.
Why You’ll Love This Honey Garlic Chicken
- Bold Flavor, Simple Ingredients: With pantry staples like soy sauce, honey, and garlic, you get restaurant-quality flavor without a long grocery list.
- Quick and Easy: Ready in under 30 minutes, this is the perfect solution for busy weeknights.
- Versatile: Works beautifully with rice, noodles, or roasted vegetables. You can also swap in tofu or shrimp for a tasty variation.
- Family Favorite: Kids and adults alike are drawn to the sweet-savory sauce and crispy bites of chicken.
- Meal-Prep Friendly: Makes delicious leftovers that reheat beautifully for lunch the next day.
Preparation Phase & Tools to Use
Essential Tools and Equipment, and the Importance of Each Tool
To ensure your Honey Garlic Chicken turns out perfectly crispy and saucy, the right tools are just as important as the ingredients:
- Large Non-Stick or Cast Iron Skillet: Crucial for even browning and caramelizing the sauce without sticking or burning.
- Mixing Bowls (at least two): One for tossing the chicken in flour or cornstarch, and another for whisking the honey garlic sauce.
- Tongs or Slotted Spoon: Helps turn the chicken pieces without breaking them apart, and keeps your hands safe from splatter.
- Paper Towels & Plate: For draining the chicken post-frying to retain crispiness.
- Whisk: Ensures the sauce is smoothly blended without lumps.
- Measuring Cups and Spoons: Precision in measuring the sauce ingredients helps balance sweet, salty, and tangy flavors.
- Thermometer (Optional but Helpful): For checking oil temperature if deep frying — around 350°F (175°C) is the sweet spot for crispy results.
Preparation Tips
- Cut Chicken Evenly: Slice your chicken into uniform bite-sized pieces for even cooking and a more polished presentation.
- Pat Chicken Dry: Before coating, blot the chicken pieces with paper towels. This helps the coating stick and prevents splattering in the pan.
- Marinate Lightly if Desired: Let the chicken sit for 10–15 minutes with a splash of soy sauce and garlic powder to infuse flavor before cooking.
- Double Fry for Extra Crunch (Optional): Fry the chicken pieces twice if you want an ultra-crispy texture that stands up even after saucing.
- Prep Sauce in Advance: Mix all sauce ingredients before frying the chicken. That way, you can pour it straight into the pan while it’s still hot for a quick glaze.
- Use Medium Heat: Too high and your sauce may burn; too low and it won’t reduce properly. Keep it medium to achieve that sticky, shiny coating.
Ingredients for this Honey Garlic Chicken
Here’s everything you’ll need to bring this sweet and savory favorite to life:
For the Chicken:
- 1.5 lbs (680g) boneless, skinless chicken thighs or breasts, cut into bite-sized pieces
- 1/2 cup cornstarch (or all-purpose flour for a lighter crunch)
- 1/2 tsp salt
- 1/2 tsp ground black pepper
- 1/4 tsp garlic powder
- Vegetable oil for frying (about 1/2 to 3/4 cup)
For the Honey Garlic Sauce:
- 1/3 cup honey
- 1/4 cup soy sauce (low-sodium preferred)
- 4 cloves garlic, minced
- 1 tsp fresh ginger, grated (optional but adds depth)
- 2 tbsp rice vinegar (or white vinegar)
- 1 tbsp cornstarch mixed with 2 tbsp water (for thickening)
For Garnish (Optional but Recommended):
- Toasted sesame seeds
- Fresh chopped chives or green onions
These ingredients come together quickly and can be adjusted to suit your taste — go heavier on the garlic for a more pungent sauce, or add chili flakes if you like it spicy.
Step 1: Prepare the Chicken
In a large bowl, combine the chicken pieces with salt, pepper, garlic powder, and cornstarch. Toss well until each piece is evenly coated. Set aside while you heat the oil.
Step 2: Fry the Chicken
Heat about 1/2 to 3/4 cup of vegetable oil in a large skillet over medium-high heat. Once hot (you can test by dropping in a small piece — it should sizzle immediately), add the chicken pieces in a single layer. Cook in batches if needed. Fry each side for about 4–5 minutes or until golden brown and cooked through. Remove and drain on a plate lined with paper towels.
Step 3: Make the Sauce
While the chicken rests, use a separate small bowl to mix honey, soy sauce, minced garlic, grated ginger, rice vinegar, and the cornstarch-water slurry. Whisk until fully combined.
Step 4: Glaze the Chicken
Drain excess oil from the skillet, leaving about a tablespoon. Pour the prepared sauce into the same skillet over medium heat. Stir continuously until it begins to bubble and thicken — this should take 2–3 minutes.
Step 5: Combine and Finish
Return the fried chicken to the skillet and toss to coat thoroughly in the sticky honey garlic glaze. Let it cook together for another 1–2 minutes to allow the flavors to meld.
Step 6: Garnish and Serve
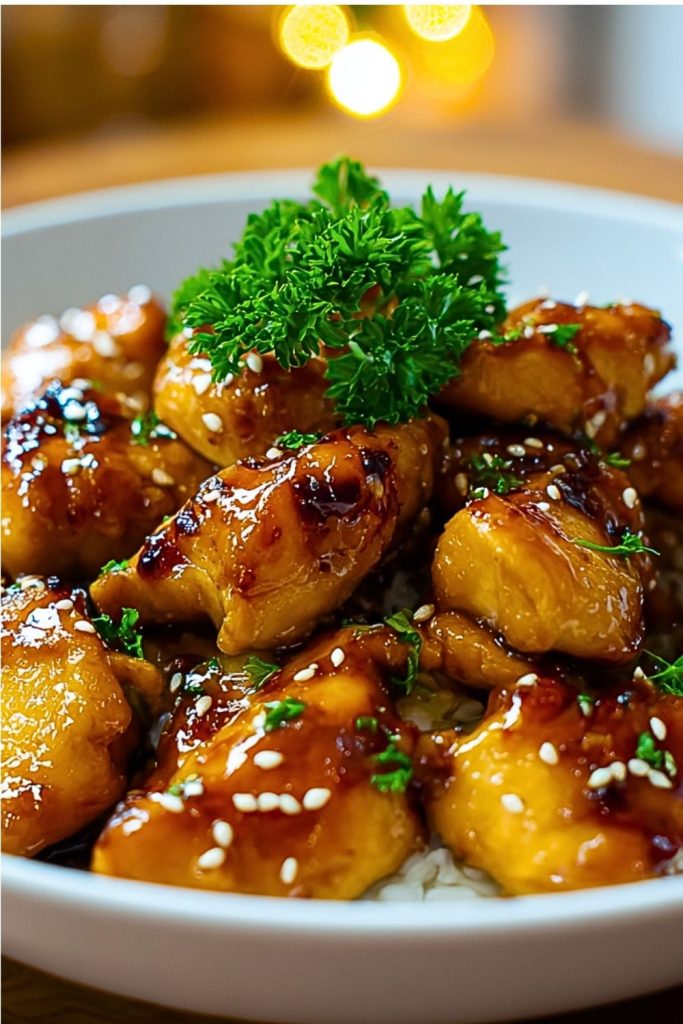
Transfer the glazed chicken to a serving plate. Sprinkle with sesame seeds and chopped chives or green onions. Serve hot over rice or your favorite side.
Notes
- Chicken Thighs vs. Breasts: Chicken thighs offer more flavor and tenderness, but breasts work well if you prefer a leaner cut.
- Make It Spicy: Add red pepper flakes or a dash of sriracha to the sauce for a spicy kick.
- Air Fryer Option: For a lighter version, air fry the coated chicken at 400°F (200°C) for 12–15 minutes, flipping halfway through.
- Gluten-Free Adaptation: Use tamari or coconut aminos in place of soy sauce and ensure your cornstarch is gluten-free certified.
- Batch Cooking: This recipe can easily be doubled. Just make sure not to overcrowd the pan when frying.
Watch Out for These Mistakes While Cooking
- Overcrowding the Pan: Frying too many pieces at once lowers the oil temperature, making the chicken soggy rather than crispy. Fry in batches if necessary.
- Skipping the Cornstarch Coating: This layer is essential for creating that signature crispy crust that holds up under the sauce.
- Burning the Garlic: Garlic cooks fast — if added too early or on too high heat, it will become bitter. Always add it to the sauce mixture, not the hot oil directly.
- Using High Heat for the Sauce: If the sauce thickens too quickly or burns, it won’t coat the chicken properly. Keep it at medium heat and stir constantly.
- Undercooking Chicken: Cut into a piece to check that it’s cooked through — golden on the outside and white (not pink) in the center.
- Not Drying Chicken Before Coating: Moisture can prevent the coating from sticking properly, so always pat the chicken dry first.
- Skipping the Garnish: The sesame seeds and chives add both flavor and texture — don’t miss out on those finishing touches!
- Not Tasting the Sauce Before Combining: You can adjust the balance of sweet, salty, or acidic before mixing it with the chicken.
What to Serve With Honey Garlic Chicken?
Honey Garlic Chicken shines as a centerpiece, but the right side dishes can turn it into a full, satisfying meal. Whether you’re keeping it light or going all-out, here are some excellent pairings:
8 Recommendations
- Steamed Jasmine Rice – The sticky sweetness of the sauce pairs perfectly with fluffy, neutral rice.
- Garlic Butter Noodles – A comforting option that soaks up extra sauce and adds buttery richness.
- Stir-Fried Vegetables – Toss broccoli, bell peppers, and snap peas in sesame oil for a healthy, colorful side.
- Asian Cucumber Salad – Crisp, tangy, and refreshing — balances the sweetness of the dish.
- Fried Rice – For a heartier option, add egg, peas, and scallions for a flavor-packed side.
- Roasted Sweet Potatoes – Their natural sweetness complements the honey in the sauce.
- Kimchi or Pickled Vegetables – A little tang and spice cuts through the richness beautifully.
- Lettuce Wraps – Scoop the chicken into romaine or butter lettuce leaves for a fresh, low-carb bite.
Storage Instructions
Honey Garlic Chicken stores well and tastes just as good the next day, making it a great candidate for meal prep.
- Refrigerator: Store leftovers in an airtight container for up to 4 days. Reheat gently in a skillet over medium heat or in the microwave until warmed through.
- Freezer: You can freeze cooked chicken without the sauce for up to 2 months. When ready to eat, thaw overnight in the fridge, reheat in a pan, and add fresh sauce.
- Reheating Tip: To restore crispiness, reheat in a pan or air fryer rather than the microwave. If reheating with sauce, add a splash of water to loosen it up.
Estimated Nutrition
Per serving (based on 4 servings total)
- Calories: ~450
- Protein: 28g
- Carbohydrates: 35g
- Sugars: 17g
- Fat: 22g
- Saturated Fat: 3g
- Cholesterol: 95mg
- Sodium: 720mg
- Fiber: 1g
Nutritional values may vary depending on specific ingredients used and portion size.
Frequently Asked Questions
1. Can I use chicken breasts instead of thighs?
Yes! Chicken breasts work just as well — they’re leaner but still delicious when cooked properly. Just be careful not to overcook them, as they dry out more quickly than thighs.
2. Is it okay to bake instead of fry the chicken?
Absolutely. You can bake the coated chicken at 425°F (220°C) for 20–25 minutes, flipping halfway through. For added crispiness, spray with a little oil before baking.
3. Can I make the sauce ahead of time?
Yes, the sauce can be mixed and stored in the fridge up to 3 days in advance. Stir well before using as ingredients may settle.
4. How do I thicken the sauce if it’s too runny?
Add a little more cornstarch slurry (1 tsp cornstarch + 2 tsp water) and cook for another minute or two until thickened to your liking.
5. What’s a good substitute for soy sauce?
Tamari or coconut aminos are great gluten-free alternatives. You can also try low-sodium soy sauce if you’re watching salt intake.
6. Can I make this recipe in an air fryer?
Yes! Coat the chicken lightly with oil and air fry at 400°F (200°C) for 12–15 minutes. Toss with the heated sauce just before serving.
7. How spicy is this dish?
The base recipe is not spicy. For heat, add red pepper flakes or a squirt of sriracha to the sauce.
8. Can I double the recipe for a crowd?
Yes, just be sure to fry the chicken in batches to avoid overcrowding and ensure even cooking. You can also keep the first batch warm in the oven at 200°F (95°C) while the rest cooks.
Conclusion
Honey Garlic Chicken delivers bold, satisfying flavor with a sweet-savory punch that’s hard to resist. It’s fast enough for a weeknight meal but impressive enough to serve guests — crispy, saucy, and incredibly versatile. Whether you’re pairing it with rice, noodles, or crunchy veggies, this dish is sure to become a regular in your kitchen rotation. Give it a try once, and you’ll keep coming back for more.
Honey Garlic Chicken
- Prep Time: 10 minutes
- Cook Time: 15 minutes
- Total Time: 25 minutes
- Yield: 4 servings
Description
Golden, crispy, and coated in a glossy honey garlic glaze, this dish is packed with bold flavor and comes together in under 30 minutes. A family favorite that’s perfect for weeknight dinners or special occasions.
Ingredients
For the Chicken:
- 1.5 lbs (680g) boneless, skinless chicken thighs or breasts, cut into bite-sized pieces
- 1/2 cup cornstarch
- 1/2 tsp salt
- 1/2 tsp ground black pepper
- 1/4 tsp garlic powder
- Vegetable oil for frying
For the Honey Garlic Sauce:
- 1/3 cup honey
- 1/4 cup soy sauce
- 4 cloves garlic, minced
- 1 tsp fresh ginger, grated (optional)
- 2 tbsp rice vinegar
- 1 tbsp cornstarch mixed with 2 tbsp water
For Garnish (Optional):
- Toasted sesame seeds
- Chopped green onions or chives
Instructions
- In a bowl, toss chicken pieces with salt, pepper, garlic powder, and cornstarch until well coated.
- Heat oil in a skillet over medium-high heat. Fry chicken in batches for 4–5 minutes per side until golden and cooked through. Drain on paper towels.
- In a small bowl, mix honey, soy sauce, garlic, ginger, rice vinegar, and cornstarch slurry.
- Remove excess oil from the pan, then pour in the sauce. Cook over medium heat, stirring until thickened.
- Return chicken to the pan and toss to coat evenly in the glaze. Cook for another 1–2 minutes.
- Garnish with sesame seeds and green onions. Serve hot.