

There’s something magical about baking a loaf of homemade white bread. The moment the warm, yeasty aroma fills the kitchen, I know I’m in for a treat. Whether it’s slathered with butter, turned into a perfect sandwich, or simply enjoyed on its own, this soft and fluffy bread is pure comfort. Baking bread from scratch may seem intimidating, but this recipe is surprisingly simple and rewarding.
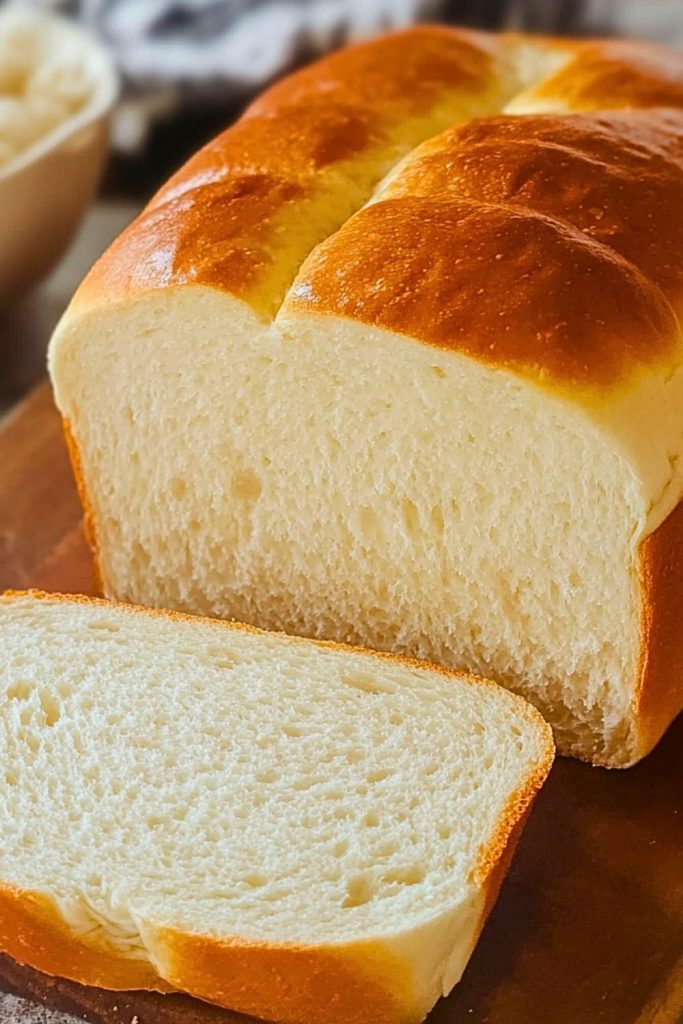
I love making this homemade white bread because it delivers a pillowy texture with a slightly sweet, buttery flavor—just like the kind from a bakery. It’s versatile enough for toast in the morning, packed lunches, or even as the base for French toast. Plus, nothing beats the satisfaction of slicing into a fresh loaf you made with your own hands.
Why You’ll Love This Homemade White Bread
- Soft and Fluffy Texture – This bread has the perfect balance of chewiness and softness, making every bite satisfying.
- Easy to Make – Even if you’re new to bread-making, this recipe is straightforward with simple ingredients.
- No Special Equipment Needed – You don’t need a stand mixer or bread machine—just a bowl, a wooden spoon, and your hands.
- Perfect for Any Occasion – Whether you’re making sandwiches, toast, or serving it alongside dinner, this bread fits every meal.
- Better Than Store-Bought – No preservatives, just pure homemade goodness. You control the ingredients, ensuring quality and freshness.
What Type of Flour Should I Use?
The type of flour you use plays a big role in the texture and structure of your homemade white bread. For the best results, I recommend using bread flour because it has a higher protein content, which helps develop more gluten and creates a chewier, fluffier loaf. However, all-purpose flour also works well if that’s what you have on hand—it will still yield a soft and delicious loaf, just with a slightly less chewy texture.
If you’re looking for an even softer bread, you can mix all-purpose flour and bread flour for the best of both worlds. Just make sure to measure your flour correctly by spooning it into the measuring cup and leveling it off to avoid adding too much, which can make the bread dense.
Options for Substitutions
One of the great things about homemade white bread is that it’s flexible! Here are some substitutions you can make based on your dietary needs or ingredient availability:
- Flour Alternatives – While white bread is traditionally made with all-purpose or bread flour, you can experiment with whole wheat flour for a heartier texture. Just replace half of the flour with whole wheat to keep the bread from being too dense.
- Sugar Alternatives – This recipe uses regular white sugar, but you can swap in honey or maple syrup for a natural sweetness. If using honey, reduce the liquid slightly to keep the dough balanced.
- Milk Substitute – For a dairy-free version, replace milk with almond milk, oat milk, or even water. Milk makes the bread softer, but water still creates a great loaf.
- Butter Substitute – Instead of butter, you can use vegetable oil, coconut oil, or margarine to keep the bread moist. Coconut oil will add a slight sweetness, while vegetable oil keeps it neutral.
- Yeast Options – If you only have instant yeast instead of active dry yeast, you can use it directly in the flour without proofing. Just reduce the amount slightly since instant yeast is more potent.
These simple swaps let you customize your bread without sacrificing its delicious homemade quality!
Ingredients for This Homemade White Bread
Every ingredient in this recipe plays an essential role in achieving the perfect loaf—soft, fluffy, and flavorful. Here’s what you’ll need and why:
- Bread Flour (or All-Purpose Flour) – The main structure of the bread. Bread flour gives a chewier texture, while all-purpose flour makes it slightly softer.
- Warm Milk – Adds richness and helps create a tender crumb. The warmth also helps activate the yeast.
- Active Dry Yeast – The leavening agent that makes the bread rise and gives it a light, airy texture.
- Granulated Sugar – Feeds the yeast and adds a slight sweetness, balancing the flavors of the bread.
- Salt – Enhances the flavor and helps regulate yeast activity for a proper rise.
- Unsalted Butter – Adds moisture, richness, and a buttery taste to the bread. Softened butter blends better into the dough.
- Warm Water – Helps dissolve the yeast and brings the dough together with the right hydration level.
- Egg (Optional, for Egg Wash) – Brushing an egg wash on top before baking gives the crust a beautiful golden color.
Step 1: Activate the Yeast
In a small bowl, combine warm water (about 110°F/43°C) and sugar, then sprinkle the active dry yeast over the top. Let it sit for 5–10 minutes until it becomes frothy. This step ensures the yeast is alive and ready to help the bread rise.
Step 2: Mix the Dough
In a large mixing bowl, combine the flour and salt, then add the warm milk, softened butter, and the activated yeast mixture. Stir until the dough starts to come together. If using a stand mixer, use the dough hook on low speed until a shaggy dough forms.
Step 3: Knead the Dough
Turn the dough onto a lightly floured surface and knead for about 8–10 minutes until it becomes smooth and elastic. If the dough is too sticky, add a little more flour, one tablespoon at a time. Proper kneading helps develop gluten, which gives the bread its soft and chewy texture.
Step 4: First Rise
Place the kneaded dough in a greased bowl, cover it with a clean towel, and let it rise in a warm place for 1–1.5 hours, or until it doubles in size. A warm environment (around 75°F/24°C) helps the yeast work efficiently.
Step 5: Shape the Dough
Once the dough has risen, punch it down gently to release excess air. Transfer it to a floured surface and shape it into a loaf by folding the edges toward the center and rolling it into a log. Place it in a greased 9×5-inch loaf pan, seam side down.
Step 6: Second Rise
Cover the pan with a towel and let the dough rise for another 30–45 minutes, until it puffs up just above the edges of the pan. This second rise ensures a light, airy texture in the finished bread.
Step 7: Bake the Bread
Preheat your oven to 375°F (190°C). If desired, brush the top of the dough with an egg wash (1 beaten egg with a tablespoon of water) for a golden crust. Bake for 25–30 minutes, until the top is golden brown and the loaf sounds hollow when tapped.
Step 8: Cool and Enjoy
Remove the bread from the oven and let it cool in the pan for 5–10 minutes before transferring it to a wire rack to cool completely. Slicing too early can make the bread gummy, so try to wait at least 30 minutes before cutting into your perfect homemade loaf!
How Long to Cook Homemade White Bread
The baking time for this homemade white bread is 25–30 minutes at 375°F (190°C). The bread is done when the top turns golden brown, and the loaf sounds hollow when tapped on the bottom. For extra accuracy, you can use a thermometer—the internal temperature should be 190–200°F (88–93°C) when fully baked.
If the top is browning too quickly but the inside still needs more time, you can tent the bread loosely with foil for the last 10 minutes of baking.
Tips for Perfect Homemade White Bread
- Make Sure Your Yeast is Active – If your yeast doesn’t foam during activation, it may be expired. Always check the date before using it.
- Measure Flour Correctly – Too much flour can make the bread dense. Spoon the flour into the measuring cup and level it off instead of scooping directly.
- Knead Properly – Kneading develops gluten, which gives the bread its structure. The dough should be smooth and slightly tacky but not sticky.
- Let the Dough Rise in a Warm Place – A draft-free, warm spot (around 75°F/24°C) will help the dough rise properly. If your kitchen is cool, place the bowl inside an oven with just the light on.
- Don’t Skip the Second Rise – This ensures a light, fluffy loaf instead of a dense one. Be patient!
- Check for Doneness – Tap the loaf or use a thermometer to ensure it’s fully baked. Undercooked bread can be gummy inside.
- Cool Before Slicing – Let the bread rest for at least 30 minutes after baking to set the structure and prevent a doughy texture.
Follow these tips, and you’ll get a perfect loaf every time!
Watch Out for These Mistakes While Cooking
- Using Water That’s Too Hot or Too Cold – Water that’s too hot (above 120°F/49°C) can kill the yeast, while cold water won’t activate it properly. Aim for 110°F (43°C) for the best results.
- Skipping the Kneading Step – Not kneading long enough can lead to a dense loaf with little structure. Knead until the dough is smooth and elastic.
- Adding Too Much Flour – A common mistake is adding too much flour, making the bread dry and heavy. The dough should be slightly sticky but manageable.
- Rushing the Rising Process – Yeast needs time to develop the right texture and flavor. Cutting the rise time short will result in a dense loaf.
- Overproofing the Dough – Letting the dough rise too long can weaken the gluten structure, causing the loaf to collapse while baking.
- Not Preheating the Oven – Bread needs an even baking environment. Always preheat to 375°F (190°C) before putting the dough in.
- Cutting the Bread Too Soon – Freshly baked bread needs time to set. Slicing too early can make the inside gummy. Let it cool for at least 30 minutes.
What to Serve With Homemade White Bread?
1. Classic Butter and Jam
A thick slice of warm bread with butter and your favorite jam is simple yet delicious.
2. Sandwiches
Use this homemade bread for the ultimate grilled cheese, deli sandwiches, or a classic peanut butter and jelly.
3. Toast with Toppings
Try it toasted with avocado, cream cheese, or honey for a satisfying breakfast or snack.
4. French Toast
This soft bread makes rich, fluffy French toast—perfect for a weekend brunch.
5. Homemade Croutons
Dice and bake leftover slices to make crispy croutons for salads and soups.
6. Bread Pudding
Turn stale slices into a delicious bread pudding with milk, eggs, and cinnamon.
7. Garlic Bread
Brush slices with butter, garlic, and herbs, then bake for a perfect side dish to pasta.
8. Dipping Bread for Soups & Stews
This bread is great for soaking up soups, stews, or even olive oil and balsamic vinegar.
No matter how you enjoy it, this homemade white bread is a perfect addition to any meal!
Storage Instructions
To keep your homemade white bread fresh and soft, store it properly:
- Room Temperature – Wrap the loaf in plastic wrap or place it in an airtight container. It stays fresh for 3–4 days at room temperature.
- Refrigeration (Not Recommended) – Storing bread in the fridge can dry it out faster. If you must, wrap it tightly to reduce moisture loss.
- Freezing – For longer storage, wrap the bread in plastic wrap and then in aluminum foil or a freezer bag. It can last up to 3 months in the freezer. When ready to eat, let it thaw at room temperature or warm it in the oven at 300°F (150°C) for 10–15 minutes.
- Sliced vs. Whole – If freezing, consider slicing the bread first so you can thaw only what you need.
Estimated Nutrition
Here’s an approximate nutritional breakdown for one slice of homemade white bread (based on 12 slices per loaf):
- Calories: 120
- Carbohydrates: 22g
- Protein: 4g
- Fat: 2.5g
- Saturated Fat: 1.5g
- Cholesterol: 5mg
- Fiber: 1g
- Sugar: 3g
- Sodium: 180mg
These values may vary depending on the specific ingredients used, but homemade bread is generally lower in preservatives and additives compared to store-bought options.
Frequently Asked Questions
1. Can I Use All-Purpose Flour Instead of Bread Flour?
Yes! All-purpose flour works well, but bread flour will give a chewier texture. If using all-purpose, you may need slightly less liquid, so adjust accordingly.
2. Why Didn’t My Bread Rise?
This could be due to expired yeast, water that was too hot or too cold, or a cold kitchen. Make sure your yeast is fresh, and let the dough rise in a warm place.
3. How Can I Make This Bread Dairy-Free?
Simply replace the milk with warm water or a plant-based milk like almond or oat milk. Use oil or dairy-free margarine instead of butter.
4. How Do I Get a Softer Crust?
Brushing the top with melted butter after baking will soften the crust. You can also cover the loaf with a towel while it cools to trap moisture.
5. Can I Make This Bread Without a Stand Mixer?
Absolutely! Knead by hand for about 8–10 minutes until the dough is smooth and elastic. It just takes a little more effort.
6. How Do I Know When the Bread Is Done Baking?
Tap the bottom of the loaf—it should sound hollow. You can also use a thermometer; the internal temperature should be 190–200°F (88–93°C).
7. Can I Add Extras Like Herbs or Cheese?
Yes! You can mix in garlic powder, dried herbs, shredded cheese, or even cinnamon and raisins for a flavorful variation.
8. What’s the Best Way to Slice Homemade Bread?
Use a serrated bread knife and let the bread cool completely before slicing. A warm loaf will be too soft and may get squished.
Conclusion
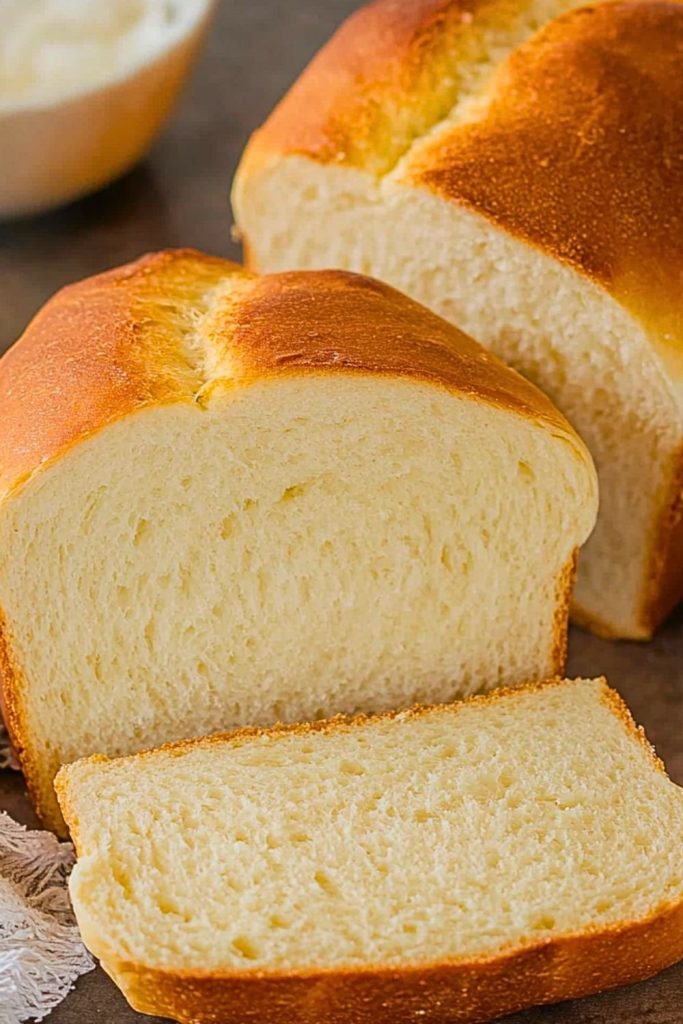
Making homemade white bread is a simple yet rewarding experience. With just a few basic ingredients, you can create a soft, fluffy loaf that’s far better than store-bought. Whether you’re using it for sandwiches, toast, or just enjoying a warm slice with butter, this bread is sure to become a household favorite. Plus, once you get the hang of it, you can experiment with flavors and textures to make it your own!
Homemade White Bread
- Prep Time: 15 minutes
- Rise Time: 1 hour 30 minutes
- Cook Time: 25 minutes
- Total Time: 2 hours 10 minutes
- Yield: 1 loaf
Description
Nothing beats the aroma of freshly baked homemade white bread straight from the oven. This easy recipe delivers a soft, fluffy, and slightly buttery loaf perfect for sandwiches, toast, or simply enjoying with a spread of butter and jam. With just a few pantry staples, you can make a bakery-style loaf in your own kitchen. Whether you’re a beginner or a seasoned baker, this bread will quickly become a household favorite!
Ingredients
- 4 cups bread flour (or all-purpose flour)
- 1 cup warm milk (110°F/43°C)
- 1/4 cup warm water (110°F/43°C)
- 2 1/4 teaspoons (1 packet) active dry yeast
- 2 tablespoons granulated sugar
- 1 1/2 teaspoons salt
- 2 tablespoons unsalted butter, softened
- 1 egg (optional, for egg wash)
Instructions
- Activate the Yeast – In a small bowl, mix warm water and sugar, then sprinkle the yeast on top. Let it sit for 5–10 minutes until frothy.
- Mix the Dough – In a large bowl, combine flour and salt. Add the warm milk, softened butter, and the yeast mixture. Stir until a rough dough forms.
- Knead the Dough – Transfer the dough to a lightly floured surface and knead for 8–10 minutes until smooth and elastic.
- First Rise – Place the dough in a greased bowl, cover it, and let it rise in a warm place for 1–1.5 hours until doubled in size.
- Shape the Dough – Punch down the risen dough, shape it into a loaf, and place it in a greased 9×5-inch loaf pan.
- Second Rise – Cover the pan and let the dough rise for another 30–45 minutes until it slightly puffs above the edges of the pan.
- Bake – Preheat the oven to 375°F (190°C). Brush the top with an egg wash if desired, then bake for 25–30 minutes until golden brown.
- Cool & Serve – Let the bread cool in the pan for 5–10 minutes, then transfer to a wire rack. Wait at least 30 minutes before slicing.