

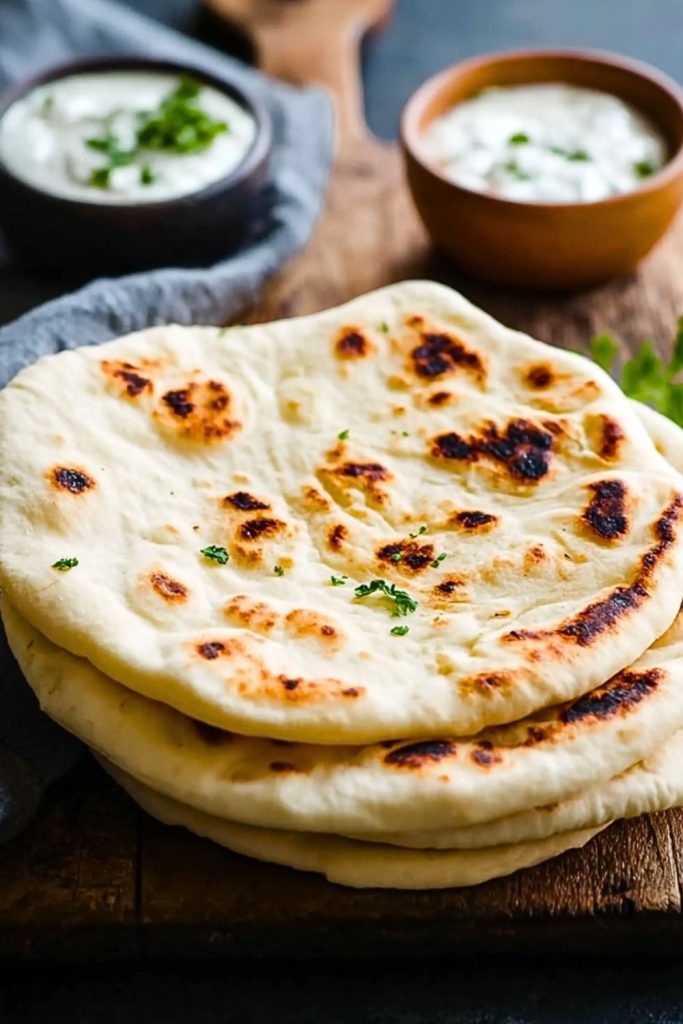
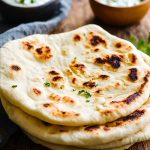
I’ve always found something magical about the way pita bread puffs up in the pan — turning from a simple round of dough into a golden, airy pocket. Making homemade pita bread at home has not only elevated my meals, but also brought a kind of comfort and satisfaction that store-bought versions never could. It’s soft, warm, and versatile — perfect for scooping up dips, stuffing with grilled veggies or meats, or simply enjoying fresh off the skillet with a swipe of butter.
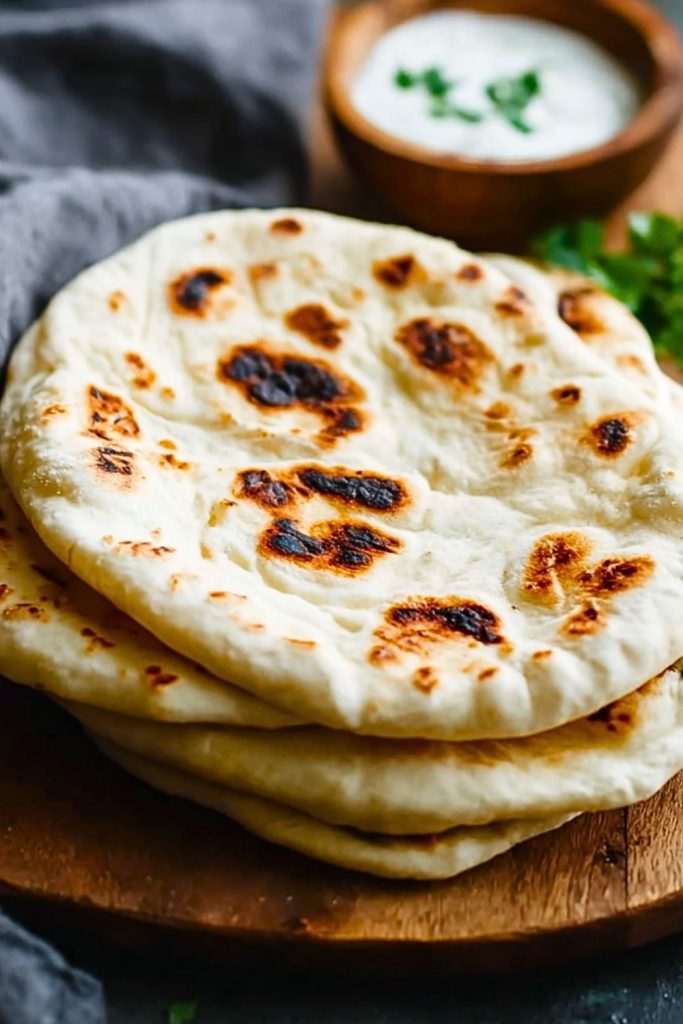
What surprised me the most is how straightforward the process really is. You don’t need fancy equipment or a bread-baking degree. Just a few pantry staples, a bit of patience, and a hot skillet. Whether you’re planning a Mediterranean dinner spread or looking for an easy bread option that’s miles better than anything in plastic wrap, this homemade pita bread is a must-try.
Why You’ll Love This Homemade Pita Bread
This recipe delivers soft, chewy, and delightfully puffed pitas that are far superior to store-bought. You’ll love how fresh they taste and how they can complement so many meals. Plus, making them from scratch is incredibly rewarding — once you try it, you’ll likely never go back.
What Type of Flour Should I Use for Homemade Pita Bread?
All-purpose flour works wonderfully for this recipe, giving you a balanced texture — soft but sturdy enough to hold fillings. You can mix in a bit of whole wheat flour for a slightly nuttier flavor, but too much can make the bread dense and prevent it from puffing up well. Stick with mostly all-purpose for the best results.
Options for Substitutions
- Flour: Use a mix of all-purpose and whole wheat (up to 50%) for a slightly healthier version.
- Yeast: Instant yeast can be used instead of active dry — just skip the proofing step.
- Sugar: You can substitute honey or maple syrup for the sugar.
- Olive Oil: Any neutral oil can be used, though olive oil adds great flavor.
- Dairy-Free: This recipe is naturally dairy-free, but always double-check ingredients if serving someone with allergies.
Ingredients for this Homemade Pita Bread
- All-Purpose Flour – This is the foundation of the pita bread, providing structure and elasticity. It ensures a soft and pliable texture that puffs beautifully.
- Warm Water – Helps activate the yeast and brings the dough together. Temperature matters; it should be warm but not hot to the touch.
- Active Dry Yeast – This leavening agent gives the bread its signature puff. It’s what creates those perfect pockets.
- Sugar – Feeds the yeast and helps with browning. Just a small amount is needed.
- Salt – Enhances the overall flavor of the dough and balances the yeast activity.
- Olive Oil – Adds moisture and a slight richness to the dough, keeping it soft even after cooking.
Step 1: Activate the Yeast
In a mixing bowl, combine warm water, sugar, and active dry yeast. Let it sit for about 5–10 minutes until it becomes foamy on top. This means the yeast is alive and ready to work.
Step 2: Make the Dough
Add flour, salt, and olive oil to the yeast mixture. Stir until a rough dough forms. Then, knead the dough for about 8–10 minutes by hand or 5–6 minutes using a stand mixer fitted with a dough hook. The dough should be smooth and elastic.
Step 3: First Rise
Transfer the kneaded dough to a lightly oiled bowl. Cover with a clean towel or plastic wrap and let it rise in a warm spot for about 1 to 1.5 hours or until it doubles in size.
Step 4: Divide and Shape
Punch down the dough and divide it into 8 equal pieces. Roll each piece into a ball, cover them, and let them rest for 10–15 minutes to relax the gluten.
Step 5: Roll Out the Pitas
On a lightly floured surface, roll each dough ball into a round, about 1/4 inch thick. Try to keep them even in thickness to ensure they puff properly.
Step 6: Cook the Pitas
Preheat a cast iron skillet or heavy-bottomed pan over medium-high heat. Cook each pita one at a time for 1–2 minutes per side. You should see them puff up beautifully. Flip only once. Do not press them down.
Step 7: Wrap and Steam
Immediately after cooking, wrap the hot pitas in a clean kitchen towel to trap the steam. This keeps them soft and pliable.
How Long to Prepare Homemade Pita Bread
Making pita bread from scratch takes a bit of time, but most of it is hands-off. From start to finish, you’ll need about 2 hours.
- Prep Time: 15 minutes to mix and knead the dough.
- Rise Time: About 1 to 1.5 hours, depending on your kitchen temperature.
- Cooking Time: Each pita takes around 2–3 minutes, so total cooking time for a batch of 8 is about 20 minutes.
If you’re short on time, you can refrigerate the dough after the first rise and cook them the next day.
Tips for Perfect Homemade Pita Bread
- Use fresh yeast — if it doesn’t foam during activation, start over.
- Let the dough rise in a warm, draft-free place.
- Roll out evenly to 1/4 inch thickness for ideal puffing.
- Cook on a hot skillet — the heat creates steam, which causes the bread to puff.
- Don’t skip the towel wrap after cooking — it helps keep them soft.
Watch Out for These Mistakes While Cooking
- Skillet not hot enough: The pitas won’t puff properly.
- Rolling too thin or too thick: Uneven thickness can lead to poor puffing.
- Overproofing the dough: Causes the bread to collapse or become chewy.
- Pressing while cooking: Flattening them can ruin the pocket.
- Not wrapping immediately: They’ll dry out quickly without steaming in a towel.
What to Serve With Homemade Pita Bread?
1. Hummus
A classic pairing — creamy, garlicky hummus with warm pita is pure comfort.
2. Chicken Shawarma
Thinly sliced, spiced chicken wrapped in pita makes a delicious and filling meal.
3. Greek Salad
Serve alongside or stuff inside your pita for a refreshing vegetarian option.
4. Tzatziki Dip
The cool cucumber yogurt dip is a perfect match for warm pita.
5. Lentil Soup
Use pita for dipping into a hearty, spiced lentil soup.
Storage Instructions
Room Temperature
Once cooled, store the pitas in an airtight bag or container at room temperature for up to 2 days.
Refrigerator
If you need to keep them longer, store in the fridge for up to 5 days. Reheat in a dry skillet to restore softness.
Freezer
Wrap individual pitas in plastic and store in a zip-top bag in the freezer for up to 2 months. Thaw and warm before using.
Estimated Nutrition (per pita)
- Calories: 165
- Protein: 4g
- Fat: 2g
- Carbohydrates: 32g
- Fiber: 1g
- Sugar: 1g
- Sodium: 180mg
Frequently Asked Questions
What if my pita doesn’t puff?
Don’t worry! It’ll still taste great and can be used as flatbread or for dipping. Try rolling more evenly or increasing skillet heat.
Can I bake these instead of using a skillet?
Yes. Preheat your oven with a baking stone or steel to 475°F and bake for 2–3 minutes until puffed.
How do I make them gluten-free?
Use a gluten-free flour blend designed for yeasted doughs, but results may vary as gluten is key to the puff.
Can I use whole wheat flour?
You can replace up to 50% of the flour with whole wheat for a slightly denser but flavorful pita.
Do I need a stand mixer?
Not at all. You can knead by hand — it just takes a bit more effort.
Conclusion
Homemade pita bread is a simple and satisfying addition to any kitchen repertoire. With minimal ingredients and just a bit of technique, you’ll have fresh, fluffy pitas that taste worlds better than anything from a bag. Whether you’re scooping up dips, making wraps, or just eating them warm from the pan, these pitas deliver every time.
Homemade Pita Bread
- Prep Time: 15 minutes
- Cook Time: 20 minutes
- Total Time: 2 hours
- Yield: 8 pitas
- Category: Bread
- Method: Stovetop
- Cuisine: Mediterranean
- Diet: Vegetarian
Description
Soft, chewy, and golden homemade pita bread is easier to make than you think — and so much better than store-bought. Perfect for everything from dips and wraps to soups and snacks, this quick bread recipe transforms pantry staples into something magical. Whether you’re looking for an easy dinner side, a quick lunch idea, or a healthy snack option, this recipe fits the bill. Great for meal prep or spontaneous cravings, it’s a must-have in your kitchen playbook for anyone who loves fresh, flavorful bread.
Ingredients
1 cup warm water
2 teaspoons active dry yeast
1 teaspoon sugar
2.5 cups all-purpose flour
1 teaspoon salt
1 tablespoon olive oil
Instructions
1. In a bowl, mix warm water, sugar, and yeast. Let it sit for 5–10 minutes until foamy.
2. Add flour, salt, and olive oil to the yeast mixture. Stir until a dough forms.
3. Knead the dough for 8–10 minutes by hand (or 5–6 minutes in a stand mixer) until smooth.
4. Transfer dough to an oiled bowl, cover, and let rise in a warm spot for 1–1.5 hours until doubled.
5. Punch down the dough and divide into 8 equal pieces. Roll each into a ball and let rest 10–15 minutes.
6. Roll each ball into a 1/4-inch-thick round. Keep thickness even for proper puffing.
7. Heat a skillet over medium-high. Cook each pita 1–2 minutes per side until puffed and browned.
8. Immediately wrap cooked pitas in a towel to trap steam and keep soft.
Notes
If your yeast doesn’t foam, it may be expired — start again with fresh yeast.
For best puffing, make sure the skillet is hot and the dough is evenly rolled.
Store pitas wrapped in a towel or airtight bag to maintain softness.
Nutrition
- Serving Size: 1 pita
- Calories: 165
- Sugar: 1
- Sodium: 180
- Fat: 2
- Saturated Fat: 0.3
- Unsaturated Fat: 1.7
- Trans Fat: 0
- Carbohydrates: 32
- Fiber: 1
- Protein: 4
- Cholesterol: 0
Keywords: easy recipe, homemade pita, bread ideas, Mediterranean, healthy snack