

Rich, hearty, and packed with bold flavor, homemade chili is the kind of comfort food that turns any dinner into a celebration. This bowl of goodness is brimming with seasoned ground beef, tender beans, juicy tomatoes, and a medley of spices that meld together into something magical. Whether you’re warming up on a cold night or feeding a crowd during game day, this dish delivers satisfaction with every spoonful.
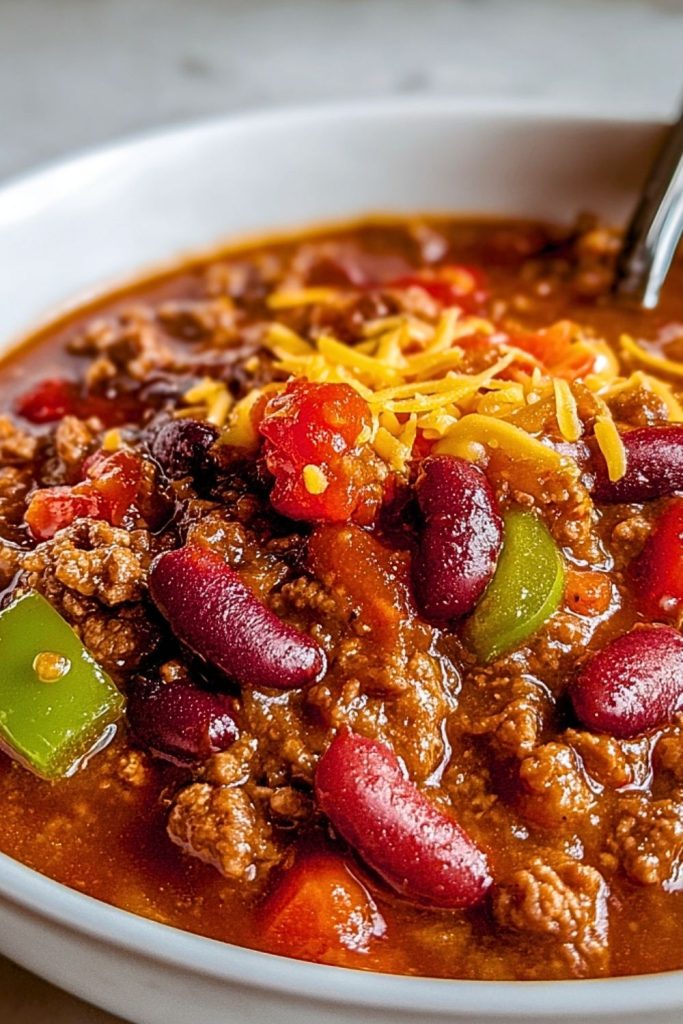
What makes this chili unforgettable isn’t just the savory blend of ingredients—it’s the way they come together into a thick, robust stew that feels like a hug in a bowl. The subtle heat from the spices, the texture of the meat and beans, and the melted cheddar on top all create a perfect balance of flavor and heartiness. One taste, and you’ll know why this recipe earns a permanent spot in your meal rotation.
Why You’ll Love This Homemade Chili
- Deep, layered flavor from slow-simmered beef and spices
- Perfectly hearty with the combo of ground meat, beans, and veggies
- Customizable heat level to suit every taste
- One-pot meal with easy cleanup
- Great for leftovers—flavor intensifies the next day
- Freezer-friendly for easy meal prep
- Crowd-pleasing for potlucks, tailgates, or family dinners
- Comfort food classic that’s easy to make and hard to resist
Preparation Phase & Tools to Use
(Essential Tools and Equipment + Importance of Each Tool)
To make the perfect homemade chili, you won’t need fancy gadgets—just a few reliable kitchen tools to make the process smooth and efficient:
- Large Dutch Oven or Heavy-Bottomed Pot: This is the heart of your chili-making. A heavy pot distributes heat evenly, allowing your ingredients to cook slowly and thoroughly without burning.
- Wooden Spoon or Silicone Spatula: Crucial for stirring the meat and vegetables as they cook. A good spoon helps prevent sticking and ensures even browning.
- Sharp Chef’s Knife: You’ll need this to chop onions, peppers, and garlic quickly and cleanly.
- Cutting Board: Preferably a non-slip one. It’s safer and gives you room to chop all the veggies with ease.
- Can Opener: Since canned tomatoes and beans are pantry staples in this recipe, a reliable can opener is a must.
- Measuring Spoons and Cups: Precision counts when it comes to spices and liquids—these will help you hit the flavor sweet spot.
- Ladle: For serving up perfect, hearty portions.
Preparation Tips
- Mise en place: Prep all your ingredients before you start cooking. It keeps the process organized and helps prevent any last-minute scrambling.
- Drain and rinse beans: Canned beans often have excess sodium. Rinsing them improves taste and texture.
- Brown the meat well: Don’t rush this step. Browning adds depth and a rich, savory note that sets the tone for the whole chili.
- Sauté the aromatics: Cooking the onions, garlic, and peppers before adding the liquid base enhances their natural sweetness and flavor.
- Taste as you go: Adjust seasoning throughout the simmering process. The flavor deepens over time, so check and tweak if needed.
- Simmer low and slow: This allows flavors to meld and thicken naturally without needing cornstarch or flour.
Ingredients for This Homemade Chili
Here’s everything you need to make a hearty and flavorful pot of homemade chili. These ingredients strike the perfect balance between spice, texture, and richness:
- 1 tablespoon olive oil – for sautéing the vegetables and meat
- 1 large yellow onion, diced
- 1 green bell pepper, chopped
- 3 cloves garlic, minced
- 1 ½ pounds ground beef (80/20 preferred for flavor)
- 2 tablespoons tomato paste – for added depth and body
- 1 (28-ounce) can crushed tomatoes
- 1 (15-ounce) can diced tomatoes (with juices)
- 2 (15-ounce) cans kidney beans, drained and rinsed
- 1 tablespoon chili powder – the key spice
- 1 teaspoon ground cumin
- ½ teaspoon smoked paprika
- ½ teaspoon dried oregano
- ¼ teaspoon cayenne pepper – optional, for extra heat
- Salt and freshly ground black pepper, to taste
- 1 cup beef broth or water – for desired consistency
- Optional toppings: shredded cheddar cheese, sour cream, chopped green onions, jalapeños
These ingredients create a robust and filling chili, perfect for cozy evenings or feeding a hungry crowd.

Step 1: Sauté the Vegetables
Heat the olive oil in a large Dutch oven or heavy-bottomed pot over medium heat. Add the diced onion and chopped green bell pepper. Cook for about 5–6 minutes, stirring occasionally, until softened. Stir in the minced garlic and cook for an additional 1 minute until fragrant.
Step 2: Brown the Ground Beef
Add the ground beef to the pot. Use a wooden spoon to break it up into crumbles. Cook until the beef is fully browned, about 7–8 minutes. Drain off excess fat if necessary, then stir in the tomato paste. Let it cook for another minute to deepen the flavor.
Step 3: Add Tomatoes and Beans
Pour in the crushed tomatoes, diced tomatoes (with their juices), kidney beans, and beef broth. Stir everything together well.
Step 4: Season the Chili
Sprinkle in the chili powder, cumin, smoked paprika, oregano, cayenne pepper (if using), salt, and pepper. Stir thoroughly to ensure the seasonings are evenly distributed throughout the chili.
Step 5: Simmer and Develop Flavor
Bring the chili to a light boil, then reduce the heat to low. Cover partially with a lid and simmer for at least 30–40 minutes, stirring occasionally. The longer it simmers, the more developed the flavors will become.
Step 6: Taste and Adjust
Give the chili a taste and adjust seasonings if needed—add a bit more salt, a dash more chili powder, or a splash of broth if it’s too thick. Once you’re happy with the flavor and consistency, it’s ready to serve.
Step 7: Serve and Top
Ladle the chili into bowls and top with your favorite garnishes—shredded cheddar cheese, sour cream, sliced jalapeños, or chopped green onions.
Notes
- Make it ahead: Chili tastes even better the next day as the flavors have more time to meld.
- Double it: This recipe is easy to scale up if you’re feeding a crowd or want to freeze extra portions.
- Customize it: Swap in black beans or pinto beans, use ground turkey or sausage, or add corn or zucchini for extra texture and variety.
- Low-sodium option: Use no-salt-added canned tomatoes and beans to better control your sodium levels.
- Thicker chili tip: Simmer uncovered for the last 10–15 minutes or mash a few beans in the pot for natural thickness.
Watch Out for These Mistakes While Cooking
- Not draining excess fat: Leaving too much grease in the pot after browning beef can make the chili oily and heavy.
- Skipping the simmer time: Rushing this step can lead to underdeveloped flavors. Let the chili take its time to fully come together.
- Adding all the salt early: Salt intensifies as the chili simmers. Start with a modest amount and adjust toward the end.
- Using raw spices last minute: Adding spices too late doesn’t give them time to release their full aroma and flavor.
- Overcrowding with toppings: Too many toppings can overpower the chili. Stick with 2–3 complementary garnishes.
- Not tasting as you go: The best chili comes from small adjustments made throughout the cooking process.
What to Serve With Homemade Chili?
A bowl of homemade chili is rich and satisfying on its own, but pairing it with the right side dish takes it to another level. Here are eight great options that complement the bold flavors perfectly:
1. Cornbread
A classic partner—its slightly sweet crumb balances the heat and richness of the chili.
2. Baked Potatoes
Serve chili spooned over fluffy baked potatoes for a comforting, carb-filled combo.
3. Tortilla Chips
Crunchy and perfect for dipping. They add texture and are great for scooping up every last bite.
4. White Rice
A neutral base that absorbs all the flavors. Great if you want to stretch the chili further.
5. Coleslaw
A crisp, tangy slaw adds freshness and cuts through the richness of the dish.
6. Garlic Bread
Soak up the chili juices with buttery, garlicky slices of toasted bread.
7. Mac and Cheese
Creamy and cheesy, this indulgent side contrasts the smoky spice of chili beautifully.
8. Simple Green Salad
Light and refreshing, a salad dressed with vinaigrette keeps your meal balanced.
Storage Instructions
Homemade chili stores exceptionally well, making it ideal for meal prep or leftovers.
- Refrigerator: Allow chili to cool completely, then store in an airtight container. It will keep in the fridge for up to 4–5 days.
- Freezer: Portion into freezer-safe containers or resealable bags (lay flat for easy stacking). Store for up to 3 months. Thaw overnight in the fridge before reheating.
- Reheating: Warm in a pot over medium heat, stirring occasionally. Add a splash of water or broth if it has thickened too much.
Estimated Nutrition
(Per 1 ½ cup serving, without toppings – values may vary slightly)
- Calories: 410
- Protein: 29g
- Fat: 16g
- Saturated Fat: 6g
- Carbohydrates: 34g
- Fiber: 10g
- Sugars: 7g
- Sodium: 780mg
This hearty meal is protein-rich, filling, and offers a good dose of fiber, especially when paired with whole ingredients and moderate toppings.
Frequently Asked Questions
1. Can I make homemade chili in a slow cooker?
Yes, brown the meat and sauté the aromatics first, then transfer everything to the slow cooker and cook on low for 6–8 hours or high for 3–4 hours.
2. Is it necessary to use both crushed and diced tomatoes?
Using both adds depth—crushed tomatoes create a rich base, while diced tomatoes offer texture. You can use all of one if preferred.
3. Can I skip the beans or use different kinds?
Absolutely. You can make beanless chili or substitute with black beans, pinto beans, or even chickpeas based on your taste.
4. How do I make this chili spicier?
Add more cayenne, throw in a chopped jalapeño, or use hot chili powder. You can also add hot sauce at the end to dial up the heat.
5. Can I make this recipe vegetarian?
Yes—omit the meat and use plant-based crumbles, lentils, or extra beans. Use vegetable broth instead of beef broth.
6. Does chili get better the next day?
Definitely. Letting it rest overnight enhances the flavors as the ingredients continue to blend and deepen.
7. What’s the best way to thicken chili?
Simmer uncovered to reduce excess liquid or mash some beans into the pot. Avoid adding flour or cornstarch.
8. Is homemade chili gluten-free?
Yes, as long as all your canned goods and spices are labeled gluten-free. Always double-check ingredient labels.
Conclusion
Homemade chili is more than just a recipe—it’s a deeply satisfying meal that blends bold spices, hearty textures, and soul-warming comfort in every bowl. Whether you’re making a big batch for a cozy weeknight or serving a crowd at your next gathering, this dish is endlessly adaptable, easy to make, and even easier to enjoy. With each spoonful, you’ll taste the care and simplicity that makes this classic a staple in kitchens everywhere.

Homemade Chili
- Prep Time: 10 minutes
- Cook Time: 40 minutes
- Total Time: 50 minutes
- Yield: 6-8 servings
Description
This homemade chili is a rich, hearty blend of ground beef, beans, tomatoes, and spices—slow-simmered to perfection. It’s comforting, full of bold flavors, and perfect for family dinners, game days, or meal prep.
Ingredients
- 1 tablespoon olive oil
- 1 large yellow onion, diced
- 1 green bell pepper, chopped
- 3 cloves garlic, minced
- 1 ½ pounds ground beef (80/20)
- 2 tablespoons tomato paste
- 1 (28 oz) can crushed tomatoes
- 1 (15 oz) can diced tomatoes (with juice)
- 2 (15 oz) cans kidney beans, rinsed
- 1 tablespoon chili powder
- 1 teaspoon cumin
- ½ teaspoon smoked paprika
- ½ teaspoon dried oregano
- ¼ teaspoon cayenne pepper (optional)
- Salt and pepper to taste
- 1 cup beef broth or water
- Optional toppings: cheddar cheese, sour cream, green onions, jalapeños
Instructions
- Heat olive oil in a large pot over medium heat. Add onion and bell pepper; sauté until soft.
- Stir in garlic and cook for 1 minute.
- Add ground beef. Brown thoroughly, breaking it up as it cooks. Drain excess fat.
- Stir in tomato paste and cook for another minute.
- Add crushed tomatoes, diced tomatoes, kidney beans, and broth.
- Season with chili powder, cumin, paprika, oregano, cayenne, salt, and pepper.
- Bring to a boil, reduce heat, and let simmer for 30–40 minutes, stirring occasionally.
- Taste and adjust seasoning. Serve hot with desired toppings.