Growing up, nothing felt quite as magical as walking into my grandma’s kitchen and catching that warm, rich aroma of her chocolate pie wafting through the house. It was a family favorite that made appearances at every holiday gathering, birthday, or “just because” Sunday dinner. There’s something comforting and nostalgic about a pie that brings back memories of laughter around the table and stories passed down over slices topped with dollops of whipped cream.

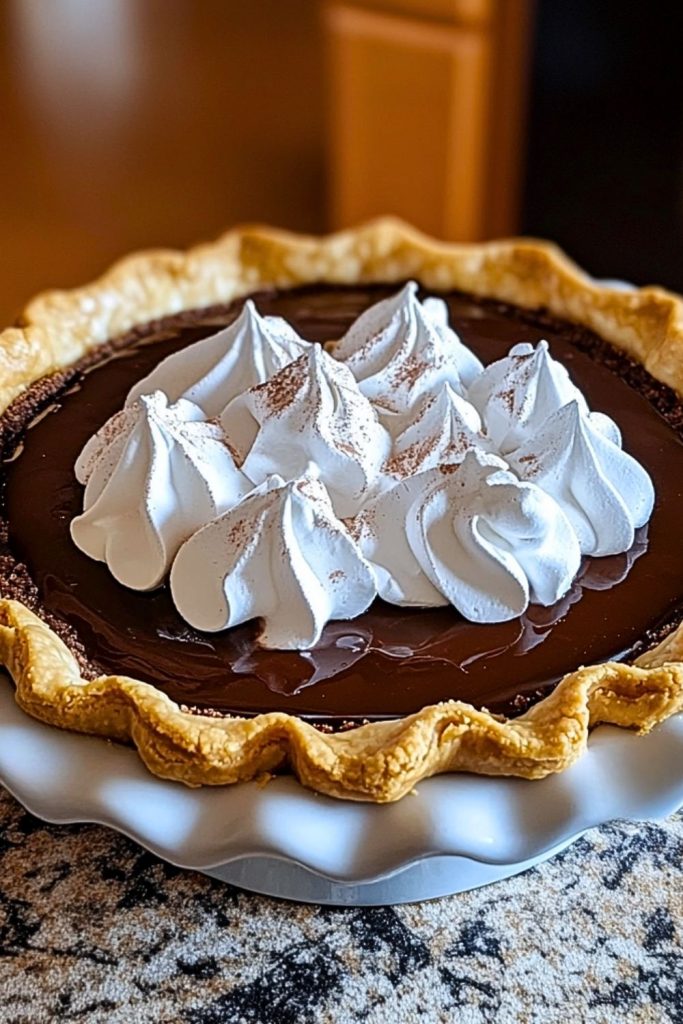
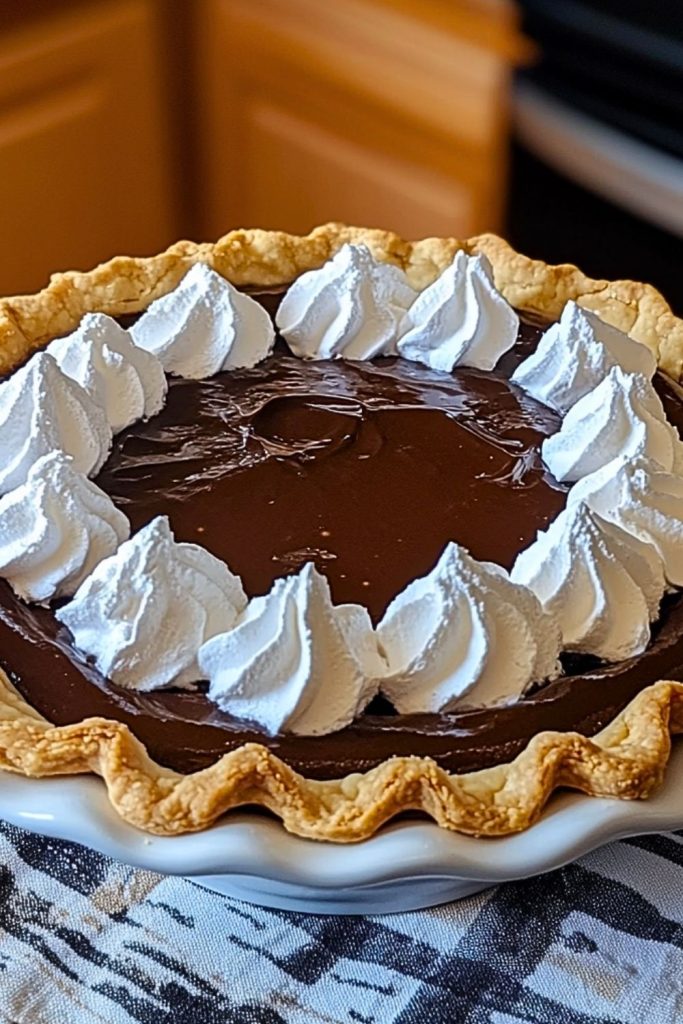
This isn’t your average chocolate pie—it’s the kind of dessert that commands silence after the first bite. The silky chocolate filling is decadently smooth, nestled inside a perfectly flaky, buttery crust. And don’t even get me started on that cloud of whipped cream on top—fluffy, sweet, and lightly kissed with cocoa. Making Grandma’s Chocolate Pie is like pressing pause on the chaos of the day and indulging in a little slice of heaven.
Why You’ll Love This Chocolate Pie
This chocolate pie is a showstopper, but it’s also incredibly simple to make. The filling comes together on the stovetop in minutes, and you can use either a homemade crust or a good-quality store-bought one to save time. It’s rich but not overly sweet, making it the kind of dessert that even self-proclaimed “non-dessert people” will fall for. Whether you serve it at a dinner party or enjoy it quietly with a cup of coffee, this pie will absolutely steal the show.
What Kind of Crust Works Best for Grandma’s Chocolate Pie?
I usually reach for a classic buttery pie crust—either homemade or a high-quality store-bought version if I’m short on time. The flaky texture complements the smoothness of the chocolate filling beautifully. If you want to elevate it, a graham cracker crust or even an Oreo crust can give it a delicious twist. Just make sure it’s fully baked and cooled before adding the filling, since this is a no-bake stovetop custard.
Options for Substitutions
One of the best things about Grandma’s Chocolate Pie is its flexibility. While I stick close to the original recipe out of tradition, a few thoughtful swaps can make it your own:
- Milk: Whole milk gives the richest flavor, but you can use 2% or even almond milk if needed—just expect a slightly thinner texture.
- Sugar: If you’re reducing refined sugar, try coconut sugar or a blend of monk fruit sweetener.
- Cornstarch: Arrowroot powder or flour can be used in a pinch, but cornstarch delivers the silkiest results.
- Butter: For a dairy-free version, a vegan butter substitute works surprisingly well.
- Topping: If you’re avoiding dairy, whipped coconut cream is a dreamy alternative to traditional whipped cream.
You don’t have to stray far from the original to make it fit your needs. This pie is forgiving and always turns out delicious.
Ingredients for Grandma’s Chocolate Pie
Pie Crust
The foundation of the pie—flaky, golden, and slightly buttery. It holds the rich chocolate filling and adds a perfect contrast in texture.
Granulated Sugar
Essential for sweetness. It balances the cocoa’s bitterness and makes the custard delightfully indulgent.
Unsweetened Cocoa Powder
This is where the deep chocolate flavor comes from. It gives the pie its rich, luxurious taste.
Cornstarch
A key thickening agent that helps the filling set to that perfect, creamy-smooth consistency.
Salt
Just a pinch enhances all the other flavors and cuts through the richness of the chocolate.
Egg Yolks
They bring creaminess and help bind the custard, giving the pie a velvety texture.
Whole Milk
The liquid base of the filling. Whole milk creates the richest result, giving the pie its signature silkiness.
Butter
Added at the end for richness and shine. It smooths out the filling and deepens the flavor.
Vanilla Extract
Just a splash rounds out the chocolate and adds a warm, aromatic finish.
Whipped Cream
For topping—light, fluffy, and slightly sweet. It adds airiness to the dense filling and finishes the pie beautifully.
Cocoa Powder or Chocolate Shavings (Optional)
A dusting or sprinkle on top adds a final touch of elegance and a hint of extra chocolate.

Step 1: Bake the Crust
Start by pre-baking your pie crust. If you’re using a homemade crust, roll it out and place it into a 9-inch pie dish. Crimp the edges, prick the bottom with a fork, and blind bake it at 375°F (190°C) for 15-18 minutes until lightly golden. Let it cool completely before adding the filling.
Step 2: Mix the Dry Ingredients
In a medium saucepan (off the heat), whisk together the granulated sugar, unsweetened cocoa powder, cornstarch, and salt. Make sure there are no lumps—this ensures an ultra-smooth filling later on.
Step 3: Add the Egg Yolks and Milk
In a separate bowl, lightly beat the egg yolks. Slowly whisk them into the dry mixture, then gradually stir in the milk. Once everything is combined, place the saucepan over medium heat.
Step 4: Cook the Custard
Stir constantly with a whisk or wooden spoon as the mixture heats up. It will start to thicken—this usually takes about 7–10 minutes. Once it reaches a pudding-like consistency and starts to bubble, remove it from the heat.
Step 5: Stir in Butter and Vanilla
While the custard is still hot, add in the butter and vanilla extract. Stir until the butter has fully melted and the filling is glossy and smooth.
Step 6: Fill and Chill
Pour the chocolate filling into the pre-baked crust. Smooth the top with a spatula, then let it cool at room temperature for about 15 minutes. Transfer to the fridge and chill for at least 4 hours, or until completely set.
Step 7: Top and Serve
Just before serving, top the pie with whipped cream. You can pipe it in pretty swirls or simply spoon it on. For a final touch, dust with cocoa powder or add chocolate shavings.
How Long to Cook Grandma’s Chocolate Pie
The crust takes about 15–18 minutes to blind bake, depending on your oven and crust thickness. The chocolate filling itself isn’t baked—it cooks on the stovetop and takes roughly 10 minutes to thicken over medium heat. After assembly, the pie needs to chill in the fridge for at least 4 hours to fully set. For best results, I usually make it the night before and let it chill overnight.
Tips for Perfect Chocolate Pie
- Stir Constantly: When cooking the filling, don’t walk away. Constant stirring keeps it smooth and prevents lumps or scorching.
- Strain If Needed: If your custard ends up a bit lumpy, strain it through a fine mesh sieve before pouring it into the crust.
- Use Room Temp Eggs: Cold yolks can cause curdling—let them sit out for a few minutes before mixing.
- Chill Long Enough: Cutting too early will result in a runny pie. Four hours is the absolute minimum, but overnight is best.
- Don’t Overbake the Crust: Blind baking too long can cause it to harden or burn once chilled.
- Use Real Vanilla: Pure vanilla extract gives a more rounded, aromatic flavor than imitation vanilla.
- Butter at the End: Add the butter after removing the custard from the heat to create that silky, glossy finish.
- Cool Before Refrigerating: Let the pie come to room temperature before chilling to avoid condensation and sogginess.
Watch Out for These Mistakes While Cooking
Even though Grandma’s Chocolate Pie is beginner-friendly, a few small slip-ups can affect the final outcome. Keep an eye out for these common mistakes:
- Not Stirring Constantly: The filling can scorch quickly if left unattended—keep it moving!
- Adding Eggs to Hot Mixture Too Soon: Always combine eggs with the dry mix and milk before applying heat to avoid scrambled eggs.
- Undercooking the Custard: If it doesn’t thicken on the stove, it won’t set properly in the fridge. Wait until it’s clearly pudding-like before removing from heat.
- Pouring Into a Hot Crust: Let the crust cool completely to avoid melting or separation between crust and filling.
- Skipping the Chill Time: Impatience leads to runny slices. Let it chill for at least 4 hours.
- Overbeating Whipped Cream: Whip it until soft peaks form—going too far turns it grainy and eventually buttery.
- Not Tasting the Custard: Taste it before filling the crust—you can adjust for sweetness or cocoa intensity.
- Forgetting the Salt: That pinch of salt is tiny but mighty—it balances and intensifies the chocolate flavor.
What to Serve With Grandma’s Chocolate Pie?
Freshly Brewed Coffee
A warm cup of coffee complements the rich chocolate and makes each bite feel like a moment of luxury.
Vanilla Ice Cream
A cold scoop alongside a slice melts just enough to mingle with the warm, fudgy center—perfection.
Mixed Berries
A handful of fresh raspberries or blueberries add a tart brightness that balances the pie’s richness.
Dessert Wine
Try a small glass of ruby port or a sweet red wine for a sophisticated dessert pairing.
Iced Espresso
A chilled, bold espresso cuts through the creamy texture and refreshes your palate between bites.
Cold Milk
Sometimes, nothing beats a classic glass of milk with chocolate pie—comfort food at its finest.
Strawberry Coulis
A drizzle of fruity sauce over the whipped cream adds color, tang, and just the right touch of elegance.
Salted Nuts
A small handful of roasted, salted pecans or almonds on the side gives a savory crunch that contrasts beautifully with the soft, smooth pie.
Storage Instructions
Grandma’s Chocolate Pie stores like a dream, which makes it perfect for prepping ahead of time. Once the pie has fully set in the fridge, cover it loosely with plastic wrap or aluminum foil. It will keep well in the refrigerator for up to 4 days. Just make sure the whipped cream topping is added right before serving for the freshest texture.
If you’d like to store it even longer, you can freeze the pie (without the whipped cream) by wrapping it tightly in plastic wrap and foil. It freezes well for up to 2 months. To serve, thaw in the refrigerator overnight and add your fresh topping just before slicing.
Estimated Nutrition (Per Slice, based on 8 servings)
Please note: Values may vary based on exact ingredients and portion sizes.
- Calories: ~420
- Total Fat: 24g
- Saturated Fat: 14g
- Cholesterol: 110mg
- Sodium: 180mg
- Carbohydrates: 45g
- Fiber: 3g
- Sugars: 30g
- Protein: 6g
This chocolate pie is definitely a treat, rich and satisfying, so a little slice goes a long way!
Frequently Asked Questions
What kind of cocoa powder should I use?
Use unsweetened cocoa powder—either natural or Dutch-processed works well. Dutch cocoa will give you a smoother, deeper chocolate flavor, while natural cocoa has a slightly sharper, more classic taste.
Can I use a graham cracker crust instead?
Yes! A graham cracker crust (or even an Oreo crust) works beautifully with the rich chocolate filling and adds a nice crunch. Just be sure to chill or bake it per the crust’s instructions before filling.
How do I know when the filling is done?
The filling is ready when it thickens to a pudding-like texture and starts to bubble gently. Stir continuously and don’t remove from heat until it visibly coats the back of a spoon.
Can I make this pie dairy-free?
Absolutely! Swap the milk for unsweetened almond or oat milk and use dairy-free butter. Just keep in mind the texture might be slightly less creamy, but still delicious.
Can I make it ahead of time?
Yes! In fact, it’s best made a day ahead so it can set properly. Just hold off on adding whipped cream until right before serving.
Why is my filling lumpy?
Lumps can happen if the mixture is overheated or not stirred enough. If that happens, simply strain the hot filling through a fine mesh sieve before pouring it into the crust.
How can I get clean slices?
Use a sharp knife dipped in hot water (and wiped dry between each cut). This helps glide through the creamy filling without dragging.
Can I use a store-bought whipped topping?
You sure can! While fresh whipped cream is my go-to, store-bought versions work well and save time when you’re in a pinch.
Conclusion
Grandma’s Chocolate Pie is the kind of dessert that makes time slow down. Every slice is packed with rich chocolate flavor, a flaky golden crust, and a pillow of whipped cream on top—it’s pure comfort on a plate. Whether you’re reviving a family tradition or starting a new one, this pie brings that homemade, from-the-heart feeling into every bite. Serve it at a special gathering or on a quiet night in—either way, it’s bound to be remembered.

Grandma’s Chocolate Pie
- Prep Time: 15 minutes
- Chill Time: 4 hours
- Cook Time: 15 minutes
- Total Time: 4 hours 30 minutes
- Yield: 8 servings
Description
Rich, velvety, and full of nostalgia, Grandma’s Chocolate Pie is a beloved dessert that never goes out of style. With its silky chocolate custard filling, flaky golden crust, and fluffy whipped cream topping, it’s the perfect balance of comfort and elegance. Whether you’re looking for a quick breakfast treat, an easy dinner dessert, or classic food ideas to impress your guests, this easy recipe delivers every time. One bite and you’ll be transported straight to Grandma’s kitchen—where love, stories, and chocolate pie were always in generous supply.
Ingredients
- 1 9-inch pie crust (homemade or store-bought), pre-baked
- 1 cup granulated sugar
- 1/4 cup unsweetened cocoa powder
- 1/4 cup cornstarch
- 1/4 teaspoon salt
- 4 large egg yolks
- 2 3/4 cups whole milk
- 2 tablespoons unsalted butter
- 1 teaspoon vanilla extract
- Whipped cream, for topping
- Cocoa powder or chocolate shavings, for garnish (optional)
Instructions
- Pre-bake the pie crust at 375°F (190°C) for 15–18 minutes or until lightly golden. Let it cool completely.
- In a medium saucepan (off heat), whisk together sugar, cocoa powder, cornstarch, and salt.
- In a separate bowl, beat egg yolks. Slowly whisk yolks and milk into the dry mixture until smooth.
- Place the saucepan over medium heat and cook, stirring constantly, until the mixture thickens and starts to bubble (about 7–10 minutes).
- Remove from heat and stir in butter and vanilla until fully melted and smooth.
- Pour filling into the cooled crust. Let cool at room temperature for 15 minutes, then refrigerate for at least 4 hours or until set.
- Top with whipped cream and garnish with cocoa powder or chocolate shavings before serving.

