

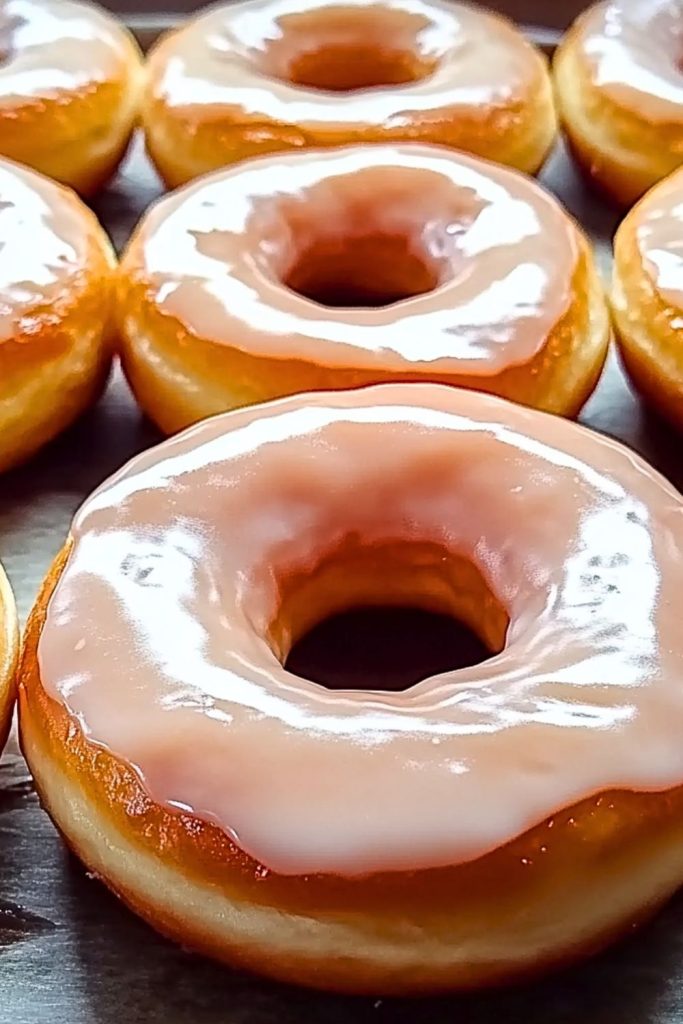
Golden, airy, and kissed with a shimmering vanilla glaze—Glazed Sourdough Donuts are the perfect union of classic comfort and modern artisan baking. These donuts are made using active sourdough starter, which not only helps them rise to fluffy perfection but also imparts a subtle tang that enhances their flavor beautifully. Whether you enjoy them fresh and warm or the next morning with coffee, each bite offers a pillowy texture and sweet finish that’s hard to beat.
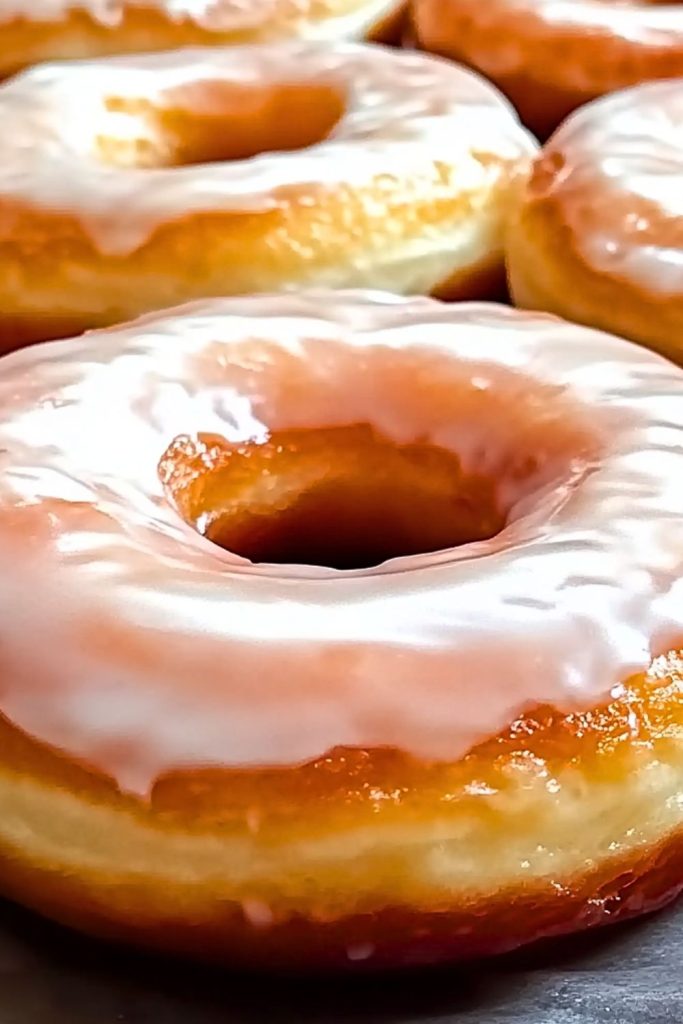
Unlike traditional yeast-raised donuts, these sourdough gems are fermented slowly, developing a richer taste and better digestibility. The glaze melts into the crispy edges and pools in the soft centers, making each donut as satisfying to look at as it is to devour. Homemade Glazed Sourdough Donuts are not just a treat—they’re an experience worth sharing.
Why You’ll Love This Glazed Sourdough Donuts Recipe
- Naturally Leavened: Uses your sourdough starter to ferment and rise, adding depth and slight tang to the dough.
- Incredibly Soft & Fluffy: The slow fermentation creates a cloud-like texture inside with a crisp golden edge.
- Aromatic & Irresistible: That warm vanilla glaze with a hint of sourdough magic? It’s what dreams are made of.
- Perfect for Special Occasions: Whether for weekend brunch, birthdays, or a cozy morning in, these donuts elevate any moment.
- Make-Ahead Friendly: Ferment the dough overnight and fry fresh in the morning!
Preparation Phase & Tools to Use (Essential Tools and Their Importance)
Creating Glazed Sourdough Donuts at home requires a bit of planning, but with the right tools and setup, you’ll make bakery-quality donuts in your own kitchen.
Essential Tools & Equipment:
- Stand Mixer with Dough Hook Attachment
This will make kneading much easier, especially since sourdough donut dough is enriched with eggs and butter. A stand mixer helps you achieve the right elasticity and strength without tiring your arms. - Mixing Bowls (preferably glass or stainless steel)
You’ll need a couple of large bowls—one for mixing and another for the long bulk fermentation. Glass bowls also help you visually monitor dough rise. - Digital Scale
Precision is key in sourdough baking. A digital scale ensures you get accurate measurements for both the starter and the rest of your ingredients. - Thermometer (Instant Read or Deep Fry)
Oil temperature is everything when frying donuts. Too hot and they burn outside, too cool and they absorb oil. An instant-read thermometer helps you fry at the perfect 350°F (175°C). - Dough Cutter or Bench Scraper
Helps in handling sticky dough without deflating it, and dividing the dough cleanly. - Rolling Pin
Needed to roll the dough evenly before cutting donut shapes. - Donut Cutter or 3-inch and 1-inch Round Cutters
For creating classic ring donuts. A dedicated donut cutter speeds things up and ensures uniformity. - Heavy Bottom Pot or Dutch Oven
Ensures even heating and safe deep-frying conditions. - Cooling Rack with Paper Towels
For draining excess oil and setting the glaze once applied.
Preparation Tips
- Feed Your Starter the Night Before
Ensure your sourdough starter is active and bubbly. This is crucial for proper fermentation and rise. - Plan for Overnight Fermentation
Start your dough in the evening so it can bulk ferment overnight. This not only develops flavor but also fits well into a relaxed baking schedule. - Keep the Dough Slightly Sticky
It should be soft and just slightly tacky—not dry. Don’t over-flour during kneading or shaping. - Warm Environment Helps
Let the dough proof in a warm spot (ideally 75–80°F). Use your oven with the light on or a proofing box. - Oil Your Hands & Surfaces
To prevent sticking while shaping or transferring the donuts, use a light coating of oil instead of extra flour. - Do a Test Fry
Fry one donut first to check oil temperature and adjust seasoning if needed before committing to the full batch.
Ingredients for This Glazed Sourdough Donuts Recipe
To make about 10–12 perfectly fluffy, golden-glazed sourdough donuts, here’s everything you’ll need. This recipe balances richness, lightness, and a subtle sourdough tang with a classic sweet vanilla glaze.
For the Donut Dough:
- 200g active sourdough starter (fed and bubbly)
- 500g all-purpose flour (plus more for dusting)
- 60g granulated sugar
- 10g salt
- 2 large eggs
- 180g whole milk (lukewarm, about 90°F)
- 60g unsalted butter (softened)
- 1 tsp vanilla extract
For the Glaze:
- 240g (2 cups) powdered sugar
- 3–4 tbsp whole milk (adjust for consistency)
- 1 tsp vanilla extract
- Pinch of salt (optional, to balance sweetness)
Optional Add-ins & Variations:
- Cinnamon or nutmeg (¼ tsp for a hint of spice in the dough)
- Citrus zest (lemon or orange, for brightness in the glaze)
- Maple or almond extract (as glaze alternatives to vanilla)
- Sprinkles or crushed nuts (for topping the glazed donuts)
Step 1: Make the Dough (Evening Before Frying)
In the bowl of your stand mixer, combine the active sourdough starter, flour, sugar, salt, eggs, and warm milk. Using the dough hook, mix on low until the ingredients come together, then increase to medium speed and knead for about 5–7 minutes.
Add the softened butter and vanilla extract gradually. Continue mixing until the dough is smooth, slightly sticky, and passes the windowpane test (stretch a small piece—it should be translucent without tearing).
Step 2: Bulk Fermentation (Overnight Rise)
Transfer the dough to a lightly oiled bowl. Cover tightly with plastic wrap or a lid and let it rest at room temperature for 30 minutes. Then refrigerate overnight (8–12 hours). This slow fermentation develops deep flavor and makes the dough easier to handle.
Step 3: Shape the Donuts
The next morning, remove the dough from the fridge and let it come to room temperature for about 1 hour.
On a lightly floured surface, roll out the dough to ½-inch thickness. Using a donut cutter (or two round cutters), cut out donuts and holes. Place them on parchment paper-lined baking trays. Gather scraps, rest them for 10 minutes, then re-roll to cut more donuts.
Step 4: Final Proof
Loosely cover the shaped donuts with a clean towel or plastic wrap. Let them proof in a warm spot (75–80°F) for 1.5–2 hours, or until they appear puffy and jiggle slightly when moved.
Step 5: Fry the Donuts
Heat oil in a heavy pot or Dutch oven to 350°F (175°C). Fry donuts in batches—do not overcrowd the pot. Cook each side for about 1–2 minutes or until golden brown.
Use a slotted spoon to remove donuts and place them on a wire rack lined with paper towels.
Step 6: Glaze the Donuts
In a bowl, whisk together powdered sugar, vanilla, and milk to form a smooth glaze.
While donuts are still warm (but not hot), dip the tops into the glaze. Place glazed side up on the cooling rack to let the glaze set.
Notes
- Use Active Sourdough Starter: Make sure your starter has been recently fed and is bubbly. Inactive or sluggish starter can result in dense, under-proofed donuts.
- Chill the Dough Overnight: Cold fermentation not only enhances flavor, but also firms up the dough, making shaping and handling much easier.
- Adjust Glaze Consistency: A slightly thick glaze that clings and drips slowly gives that picture-perfect sheen. If it’s too thin, it will soak in; too thick, and it won’t coat evenly.
- Fry in Small Batches: Frying 2–3 donuts at a time helps maintain consistent oil temperature, which is crucial for achieving even coloring and texture.
- Best Served Fresh: These donuts are absolutely divine when warm and freshly glazed. While still good the next day, they lose their airy texture over time.
Watch Out for These Mistakes While Cooking
- Skipping the Windowpane Test: Under-kneaded dough won’t hold enough structure to rise properly. Always check for elasticity and gluten development before proofing.
- Overproofing: Letting the donuts proof for too long can make them deflate when frying. If they rise too much, they may collapse and absorb excess oil.
- Incorrect Oil Temperature: Not using a thermometer can lead to soggy, greasy donuts (if the oil is too cool) or overly dark outsides with raw centers (if too hot).
- Flouring the Surface Too Much: Excess flour can toughen the donuts and burn in the oil. Instead, lightly oil your work surface and hands.
- Letting the Glaze Cool Too Much: If the glaze is cold or the donuts have cooled completely, the glaze won’t adhere properly and may appear dull or flaky.
- Crowding the Pot: Adding too many donuts at once lowers the oil temperature dramatically and results in uneven frying.
What to Serve With Glazed Sourdough Donuts?
These light, golden, and slightly tangy donuts are delightful on their own—but pairing them with the right beverage or side can elevate the entire experience. Whether you’re planning a brunch spread or just indulging on a cozy morning, these ideas bring out the best in every bite.
8 Recommendations:
- Hot Coffee or Cold Brew
A classic pairing. The slight bitterness of coffee balances the sweetness of the glaze perfectly. - Fresh Berries or a Berry Compote
A side of raspberries, strawberries, or blueberries adds freshness and acidity, enhancing the donut’s flavor. - Vanilla or Chai Latte
Warm, spiced drinks complement the vanilla glaze and bring cozy, aromatic notes. - Greek Yogurt with Honey
A creamy, tangy yogurt dip can add a refreshing contrast to the sweetness of the donut. - Sparkling Water with Citrus Slices
If serving as part of a brunch buffet, this light drink refreshes the palate between bites. - Scrambled Eggs with Herbs
Add a savory element to balance the sweetness—especially great for brunch tables. - Iced Matcha Latte
Earthy and vibrant, matcha offers a beautiful contrast to the donut’s sweetness and makes a visually stunning pairing. - Bacon or Turkey Sausage Links
For a sweet-and-savory twist, add crispy bacon or lean sausage to the plate for texture and saltiness.
Storage Instructions
While Glazed Sourdough Donuts are best enjoyed fresh on the day they’re fried, you can still store them for later without sacrificing too much quality.
Short-Term Storage:
- Room Temperature: Place leftover donuts in a single layer inside an airtight container. Keep them at room temperature for up to 1 day.
- Avoid Refrigeration: Storing in the fridge can dry them out and harden the glaze. It’s better to leave them out or freeze.
Freezing Instructions:
- Un-glazed Donuts: After frying and cooling, place the donuts on a tray to freeze individually. Once frozen, transfer to a freezer-safe bag or container for up to 2 months.
- Reheat: Warm in the oven at 300°F (150°C) for 5–7 minutes. Glaze after reheating for best texture and shine.
Estimated Nutrition (Per Donut)
Note: These are approximate values based on one glazed donut from a batch of 12.
- Calories: 310
- Total Fat: 12g
- Saturated Fat: 6g
- Cholesterol: 65mg
- Sodium: 190mg
- Total Carbohydrates: 45g
- Sugars: 22g
- Protein: 5g
- Fiber: 1g
These values may vary slightly depending on your portion size, thickness, and specific ingredients.
Frequently Asked Questions
1. Can I make the dough without a stand mixer?
Yes, you can knead the dough by hand, though it will take more time and effort due to the enriched ingredients (eggs, butter). Expect 10–15 minutes of consistent kneading to reach the right texture.
2. What type of sourdough starter should I use?
A 100% hydration (equal parts water and flour) starter made with all-purpose or bread flour works best. Make sure it’s active, bubbly, and recently fed.
3. Can I make the dough and fry it the same day?
Technically yes, but you’ll lose the complex flavor and digestibility benefits that come with overnight fermentation. For best results, plan ahead and cold-ferment overnight.
4. Why are my donuts greasy or soggy?
This usually happens when the oil is too cold. Always keep the oil temperature around 350°F (175°C) and fry in small batches to avoid temperature drops.
5. Can I bake instead of fry these donuts?
While you can bake them at 375°F (190°C) for 10–12 minutes, the texture won’t be the same—more like a fluffy roll than a donut. Frying gives that classic crisp exterior and fluffy inside.
6. How do I know when the dough is fully proofed?
Gently poke the dough with a floured finger—if the indentation springs back slowly and not completely, it’s ready to fry.
7. Can I change the glaze flavor?
Absolutely. Swap vanilla extract with almond, maple, lemon, or even coffee extract. Add spices like cinnamon or cardamom for extra warmth.
8. What oil is best for frying donuts?
Use a neutral, high-smoke-point oil like canola, peanut, or vegetable oil. Avoid olive oil or flavored oils, as they can overpower the donut’s taste.
Conclusion
Glazed Sourdough Donuts are more than just a weekend treat—they’re a rewarding baking project that bridges the gap between traditional sourdough craftsmanship and indulgent comfort food. With a gently tangy dough, beautifully airy texture, and a glossy vanilla glaze, these donuts deliver an irresistible combination of flavor and nostalgia.
They’re ideal for family brunches, special breakfasts, or just because you deserve something homemade and delicious. Once you’ve mastered the process, they’re sure to become a beloved staple in your sourdough repertoire. So grab your starter, dust off the rolling pin, and prepare to create something truly magical.

Glazed Sourdough Donuts
- Prep Time: 30 minutes
- Cook Time: 15 minutes
- Total Time: 45 minutes
- Yield: 10–12 donuts
Description
Wake up to the scent of warm, golden donuts straight from your kitchen. These Glazed Sourdough Donuts are soft, airy, and coated in a sweet, vanilla glaze that melts with every bite. Whether you’re looking for a quick breakfast idea, an easy recipe for a weekend treat, or delicious food ideas to impress guests, this recipe fits the bill. With a naturally fermented dough, these donuts offer a healthier spin and a depth of flavor that store-bought simply can’t match. This easy donut recipe brings bakery-quality results right to your breakfast table—perfect for brunch, dessert, or an anytime indulgence.
Ingredients
For the Dough:
- 200g active sourdough starter
- 500g all-purpose flour
- 60g granulated sugar
- 10g salt
- 2 large eggs
- 180g warm whole milk
- 60g unsalted butter, softened
- 1 tsp vanilla extract
For the Glaze:
- 240g powdered sugar
- 3–4 tbsp whole milk
- 1 tsp vanilla extract
- Pinch of salt (optional)
Instructions
- Mix the Dough: In a stand mixer, combine starter, flour, sugar, salt, eggs, and milk. Knead until combined, then add butter and vanilla. Mix until dough is smooth and stretchy.
- Bulk Ferment Overnight: Transfer dough to an oiled bowl. Cover and ferment in the fridge overnight (8–12 hours).
- Shape Donuts: Let dough sit at room temp for 1 hour. Roll to ½-inch thickness, then cut donuts using cutters.
- Final Proof: Place donuts on parchment-lined trays. Cover and let proof in a warm spot for 1.5–2 hours.
- Fry: Heat oil to 350°F. Fry donuts 1–2 minutes per side until golden. Transfer to paper towel-lined rack.
- Glaze: Whisk glaze ingredients until smooth. Dip warm donuts and place glazed side up on a rack to set.