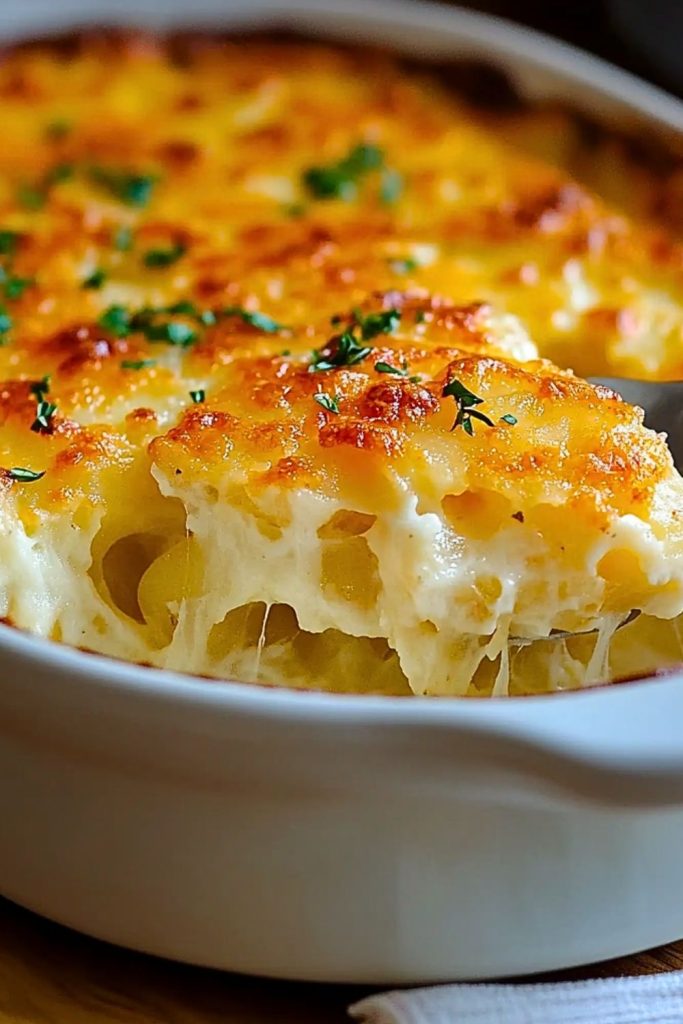
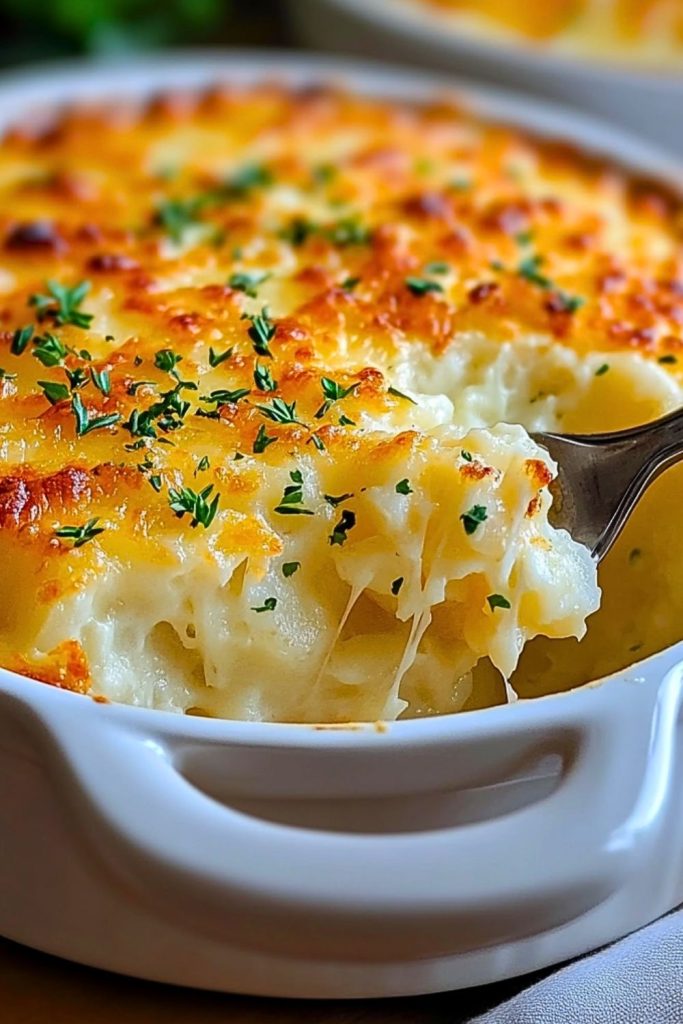
Golden, creamy, and irresistibly cheesy, Funeral Potatoes are the epitome of comfort food. This classic casserole dish, with its bubbly, melted cheese topping and rich, velvety potato base, is both satisfying and heartwarming. Often served at potlucks, family gatherings, and of course, post-funeral receptions where it got its name, it’s a dish that brings people together in moments of comfort and celebration alike. The crispy, golden top gives way to a creamy, cheesy interior that melts in your mouth with every bite.

Funeral Potatoes are versatile and simple to prepare, making them a perfect addition to any dinner table. Whether you’re serving them alongside a Sunday roast or offering them as the star of a cozy breakfast spread, this dish never disappoints. Its rich and comforting flavors make it an instant crowd-pleaser, loved by kids and adults alike. Plus, the ease of preparation makes it ideal for feeding a large group with minimal effort.
Why You’ll Love This Funeral Potatoes Recipe
- Ultra-Creamy Texture: The creamy mixture of potatoes, cheese, and sour cream creates a luscious base that’s impossible to resist.
- Cheesy Goodness: With melty, bubbly cheese on top, each bite is loaded with savory flavor.
- Perfect for Crowds: This casserole dish is excellent for potlucks, family gatherings, and holidays.
- Simple to Make: Quick prep and straightforward ingredients make this recipe approachable for any level of cooking skill.
- Customizable: Easily switch up the cheese, add bacon, or include vegetables for a personalized touch.
Preparation Phase & Tools to Use
To make the perfect Funeral Potatoes, having the right tools at your disposal can make all the difference. Here’s a breakdown of the essential tools and why they matter:
Essential Tools and Equipment
- Mixing Bowl: A large bowl is crucial for combining all the ingredients smoothly without making a mess.
- 9×13-Inch Baking Dish: This size is ideal for evenly spreading the potato mixture, ensuring consistent cooking and a golden-brown crust.
- Spatula or Wooden Spoon: For thorough mixing and easy transfer of the creamy mixture into the baking dish.
- Cheese Grater (if using fresh cheese): Freshly grated cheese melts better and provides a richer flavor.
- Aluminum Foil (Optional): Useful for covering the dish during the initial baking process to prevent over-browning.
- Oven Mitts: Safety first! Ensure you have a pair of thick oven mitts to handle hot dishes.
- Sharp Knife: Essential if you’re adding chopped onions, bacon, or vegetables for extra flavor.
Why These Tools Matter
- Even Cooking: Using a 9×13-inch baking dish ensures the casserole cooks evenly, avoiding undercooked or overcooked sections.
- Smooth Mixing: A large mixing bowl prevents spillage and ensures every ingredient is thoroughly combined.
- Safety: Using oven mitts and appropriate utensils helps prevent burns and injuries.
Preparation Tips
- Thaw the Hash Browns: If you’re using frozen hash browns, ensure they’re fully thawed before mixing. This prevents uneven cooking and excess moisture.
- Use Freshly Grated Cheese: Pre-packaged shredded cheese often contains anti-caking agents, which can affect how it melts. Grating your own cheese results in a smoother, creamier texture.
- Customize the Flavor: Add diced onions, garlic powder, or even crispy bacon bits for extra depth of flavor.
- Don’t Overmix: When combining the ingredients, mix gently to maintain a nice, creamy consistency. Overmixing can make the dish too dense.
- Check for Golden-Brown Perfection: Bake until the top is perfectly golden and bubbly for maximum flavor and texture.
- Let It Rest: Allow the dish to sit for 5–10 minutes before serving. This helps the ingredients settle and makes slicing easier.
Ingredients for This Funeral Potatoes Recipe
Creating this rich and comforting dish requires simple, easy-to-find ingredients. Here’s everything you’ll need:
Base Ingredients
- Frozen Hash Browns (shredded or diced): 1 (32-ounce) bag, thawed. Provides the starchy, creamy foundation for the dish.
- Sour Cream: 2 cups. Adds creaminess and a slight tangy flavor that balances the richness.
- Cream of Chicken Soup: 1 (10.5-ounce) can. Provides a savory, creamy binding element.
- Shredded Cheddar Cheese: 2 cups, freshly grated. Adds melty, cheesy goodness throughout.
Flavor Enhancers
- Onion (optional): 1 medium, finely chopped. Adds sweetness and depth.
- Garlic Powder: 1 teaspoon. Provides a subtle, savory undertone.
- Salt and Pepper: To taste. Essential for bringing out the flavors.
Topping Ingredients
- Shredded Cheddar Cheese: 1 cup, for sprinkling on top. Adds a golden, bubbly finish.
- Breadcrumbs or Crushed Cornflakes (optional): 1 cup. Provides a crispy, delightful topping.
- Butter (melted): ¼ cup, to mix with breadcrumbs or cornflakes for extra crispiness.
- Fresh Parsley (optional): For garnish, adding a touch of color and freshness.

Step 1: Prepare Your Ingredients
- Preheat your oven to 350°F (175°C).
- Thaw the frozen hash browns completely, draining any excess moisture if needed.
- If using fresh cheese, grate the cheddar and set aside.
- Finely chop the onion if you’re including it for extra flavor.
Step 2: Make the Creamy Mixture
- In a large mixing bowl, combine sour cream, cream of chicken soup, shredded cheddar cheese (2 cups), garlic powder, salt, and pepper.
- Stir until all ingredients are well combined, creating a rich and creamy mixture.
Step 3: Add Hash Browns & Onion
- Gently fold the thawed hash browns and chopped onion (if using) into the creamy mixture.
- Mix until the potatoes are evenly coated, but avoid overmixing to maintain texture.
Step 4: Transfer to Baking Dish
- Grease a 9×13-inch baking dish with cooking spray or butter.
- Spread the potato mixture evenly in the dish, smoothing the top with a spatula for even cooking.
Step 5: Add Cheese and Topping
- Sprinkle the remaining 1 cup of shredded cheddar cheese evenly over the top of the potato mixture.
- For an extra crispy topping, mix breadcrumbs or crushed cornflakes with melted butter, then spread over the cheese layer.
Step 6: Bake to Golden Perfection
- Place the dish in the preheated oven and bake for 45–50 minutes, or until the top is golden brown, bubbly, and the edges are crispy.
- If the top starts browning too quickly, cover loosely with foil and continue baking until done.
Step 7: Let It Rest & Serve
- Remove from the oven and allow the dish to rest for 5–10 minutes before serving. This helps the casserole firm up slightly and makes it easier to scoop.
- Garnish with fresh parsley if desired, and enjoy!
Notes
- Make-Ahead Option: You can assemble Funeral Potatoes up to 24 hours in advance. Simply cover the dish tightly with plastic wrap and refrigerate until you’re ready to bake.
- Using Fresh Potatoes: If you prefer using fresh potatoes, peel and grate about 6 medium potatoes, then soak them briefly in cold water and drain well before mixing.
- Cream Soup Alternatives: Substitute cream of chicken soup with cream of mushroom or cream of celery if you prefer a vegetarian version or a different flavor profile.
- Spice It Up: For a hint of heat, add chopped jalapeños, paprika, or cayenne pepper to the creamy mixture.
- Serving Style: While traditionally served as a side dish, you can easily transform Funeral Potatoes into a main dish by adding cooked chicken, bacon, or sausage.
Watch Out for These Mistakes While Cooking
- Skipping Thawing the Hash Browns: Using frozen potatoes will result in uneven cooking and excess moisture, leading to a soggy dish.
- Using Pre-Shredded Cheese: Freshly grated cheese melts better and gives a smoother, creamier texture. Pre-shredded varieties often contain anti-caking agents that hinder melting.
- Overmixing the Potatoes: Stirring too aggressively can break down the potatoes, making the casserole dense rather than creamy.
- Baking at Too High a Temperature: Baking above 350°F (175°C) can cause the top to brown before the inside is fully cooked.
- Forgetting to Let It Rest: Serving the dish straight from the oven can cause it to fall apart. Letting it rest allows the creamy mixture to settle for better texture.
- Not Using Enough Butter in the Topping: Dry breadcrumbs or cornflakes won’t crisp up properly without the added butter.
- Overcrowding the Baking Dish: Trying to fit too much into one dish can result in uneven cooking. Stick to the recommended 9×13-inch pan.
What to Serve With Funeral Potatoes?
Funeral Potatoes are rich and creamy, making them a fantastic side dish for various meals. Whether you’re serving them for breakfast, lunch, or dinner, here are some delightful pairing ideas:
1. Roast Chicken or Turkey
The comforting, creamy potatoes pair perfectly with tender, juicy roast chicken or turkey. The savory, crispy skin contrasts beautifully with the soft, cheesy casserole.
2. Ham
A classic pairing, especially during holiday gatherings. The saltiness of glazed ham complements the creamy richness of Funeral Potatoes.
3. Grilled Steak
The bold, smoky flavors of a well-grilled steak make for an excellent contrast to the smooth, cheesy potatoes.
4. Pork Chops
Juicy pork chops, whether baked, grilled, or pan-seared, provide a hearty protein pairing that balances the creamy texture of the casserole.
5. Green Beans or Asparagus
Adding a crisp, fresh vegetable like steamed or sautéed green beans or asparagus helps balance out the richness of the potatoes.
6. Eggs & Bacon (for Breakfast)
Funeral Potatoes make a fantastic breakfast side, especially when paired with scrambled eggs, crispy bacon, or breakfast sausages.
7. Meatloaf
The savory, comforting nature of meatloaf is a perfect match for this cheesy, creamy side dish.
8. Salad
A light, crisp salad with a tangy vinaigrette provides a refreshing contrast that cuts through the richness of the casserole.
Storage Instructions
Proper storage ensures that your Funeral Potatoes stay fresh and delicious, even as leftovers. Here’s how to do it:
Refrigeration
- Storing Leftovers: Allow the dish to cool completely before transferring it to an airtight container or covering the baking dish tightly with plastic wrap or foil.
- Shelf Life: Store in the refrigerator for up to 3–4 days.
Freezing
- Before Baking: Prepare the dish as instructed but do not bake. Cover tightly with plastic wrap and foil, then freeze for up to 2 months. Thaw overnight in the refrigerator before baking.
- After Baking: If you have leftover cooked Funeral Potatoes, you can freeze them, but the texture may be slightly affected. Store in an airtight container for up to 1 month.
Reheating
- Oven Method (Recommended): Preheat oven to 350°F (175°C). Bake covered with foil for 20–25 minutes, or until heated through.
- Microwave Method: Heat individual portions on a microwave-safe plate for 1–2 minutes, or until hot.
Estimated Nutrition (Per Serving)
Serving Size: 1 cup (Approximate, based on a 9×13-inch pan serving 10 portions)
- Calories: 380
- Protein: 9g
- Carbohydrates: 30g
- Fat: 25g
- Saturated Fat: 15g
- Cholesterol: 70mg
- Sodium: 800mg
- Sugar: 2g
- Fiber: 2g
Note: Nutritional values may vary based on ingredient brands and portion sizes.
Frequently Asked Questions
1. Can I make Funeral Potatoes ahead of time?
Yes! You can prepare the dish up to 24 hours in advance. Simply assemble, cover tightly with plastic wrap, and refrigerate until you’re ready to bake.
2. Can I use fresh potatoes instead of frozen hash browns?
Absolutely. Peel and grate about 6 medium potatoes, soak briefly in cold water, drain, and dry well before mixing with the other ingredients.
3. How do I make this recipe vegetarian?
Swap the cream of chicken soup for cream of mushroom or cream of celery soup. You can also add vegetables like bell peppers or mushrooms for extra flavor.
4. Can I freeze Funeral Potatoes?
Yes, both unbaked and baked versions can be frozen. For best results, freeze before baking and thaw overnight in the fridge before cooking.
5. How do I make the topping extra crispy?
Mix breadcrumbs or crushed cornflakes with melted butter before sprinkling on top. This adds both flavor and crunch.
6. What type of cheese works best for Funeral Potatoes?
Sharp Cheddar cheese is a classic choice for its rich flavor. However, you can mix in Monterey Jack, Colby, or Pepper Jack for extra creaminess or heat.
7. Can I make this dish gluten-free?
Yes! Use gluten-free cream soup and gluten-free breadcrumbs or crushed rice cereal for the topping.
8. Why are my Funeral Potatoes soggy?
This usually happens if you didn’t fully thaw the hash browns or if there’s too much moisture in the mixture. Ensure proper thawing and draining for best results.
Conclusion
Funeral Potatoes are the ultimate comfort food, providing cheesy, creamy goodness in every bite. With their simple preparation and universally loved flavor, they’re perfect for gatherings, special occasions, or even a cozy family dinner. Whether you’re making them as a holiday side dish or a hearty breakfast option, this recipe is sure to become a staple in your kitchen. Enjoy every bite of this warm and satisfying classic!

Funeral Potatoes: A Comforting, Cheesy Casserole Delight
- Prep Time: 15 minutes
- Cook Time: 45 minutes
- Total Time: 1 hour
- Yield: 10 servings
Description
Golden, creamy, and irresistibly cheesy, Funeral Potatoes are the ultimate comfort food that everyone loves. This simple yet rich casserole combines shredded potatoes, sour cream, cheddar cheese, and a crispy topping, making it the perfect dish for potlucks, holiday gatherings, or cozy family dinners. Whether you’re serving it as a breakfast side or a hearty dinner option, this easy recipe delivers pure satisfaction with every bite.
Ingredients
- Frozen Hash Browns (shredded or diced): 1 (32-ounce) bag, thawed.
- Sour Cream: 2 cups.
- Cream of Chicken Soup: 1 (10.5-ounce) can.
- Shredded Cheddar Cheese: 2 cups, freshly grated.
- Onion (optional): 1 medium, finely chopped.
- Garlic Powder: 1 teaspoon.
- Salt and Pepper: To taste.
- Shredded Cheddar Cheese (for topping): 1 cup.
- Breadcrumbs or Crushed Cornflakes (optional): 1 cup.
- Butter (melted): ¼ cup.
- Fresh Parsley (optional): For garnish.
Instructions
- Preheat oven to 350°F (175°C).
- Thaw frozen hash browns completely and drain any excess moisture.
- In a large mixing bowl, combine sour cream, cream of chicken soup, shredded cheddar cheese (2 cups), garlic powder, salt, and pepper. Mix well.
- Add hash browns and chopped onion (if using) to the mixture and stir gently until coated.
- Grease a 9×13-inch baking dish and spread the mixture evenly.
- Sprinkle 1 cup of shredded cheddar cheese over the top.
- For a crispy topping, mix breadcrumbs or crushed cornflakes with melted butter and spread over the cheese layer.
- Bake in preheated oven for 45–50 minutes, or until golden brown and bubbly.
- Remove from oven and let rest for 5–10 minutes before serving.

