

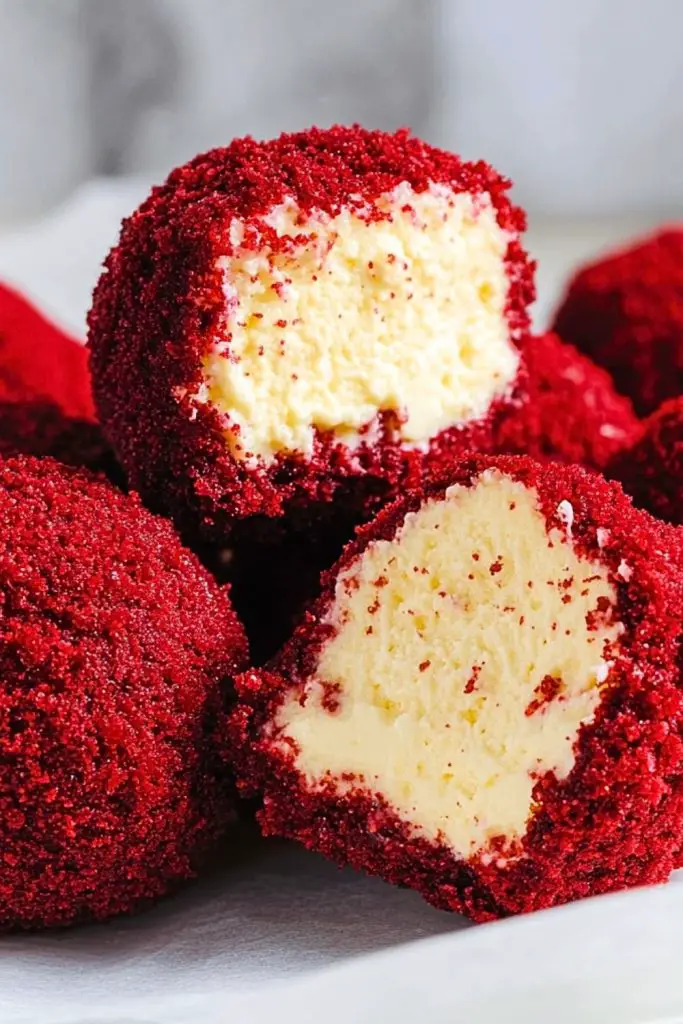
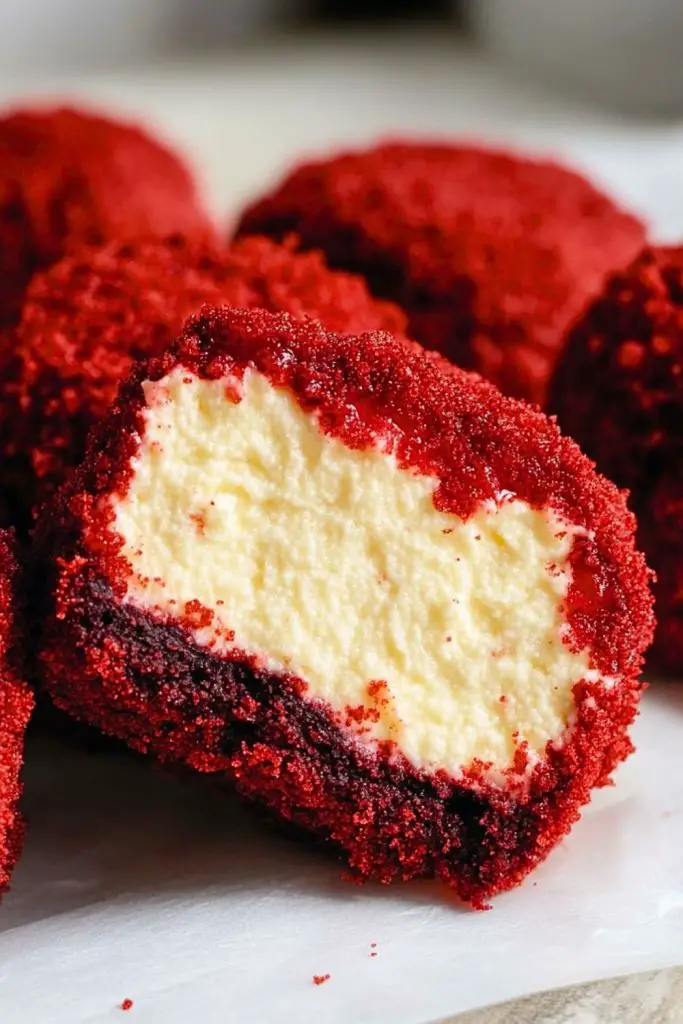
I can still remember the first time I made these Red Velvet Cheesecake Bites—I was looking for something indulgent, fun, and portable to bring to a holiday party. What started as a spontaneous idea quickly turned into a crowd-favorite recipe I now get asked to make for every gathering. These bite-sized treats combine the silky richness of classic cheesecake with the irresistible flavor and bold hue of red velvet cake. Each one is creamy on the inside with a vibrant, velvety crumble on the outside that’s almost too pretty to eat (almost).
What I love most is how they hit all the right notes—sweet, tangy, creamy, and just a little bit decadent. They’re easy enough to make ahead of time, freeze beautifully, and they’re the kind of dessert that makes people go, “Wait, you made these?” Whether you’re prepping for a party, gifting a homemade treat, or just craving something rich and delightful, these bites deliver every single time.
Why You’ll Love This Red Velvet Cheesecake Bites Recipe
- Perfect for any occasion: From holidays to birthdays, they fit right in.
- No baking required: Yep, you read that right—no oven time needed.
- Make-ahead friendly: These store beautifully in the fridge or freezer.
- Portable and giftable: Great for dessert trays, lunchbox surprises, or edible gifts.
- Crowd pleaser: They vanish quickly wherever I bring them.
- Texture heaven: Soft, creamy cheesecake center with a slightly crunchy red velvet shell.
What Kind of Cake Should I Use for Red Velvet Cheesecake Bites?
You’ll want to use a classic red velvet cake with a soft, moist crumb—either homemade or store-bought will do the trick. When I’m in a rush, I honestly just grab a box mix and bake it the night before. The key is to let it cool completely before crumbling. If you have leftover red velvet cupcakes or a sheet cake that didn’t get frosted, this is a genius way to repurpose them. I’ve even used bakery slices in a pinch, and they worked beautifully. Just make sure the cake is soft but not too sticky—it should crumble easily without turning into paste.
Options for Substitutions
One of the best things about these cheesecake bites is how adaptable they are. Here are a few ideas if you need to make a switch:
- Cake Type: No red velvet? Chocolate cake or devil’s food cake works well and still gives that dramatic color contrast with the cheesecake center.
- Cream Cheese: If you want something a bit lighter, Neufchâtel cheese is a great substitute.
- Sweetener: I’ve used powdered erythritol instead of sugar for a lower-sugar version with solid results.
- Gluten-Free: Swap in a gluten-free red velvet cake mix or your favorite GF cake recipe.
- Vegan Cream Cheese: There are some good plant-based cream cheeses out there—go with one that’s thick and tangy.
- Flavor Boosters: A splash of vanilla extract or a pinch of cinnamon in the cheesecake base adds depth.
You can really play with the flavors once you’ve nailed the basic texture. Want a peppermint version for the holidays? Toss in crushed candy canes. Craving a little crunch? Roll the finished bites in mini chocolate chips or toasted nuts.
Ingredients for Red Velvet Cheesecake Bites
Each ingredient in this recipe has a specific purpose—bringing the texture, flavor, and overall magic of these bites to life. Let’s walk through the essentials:
Red Velvet Cake
This forms the outer coating and contributes that signature cocoa-vanilla flavor and deep red color. You’ll crumble it finely and use it to coat each cheesecake ball. Whether you use a boxed mix or homemade, make sure it’s moist and completely cooled before crumbling.
Cream Cheese
The star of the filling—smooth, tangy, and rich. You want it softened to room temperature so it blends easily without lumps. Full-fat cream cheese gives the best texture and flavor.
Powdered Sugar
This adds sweetness to the cheesecake center without making it grainy. It also helps stabilize the mixture, giving it a soft but scoopable consistency.
Vanilla Extract
Just a splash brings warmth and depth to the cream cheese mixture. It enhances the tanginess and balances the richness perfectly.
Red Food Coloring (optional)
If your red velvet cake isn’t as vibrant as you’d like, you can add a few drops of red food coloring to the crumbled cake for a deeper red finish.
Butter (optional)
Some variations use a bit of melted butter in the cheesecake mixture for added richness and a firmer texture when chilled. It’s optional but can help if your mix feels too soft.
Step 1: Bake and Cool the Red Velvet Cake
Start by baking your red velvet cake according to your recipe or box instructions. Once it’s done, let it cool completely—this is crucial. Warm cake will clump instead of crumble and might melt your cheesecake filling later on. I usually bake the cake the day before and chill it in the fridge overnight for the perfect crumb texture.
Step 2: Make the Cheesecake Filling
In a large mixing bowl, beat the softened cream cheese until smooth. Add powdered sugar and vanilla extract, then continue mixing until everything is creamy and well blended. The mixture should be thick enough to scoop and roll—if it’s too soft, pop it in the fridge for 15–20 minutes.
Step 3: Form the Cheesecake Balls
Using a small cookie scoop or spoon, portion out the cheesecake mixture and roll it into bite-sized balls with your hands. Line a baking sheet with parchment paper and place the balls on it. Once all the balls are rolled, freeze them for about 20–30 minutes. This helps them firm up for easy coating.
Step 4: Crumble the Red Velvet Cake
While the cheesecake balls chill, crumble your red velvet cake into fine crumbs using your hands or a food processor. You want the texture to be sandy and even, without any large chunks.
Step 5: Coat the Cheesecake Bites
Roll each chilled cheesecake ball in the red velvet cake crumbs, pressing gently so the crumbs stick evenly. Make sure they’re fully coated for that signature look and taste. You can give them a light second roll if you want a thicker red velvet coating.
Step 6: Chill Before Serving
Place the coated bites back in the fridge for at least 1 hour before serving. This helps them set and enhances the flavor. You can also freeze them if you’re making them ahead of time—just thaw for 10–15 minutes before enjoying.
How Long to Chill the Red Velvet Cheesecake Bites
Since this is a no-bake dessert, the focus is all about chilling—not cooking. Here’s the timing breakdown for best results:
- Initial Chill (after forming): Freeze the cheesecake balls for 20–30 minutes. This firms them up so they’re easier to handle and coat in cake crumbs.
- Final Chill (after coating): Refrigerate the finished bites for at least 1 hour before serving. This gives them time to set and lets the flavors develop beautifully.
- Make-ahead Option: You can freeze them for up to 2 months. Just thaw in the fridge overnight or leave at room temp for 15 minutes before eating.
Tips for Perfect Red Velvet Cheesecake Bites
Getting that dreamy balance of creamy inside and crumbly outside isn’t hard, but a few tips can take your bites from good to next-level:
- Use room temperature cream cheese to avoid lumps in your filling.
- Chill the filling before rolling if it’s too soft to handle—don’t skip this!
- Use a food processor to make the red velvet crumbs super fine. The smoother the crumb, the more polished the final look.
- Don’t overwork the coating—press the cake crumbs gently to avoid squishing the soft centers.
- Wear gloves if you’re rolling a big batch—the red velvet color can stain.
- Add a pinch of salt to the cheesecake mix to enhance flavor and cut sweetness.
- Get creative with coatings—try sprinkles, mini chocolate chips, or even cocoa powder for a twist.
- Make a test bite first to tweak the texture or sweetness before rolling the entire batch.
Watch Out for These Mistakes While Cooking
Even though Red Velvet Cheesecake Bites are pretty straightforward, a few missteps can throw off the texture or flavor. Here’s what to look out for:
- Using warm cake – If your cake is still warm when you crumble it, the moisture can make the crumbs clump together and affect the coating texture. Always let it cool completely.
- Skipping the chill time – If you don’t chill the cheesecake filling before coating, it’ll be too soft to shape and roll. You’ll end up with messy bites that fall apart.
- Overmixing the cream cheese – Mixing too long can make the filling too soft and airy. Blend just until smooth for the perfect dense, creamy texture.
- Making crumbs too coarse – Larger chunks won’t stick well and will make the coating look uneven. Use your hands or a food processor to get that fine, sandy consistency.
- Using low-fat cream cheese – It’s tempting, but it can make the filling watery and bland. Stick with full-fat for richness and structure.
- Skipping the taste test – Before rolling all the cheesecake balls, taste one and adjust the sweetness or vanilla as needed.
- Forgetting to line the tray – Always use parchment or wax paper on your tray to prevent sticking and make cleanup easier.
- Letting them sit out too long – These bites soften quickly at room temp. Serve chilled, especially if they’ll be sitting out on a party table.
What to Serve With Red Velvet Cheesecake Bites
If you’re building a dessert spread or just want to add some flair, here are some great pairings:
Coffee or Espresso
The slight bitterness of a hot espresso balances the sweetness and richness of the bites beautifully.
Fresh Berries
Strawberries, raspberries, or blueberries on the side add a refreshing, tangy contrast.
Chocolate Sauce
Drizzle a little over the top or serve it on the side for dipping—extra decadent!
Sparkling Wine or Champagne
The fizz and lightness cut through the creaminess and elevate the whole experience.
Vanilla Bean Ice Cream
A scoop of cold, creamy vanilla with your bites makes an indulgent plated dessert.
Iced Latte
Perfect for a warm day and pairs well with the tangy-sweet flavor of the cheesecake.
Assorted Mini Cupcakes
Create a fun dessert board with other mini sweets for variety and color.
Salted Caramel Sauce
Drizzle a little over the top or let guests dip—it’s an unexpected but magical combo.
Storage Instructions
One of the best things about Red Velvet Cheesecake Bites is how well they store, making them perfect for prepping ahead or keeping a stash on hand for sweet cravings.
Refrigerator:
Store the bites in an airtight container in the fridge for up to 5 days. Place a sheet of parchment paper between layers to keep them from sticking or smudging.
Freezer:
These freeze beautifully! Place the bites on a baking sheet and freeze until firm, then transfer to a freezer-safe container or bag. They’ll last up to 2 months this way. To enjoy, just thaw in the fridge overnight or at room temperature for about 15 minutes.
Make-Ahead Tip:
If you’re prepping for a party or event, make them a few days in advance and chill or freeze them. They actually taste better once they’ve had time to set and the flavors meld together.
Estimated Nutrition
Keep in mind that nutrition can vary slightly depending on the exact ingredients and proportions, but here’s a rough estimate per bite (based on a batch of 24):
- Calories: 110
- Total Fat: 6g
- Saturated Fat: 4g
- Cholesterol: 20mg
- Sodium: 85mg
- Carbohydrates: 12g
- Sugars: 10g
- Protein: 1g
These bites are indulgent, but they’re also portion-controlled, so you can enjoy one (or two) without overdoing it.
Frequently Asked Questions
What’s the best way to crumble the red velvet cake?
Use your hands if the cake is soft and fresh, or a food processor for a finer, more uniform crumb. Just make sure the cake is fully cooled—chilled cake crumbles even better.
Can I make these bites without red velvet cake?
Absolutely! Chocolate cake or even a vanilla cake dyed red works well. You’ll still get the same creamy center, just with a different flavor base.
How do I keep the cheesecake mixture from sticking to my hands?
Chill the mixture first, and lightly grease your hands with a bit of butter or oil before rolling. A cookie scoop also helps maintain size and shape without too much mess.
Can I add mix-ins to the cheesecake center?
Yes! Mini chocolate chips, crushed Oreos, or a swirl of raspberry jam can add extra texture and flavor. Just don’t overdo it—too much can make the filling tricky to shape.
Are these bites okay to leave out at room temperature?
They’re best served chilled. They can stay at room temp for about 1–2 hours, but any longer and they may soften too much. Keep them cool until just before serving.
Can I dip them in chocolate instead of cake crumbs?
Definitely! Dip the frozen cheesecake balls in melted chocolate and let them set for a candy-coated version. Still delicious, just a different texture and finish.
How can I make these more festive for holidays?
Add themed sprinkles, drizzle with colored chocolate, or mix in crushed peppermint for a winter spin. They’re easy to dress up for any occasion.
Do I need to use a stand mixer?
Nope! A handheld electric mixer or even a sturdy spatula works fine for blending the filling. Just make sure the cream cheese is softened to avoid lumps.
Conclusion
Red Velvet Cheesecake Bites are the kind of dessert that checks every box—creamy, rich, eye-catching, and incredibly easy to make. Whether you’re bringing them to a party, making them for your family, or sneaking a late-night treat from the fridge (guilty!), they always hit the spot. I love how flexible they are with flavors and decorations, and they never fail to impress.
Once you make these, don’t be surprised if they become your go-to no-bake treat. They’re quick to prep, easy to share, and most importantly, ridiculously delicious.

EASY Red Velvet Cheesecake Bites
- Prep Time: 30 minutes
- Cook Time: 1 hour 30 minutes
- Total Time: 2 hours
- Yield: 24 bites
Description
If you’re craving a dessert that’s as gorgeous as it is indulgent, Red Velvet Cheesecake Bites are your new go-to. These no-bake treats bring together rich red velvet cake crumbs and a creamy cheesecake center in bite-sized form—perfect for parties, gifts, or a poppable snack at home. This easy recipe is ideal for anyone looking for quick dessert ideas, fun baking projects, or elegant holiday bites. With their striking color and melt-in-your-mouth texture, they’re guaranteed to disappear fast. Plus, they store like a dream and require minimal fuss. Whether you’re looking for a quick breakfast treat, sweet snack, or dessert table favorite, these bites have you covered.
Ingredients
- 1 prepared red velvet cake (homemade or from box mix, fully cooled)
- 8 oz full-fat cream cheese, softened
- 1/2 cup powdered sugar
- 1 tsp vanilla extract
Optional:
- A few drops of red food coloring (for brighter crumb color)
- 1 tbsp melted butter (to firm up cheesecake filling)
Instructions
- Bake and fully cool your red velvet cake. Crumble it finely using your hands or food processor.
- In a bowl, beat the softened cream cheese until smooth.
- Add powdered sugar and vanilla, mixing until well combined.
- Scoop and roll the cheesecake mixture into small balls.
- Place balls on a parchment-lined tray and freeze for 20–30 minutes.
- Roll each ball in red velvet cake crumbs, pressing gently to coat.
- Chill the coated bites for at least 1 hour before serving.
- Store leftovers in the fridge for up to 5 days, or freeze up to 2 months.