

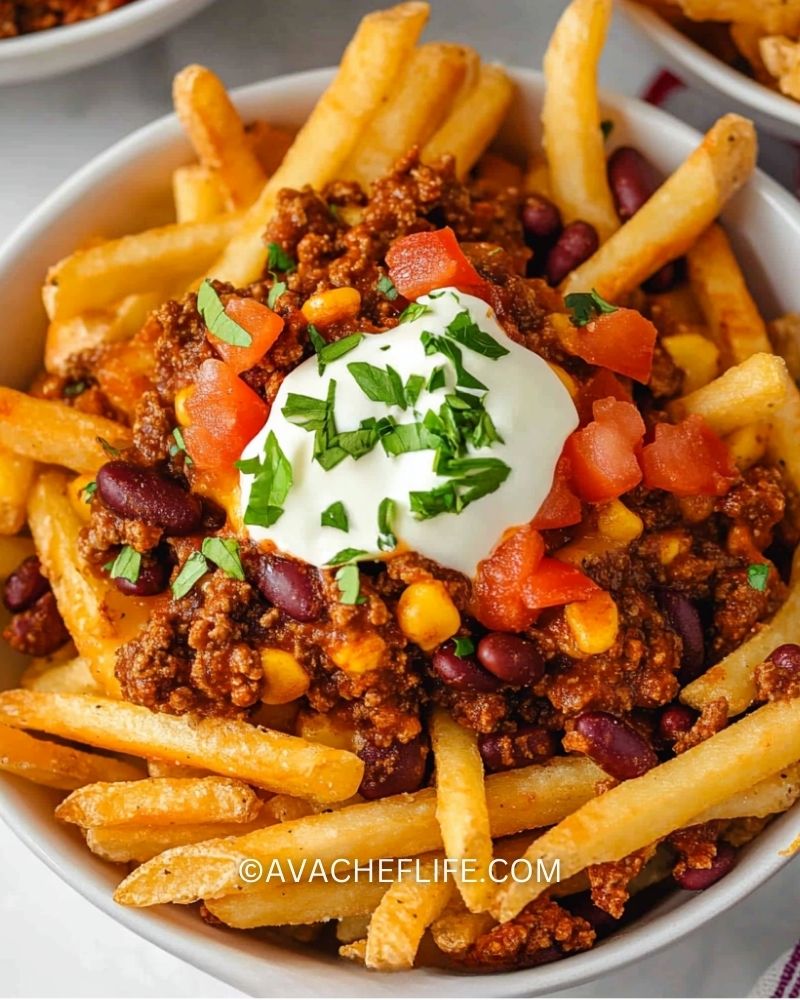
There’s something irresistible about a plate of chili cheese fries. The combination of crispy golden fries, rich and hearty chili, and gooey melted cheese is the ultimate comfort food. Whether you’re making them for a game night, a family gathering, or just to satisfy a craving, this dish delivers a satisfying balance of textures and bold flavors.
I love making chili cheese fries at home because it allows me to control every layer—choosing the crispiest fries, cooking a flavorful homemade chili, and topping it all with just the right amount of cheese and garnishes. Plus, they’re surprisingly easy to make! If you’re looking for a fun, shareable dish that never fails to impress, this recipe is a must-try.
Why You’ll Love These Chili Cheese Fries
- Packed with flavor – Savory, cheesy, and slightly spicy, these fries hit all the right notes.
- Easy to customize – Swap out ingredients or add your favorite toppings.
- Perfect for sharing – A great dish for parties, gatherings, or even movie nights.
- Hearty and filling – The chili adds a protein-packed punch that makes these fries a meal on their own.
What Kind of Fries Should I Use?
The foundation of chili cheese fries is, of course, the fries themselves. You want a fry that holds up to the weight of the chili and cheese without turning soggy too quickly. Thick-cut fries, crinkle-cut, or even waffle fries work best because they have more surface area to catch all the toppings. If you prefer a crunchier base, opt for steak fries or double-fry your fries for extra crispiness.
For a quick and easy option, frozen fries baked or air-fried until golden brown work great. However, if you’re in the mood to go all out, making homemade fries from fresh potatoes will take this dish to another level.
Options for Substitutions
Fries Alternatives
- Sweet potato fries – Adds a slightly sweet contrast to the savory chili.
- Tater tots – A fun and crispy swap for traditional fries.
- Baked potato wedges – A thicker, heartier alternative.
- Tortilla chips – Turns this into a chili cheese nacho variation.
Cheese Options
- Cheddar cheese – Classic choice that melts beautifully.
- Pepper Jack – Adds a bit of spice.
- Mozzarella – Creamy and stretchy melt.
- Vegan cheese – Dairy-free option for plant-based eaters.
Chili Variations
- Turkey or chicken chili – A leaner alternative to beef.
- Vegetarian chili – Use beans, lentils, or plant-based meat substitutes.
- Spicy chili – Add jalapeños or extra chili powder for heat.
Topping Ideas
- Sour cream – Adds a creamy tang that balances the spice.
- Green onions – Fresh and slightly sharp flavor.
- Jalapeños – Extra heat for spice lovers.
- Avocado or guacamole – A creamy and refreshing twist.
Ingredients for These Chili Cheese Fries
Each ingredient plays a key role in making these chili cheese fries absolutely delicious. Here’s what you’ll need:
For the Fries
- Frozen or fresh-cut fries – The crispy base that holds all the toppings. Choose thick-cut, crinkle, or waffle fries for the best texture.
For the Chili
- Ground beef (or turkey) – The hearty, protein-packed foundation of the chili.
- Kidney beans or black beans – Adds texture and a rich, earthy flavor.
- Tomato sauce – Gives the chili a thick, savory base.
- Diced tomatoes – Brings a slight acidity and freshness to balance the richness.
- Onion & garlic – Essential aromatics that build depth in the chili.
- Chili powder & cumin – The key spices that give the chili its signature warmth.
- Paprika & cayenne (optional) – Adds smokiness and a little heat if you like it spicy.
- Salt & pepper – Basic seasonings to enhance all the flavors.
For the Cheese & Toppings
- Shredded cheddar cheese – The perfect melty topping for a gooey, cheesy bite.
- Sour cream – A creamy, tangy contrast to the hearty chili.
- Diced tomatoes – A fresh topping that adds a burst of color and juiciness.
- Chopped cilantro or green onions – For a bright, herby finish.
- Jalapeños (optional) – If you love a spicy kick, add some sliced jalapeños on top.
Step 1: Prepare the Fries
Start by cooking your fries according to the package instructions or your preferred method. If using frozen fries, bake or air-fry them until golden and crispy. For homemade fries, cut potatoes into strips, soak them in cold water for 30 minutes, then fry or bake them for a crispier texture.
Step 2: Cook the Chili
In a large skillet over medium heat, cook the ground beef (or turkey) until browned, breaking it up with a spatula. Drain any excess grease. Add the chopped onions and garlic, cooking until softened and fragrant.
Step 3: Add the Chili Ingredients
Stir in the diced tomatoes, tomato sauce, kidney beans, chili powder, cumin, paprika, salt, and pepper. Let the chili simmer for about 15–20 minutes, stirring occasionally, until it thickens. If you like it spicier, add cayenne pepper or sliced jalapeños.
Step 4: Melt the Cheese
While the chili is simmering, shred your cheddar cheese (or any cheese of your choice). You can melt it directly over the hot fries or make a cheese sauce by heating shredded cheese with a little milk until smooth.
Step 5: Assemble the Chili Cheese Fries
Place the crispy fries on a serving plate or a large baking sheet. Spoon the hot chili generously over the fries, making sure every bite is loaded with flavor. Sprinkle the shredded cheese on top and let it melt naturally or place the tray under the broiler for a minute to get it extra gooey.
Step 6: Add Toppings & Serve
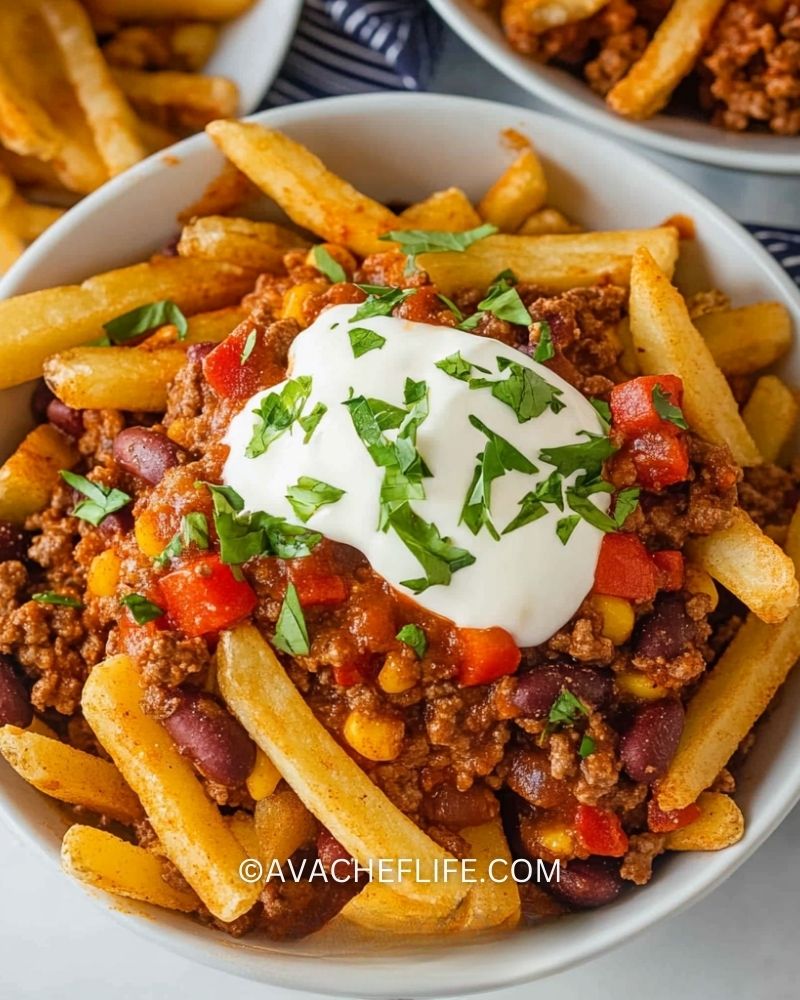
Finish with your favorite toppings like sour cream, diced tomatoes, green onions, cilantro, or jalapeños. Serve immediately while everything is hot and melty. Enjoy your homemade chili cheese fries!
How Long to Cook the Chili Cheese Fries
The total cooking time depends on whether you’re making everything from scratch or using pre-made ingredients. Here’s a rough breakdown:
- Fries: 20–25 minutes (baked) or 10–15 minutes (air-fried or deep-fried).
- Chili: 20–25 minutes to simmer and develop flavor.
- Cheese melting: 1–2 minutes under the broiler or immediately when placed on hot chili.
- Total time: About 40–50 minutes, depending on your cooking method.
If you’re in a hurry, you can use canned chili and pre-shredded cheese to cut the time in half.
Tips for Perfect Chili Cheese Fries
- Use thick-cut or crinkle fries – They hold up better under the weight of chili and cheese.
- Double-fry for extra crispiness – If making homemade fries, fry them twice for maximum crunch.
- Drain excess grease from the chili – This prevents soggy fries and keeps the dish balanced.
- Shred your own cheese – Pre-shredded cheese contains anti-caking agents that prevent smooth melting.
- Layer the toppings strategically – Start with fries, then chili, followed by cheese to let the heat melt it naturally.
- Serve immediately – Chili cheese fries are best eaten fresh before they get soggy.
- Make it your own – Add toppings like jalapeños, avocado, or even a fried egg for a unique twist!
Watch Out for These Mistakes While Cooking
- Using thin fries – Skinny fries or shoestring fries will get soggy too fast under the chili. Opt for thick-cut, crinkle-cut, or waffle fries.
- Not draining the chili properly – Too much liquid in the chili will make the fries mushy. Let the chili simmer until thick, and drain excess grease from the meat.
- Overloading with cheese before melting – Layering too much cheese at once can prevent it from melting evenly. Sprinkle in layers or melt it into a sauce for better coverage.
- Not serving immediately – Chili cheese fries are best eaten fresh! Letting them sit too long causes the fries to lose their crispiness.
- Skipping seasoning the fries – Even if you have flavorful chili, seasoning the fries with salt, pepper, or a sprinkle of garlic powder enhances the overall taste.
What to Serve With Chili Cheese Fries?
While chili cheese fries are already a filling dish, here are some great pairings to round out the meal:
1. Grilled Burgers
A juicy burger alongside chili cheese fries makes for the ultimate diner-style meal.
2. Crispy Onion Rings
A crunchy side that pairs well with the cheesy, saucy goodness of the fries.
3. Coleslaw
The fresh, tangy crunch of coleslaw balances the richness of the chili and cheese.
4. Fried Chicken
Crispy fried chicken and chili cheese fries are a match made in comfort food heaven.
5. Cornbread
A warm, slightly sweet cornbread complements the spicy chili flavors.
6. Milkshakes or Soda
A classic milkshake or fizzy soda enhances the diner experience. Try vanilla or chocolate shakes!
7. Guacamole & Salsa
A fresh and zesty dip for extra flavor and contrast.
8. Fried or Scrambled Eggs
For a breakfast twist, top your chili cheese fries with a runny fried egg or serve them with scrambled eggs.
Storage Instructions
Chili cheese fries are best enjoyed fresh, but if you have leftovers, here’s how to store and reheat them properly:
- Fries: Store leftover fries separately in an airtight container in the fridge for up to 2 days. Reheat them in an air fryer or oven at 375°F (190°C) for 5–7 minutes to regain crispiness. Avoid microwaving, as it makes them soggy.
- Chili: Store chili in a separate airtight container in the fridge for up to 4 days or freeze for up to 3 months. Reheat in a saucepan over medium heat, adding a little water if it has thickened too much.
- Cheese & Toppings: Fresh toppings like sour cream, tomatoes, and green onions should be added right before serving to keep them fresh and vibrant.
How to Reassemble Leftovers
For best results, reheat the fries and chili separately, then layer them again with fresh cheese and toppings before serving.
Estimated Nutrition
The nutrition values will vary based on portion size and toppings, but here’s an approximate breakdown per serving:
- Calories: 550–700 kcal
- Protein: 25–30g
- Carbohydrates: 50–60g
- Fat: 30–40g
- Fiber: 6–8g
- Sodium: 800–1000mg
For a lighter version, use baked fries, lean ground turkey, and reduced-fat cheese. You can also opt for vegetarian chili with beans and veggies instead of meat.
Frequently Asked Questions
1. Can I make chili cheese fries ahead of time?
You can prepare the chili in advance and store it in the fridge for up to 4 days or freeze it for 3 months. However, fries should be made fresh for the best texture.
2. What’s the best way to keep fries crispy under chili?
Use thick-cut or crinkle fries, double-fry them for extra crunch, and drain excess liquid from the chili before layering. You can also serve chili on the side for dipping instead of pouring it over the fries.
3. Can I make this recipe vegetarian?
Yes! Swap out the ground beef for plant-based crumbles, lentils, or extra beans. You can also add diced mushrooms or bell peppers for more texture.
4. What cheese melts best for chili cheese fries?
Cheddar, Monterey Jack, Pepper Jack, or a cheese blend work best. For extra creaminess, melt cheese into a sauce using a little milk or cream.
5. How can I make the chili spicier?
Add more chili powder, cayenne pepper, diced jalapeños, or hot sauce to amp up the heat.
6. Can I use canned chili instead of homemade?
Absolutely! While homemade chili is more flavorful, canned chili is a quick alternative. Just heat it up and pour it over your fries.
7. What’s the best way to reheat leftovers?
Reheat the fries in an air fryer or oven at 375°F (190°C) for 5–7 minutes. Warm up the chili on the stove or microwave, then reassemble with fresh cheese and toppings.
8. Can I make chili cheese fries in the air fryer?
Yes! Cook the fries in the air fryer at 400°F (200°C) for 10–15 minutes, shaking the basket halfway through. Then, assemble with chili and cheese.
Conclusion
Chili cheese fries are the ultimate comfort food—crispy, cheesy, and loaded with bold flavors. Whether you’re making them for game night, a family dinner, or just indulging in a treat, this recipe is easy to customize and always satisfying. With the right fries, a flavorful chili, and gooey melted cheese, every bite is packed with deliciousness. Now it’s time to dig in and enjoy!

Chili Cheese Fries
- Prep Time: 10 minutes
- Cook Time: 30 minutes
- Total Time: 40 minutes
- Yield: 4 servings
Description
Crispy golden fries topped with hearty homemade chili, gooey melted cheese, and your favorite toppings—these chili cheese fries are the ultimate indulgence. Perfect for game nights, parties, or just a comforting snack, this dish is loaded with bold flavors and satisfying textures. Whether you make them with homemade fries or a quick store-bought version, these cheesy, savory fries are guaranteed to be a hit!
Ingredients
For the Fries:
- 1 bag frozen thick-cut or crinkle-cut fries (or homemade fries)
For the Chili:
- 1 lb ground beef or turkey
- 1 small onion, diced
- 2 cloves garlic, minced
- 1 can (14 oz) diced tomatoes
- 1 can (8 oz) tomato sauce
- 1 can (15 oz) kidney beans, drained and rinsed
- 1 tbsp chili powder
- 1 tsp cumin
- 1/2 tsp smoked paprika
- Salt & pepper to taste
For the Cheese & Toppings:
- 2 cups shredded cheddar cheese
- 1/2 cup sour cream
- 1/4 cup diced tomatoes
- 1/4 cup chopped green onions or cilantro
- Sliced jalapeños (optional)
Instructions
- Prepare the Fries: Bake or air-fry the fries according to package instructions until golden and crispy. If making homemade fries, cut potatoes into strips, soak in cold water for 30 minutes, then fry or bake until crisp.
- Cook the Chili: In a large skillet over medium heat, brown the ground beef until fully cooked. Drain excess grease. Add the diced onions and garlic, cooking until softened.
- Add the Ingredients: Stir in the diced tomatoes, tomato sauce, kidney beans, chili powder, cumin, paprika, salt, and pepper. Simmer for 20–25 minutes, stirring occasionally, until the chili thickens.
- Melt the Cheese: Shred the cheddar cheese. Either sprinkle it over the fries and let the heat melt it naturally or create a cheese sauce by melting the cheese with a little milk.
- Assemble the Dish: Place the crispy fries on a serving plate, spoon the hot chili over the fries, and sprinkle with cheese. Let the cheese melt or broil for 1–2 minutes for extra gooeyness.
- Add Toppings & Serve: Top with sour cream, diced tomatoes, green onions, and jalapeños. Serve immediately and enjoy!