
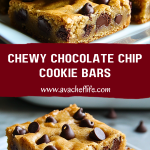
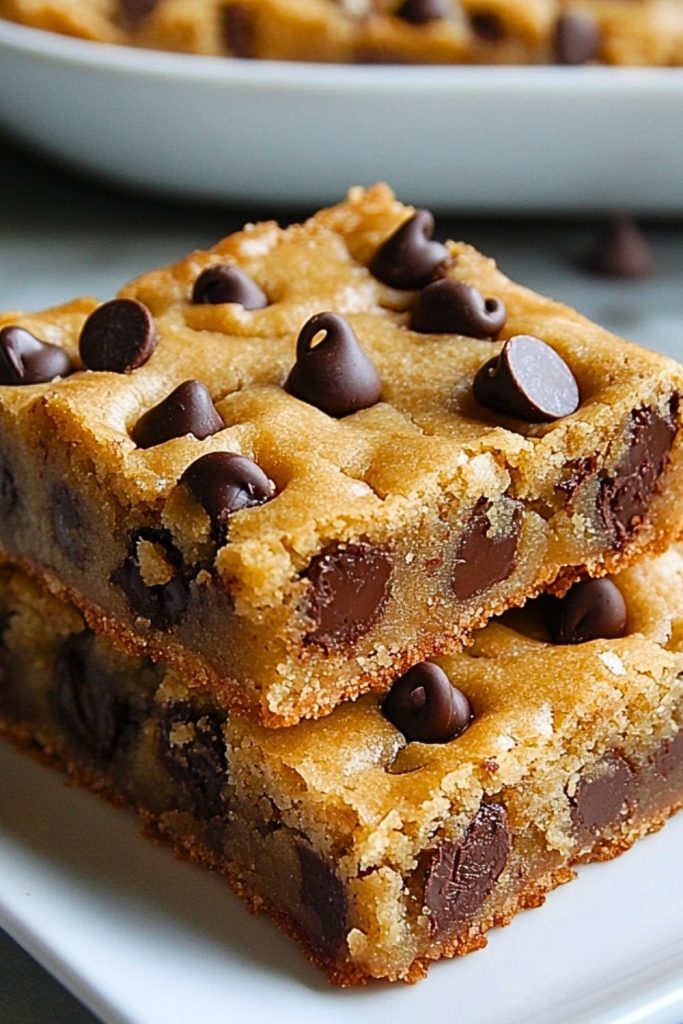
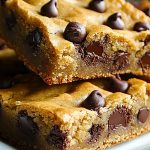
I’ve baked countless batches of cookies in my kitchen, but nothing quite hits the spot like these Chewy Chocolate Chip Cookie Bars. They’re thick, golden, gooey in the center with just the right amount of crisp at the edges. I love how you get all the deliciousness of a chocolate chip cookie but without the hassle of rolling dough into balls or baking multiple trays. Just mix, spread, and bake—it’s pure cookie joy in a single pan.

These cookie bars have become my go-to for parties, potlucks, or when I just need a sweet fix and don’t want to spend hours in the kitchen. They’re ultra-reliable, crowd-pleasing, and dangerously easy to whip up. Plus, they make your whole house smell like a warm hug. Once you make them, I promise you’ll never go back to the standard cookie route again.
Why You’ll Love These Chewy Chocolate Chip Cookie Bars
You’re going to fall hard for these bars. For starters, they’ve got that perfect texture: chewy and dense with melty chocolate in every bite. They’re faster than traditional cookies and easier to slice and serve. No chilling dough. No batch baking. And because they’re baked in a pan, you can control just how thick and gooey you want them. Whether you’re making a quick dessert or planning a bake sale treat, these bars are a guaranteed win.
What Kind of Chocolate Chips Work Best?
When it comes to Chewy Chocolate Chip Cookie Bars, the type of chocolate you use can totally change the game. I love using semi-sweet chocolate chips because they strike the perfect balance—rich and sweet without being overpowering. If you’re a dark chocolate fan, feel free to swap in bittersweet chips for a deeper flavor. Milk chocolate chips will make the bars extra sweet and creamy, while mini chips will distribute more evenly throughout the dough. And if you’re feeling indulgent, chopped chocolate chunks or a mix of chip sizes give you melty pockets in every bite.
Options for Substitutions
Whether you’re out of an ingredient or looking to make these cookie bars fit a dietary preference, there are a few simple swaps you can make:
- Butter: You can substitute with vegan butter or even coconut oil (though the flavor and texture will change slightly—more tender and a touch coconutty).
- Eggs: Replace each egg with a flax egg (1 tbsp ground flax + 3 tbsp water) for a plant-based version.
- Flour: A 1:1 gluten-free baking flour mix works well in place of all-purpose flour. Just be sure to mix thoroughly for the best texture.
- Sugar: Coconut sugar or brown sugar alternatives can replace white sugar for a more caramelized flavor.
- Chocolate Chips: Use white chocolate, peanut butter chips, or a chopped-up candy bar if you want to shake things up.
These bars are super forgiving, which makes them ideal for experimenting and adapting to your pantry.
Ingredients for These Chewy Chocolate Chip Cookie Bars
Let’s talk about what makes these bars so irresistible—each ingredient plays its part in creating that soft, gooey center and perfectly golden edge.
- Unsalted Butter
Butter adds rich flavor and helps achieve that chewy texture with crisp edges. Melting it first gives the bars a smooth, dense base. - Brown Sugar
This is key to the chewiness! Brown sugar also adds a slight caramel note that deepens the flavor. - Granulated Sugar
A touch of white sugar balances the moisture from the brown sugar and gives the top a light crust. - Large Eggs
They bind everything together and add structure. Room temperature eggs blend more easily and evenly into the batter. - Vanilla Extract
Just a couple teaspoons of vanilla bring warmth and richness to the dough—don’t skip it. - All-Purpose Flour
The backbone of the recipe, giving the bars their body and soft crumb. Measure it correctly for best results. - Baking Soda
This leavening agent helps the bars rise just enough to stay soft and thick without being cakey. - Salt
A little salt enhances all the sweet flavors and balances the chocolate. - Semi-Sweet Chocolate Chips
The star of the show! Fold them in generously, and toss a few more on top before baking for that picture-perfect finish.
Step 1: Preheat and Prepare Your Pan
Start by preheating your oven to 350°F (175°C). Line a 9×13-inch baking pan with parchment paper or lightly grease it with nonstick spray. This makes it easier to lift out the bars once they’re cooled and keeps the edges from sticking.
Step 2: Melt the Butter
In a microwave-safe bowl, melt the unsalted butter. Let it cool slightly so it doesn’t cook the eggs when added later. This melted butter is the secret to that rich, chewy texture.
Step 3: Mix the Sugars and Wet Ingredients
In a large mixing bowl, whisk together the melted butter, brown sugar, and granulated sugar until smooth and glossy. Add the eggs and vanilla extract, and mix until fully combined.
Step 4: Add Dry Ingredients
Sift in the flour, baking soda, and salt. Stir everything together until just combined—don’t overmix. The dough will be thick and a little sticky.
Step 5: Fold in the Chocolate Chips
Gently fold in the chocolate chips using a spatula or wooden spoon. Save a small handful to press on top later for that perfect bakery-style look.
Step 6: Press and Smooth into the Pan
Spread the dough evenly into your prepared baking dish. Use a spatula or your fingertips to press it into the corners. Sprinkle the reserved chocolate chips across the top.
Step 7: Bake to Golden Perfection
Bake for 25–30 minutes, or until the top is golden brown and the edges look set. The center might seem a little underdone—that’s exactly what you want for chewy bars.
Step 8: Cool, Slice, and Enjoy
Let the pan cool completely before slicing into squares. This helps them set up and keeps the texture perfect. Once cool, cut into bars and dig in!
How Long to Cook the Chewy Chocolate Chip Cookie Bars
These bars bake beautifully in 25 to 30 minutes at 350°F (175°C). The edges should look golden and slightly crisp, while the center remains soft and a little underbaked—that’s the secret to that chewy, melt-in-your-mouth center. If you like your bars firmer, add 2–3 extra minutes, but don’t overbake or you’ll lose that dreamy texture.
Tips for Perfect Chewy Chocolate Chip Cookie Bars
- Don’t Overmix the Dough
Once the flour is in, mix just until the dry streaks disappear. Overmixing makes the bars dense and tough instead of soft and chewy. - Use Room Temperature Eggs
Cold eggs can cause the butter to seize and make the batter uneven. Let them sit out for 15 minutes before mixing. - Line Your Pan
Parchment paper or foil with a little overhang makes it easy to lift the entire block out for clean slicing. - Reserve Some Chocolate Chips
Sprinkling a few chips on top before baking makes the bars look extra tempting and ensures melty bits in every bite. - Let Them Cool Completely
It’s tempting to dive in, but cooling lets the bars set properly so they hold their shape when sliced. - Add a Sprinkle of Sea Salt
A pinch of flaky salt on top before baking adds an irresistible contrast to the sweetness. - Use a Metal Pan
Metal pans bake more evenly than glass, which can retain heat and overbake the edges. - Store in an Airtight Container
If you want them soft for days, tuck a slice of bread into the container—the bars will absorb the moisture and stay chewy.
Watch Out for These Mistakes While Cooking
- Using Hot Butter with Eggs
Adding eggs to butter that’s still piping hot can scramble them. Let the butter cool for a few minutes before mixing. - Incorrect Measuring of Flour
Too much flour = dry bars. Spoon the flour into your measuring cup and level it off rather than scooping straight from the bag. - Skipping the Parchment Paper
It may seem like a small thing, but parchment makes a huge difference for clean lifting and non-stick success. - Overbaking
The biggest cookie bar sin! The center should look slightly underdone when you pull them out—they’ll firm up as they cool. - Not Preheating the Oven
Even heat from the start is key. A cold oven can mess with the texture and baking time. - Using Expired Baking Soda
Old baking soda loses its power. Test it by dropping a little in vinegar—it should fizz instantly. - Uneven Dough Spreading
If the dough isn’t spread evenly in the pan, you’ll get inconsistent thickness and baking. Take the time to smooth it out to the corners. - Cutting Before Cooling
Warm bars fall apart. Let them cool completely for neat squares and chewy perfection.
What to Serve With Chewy Chocolate Chip Cookie Bars?
1. A Cold Glass of Milk
Classic and unbeatable. The creamy coolness of milk balances the warm, gooey chocolate perfectly.
2. Vanilla Ice Cream
A scoop of ice cream turns these bars into a next-level dessert—warm bars + cold ice cream = magic.
3. Hot Coffee or Espresso
The bittersweetness of coffee contrasts the sweetness of the bars for a sophisticated combo.
4. Whipped Cream with a Dusting of Cocoa
A light, airy topping that makes the bars feel fancy without overpowering the flavor.
5. Strawberries or Raspberries
A few fresh berries add brightness and balance the richness with a little tartness.
6. Salted Caramel Drizzle
Drizzle warm caramel over a slice for a decadent twist that feels bakery-worthy.
7. Peanut Butter Spread
Swipe a little peanut butter on top or dip a bite—if you’re a PB fan, this one’s for you.
8. Crushed Pretzels or Nuts on the Side
Add a crunchy, salty element to contrast the soft chewiness of the bars.
Storage Instructions
To keep your Chewy Chocolate Chip Cookie Bars soft and delicious for days, store them in an airtight container at room temperature for up to 5 days. If you want them to stay ultra chewy, place a slice of bread in the container with them—the bars will absorb the moisture from the bread and stay fresh longer.
For longer storage, you can refrigerate them for up to 10 days, but let them come to room temperature before serving (or zap them in the microwave for 10 seconds to bring back that gooey texture).
Freezing is also a great option! Wrap individual bars tightly in plastic wrap and store them in a freezer-safe bag or container for up to 3 months. Just thaw on the counter for 30–60 minutes or microwave in short bursts until soft.
Estimated Nutrition
Here’s an approximate breakdown per serving (based on 1 bar from a batch of 24):
- Calories: 210
- Total Fat: 11g
- Saturated Fat: 7g
- Cholesterol: 30mg
- Sodium: 90mg
- Total Carbohydrates: 28g
- Sugars: 18g
- Protein: 2g
- Fiber: 1g
Note: Values may vary depending on the exact brands and ingredients used.
Frequently Asked Questions
What makes these bars chewy instead of cakey?
The key is in the ratio of brown sugar to white sugar, using melted butter, and not overbaking. Brown sugar adds moisture, and melted butter gives a denser, chewier bite.
Can I make these cookie bars gluten-free?
Absolutely! Just substitute the all-purpose flour with a 1:1 gluten-free baking blend. Make sure it includes xanthan gum for the best structure.
Can I use a smaller pan if I want thicker bars?
Yes! A 9×9-inch square pan will give you much thicker, gooier bars. Just extend the baking time by about 5–10 minutes and keep an eye on the center.
Can I add nuts or other mix-ins?
Definitely. Chopped walnuts, pecans, white chocolate, toffee bits, or even dried fruit all work beautifully. Stick to about 1/2 to 3/4 cup total add-ins so you don’t overwhelm the dough.
Why do my bars seem underdone in the middle?
That’s actually perfect! The center should look just set when you remove them—they’ll firm up as they cool, keeping the texture soft and chewy.
Can I double the recipe?
You sure can! Use a larger sheet pan (around 12×17 inches), and keep a close eye on the baking time—it may be slightly shorter depending on how thick you spread the dough.
Should I chill the dough before baking?
No need! That’s the beauty of this recipe—just mix, spread, and bake. Chilling is optional, but not necessary for great results.
How do I cut clean, neat squares?
Let the bars cool completely first. Then use a sharp knife, wiping it clean between cuts. For extra clean edges, chill the bars in the fridge for 20–30 minutes before slicing.
Conclusion
These Chewy Chocolate Chip Cookie Bars are everything I love about cookies, but in an easier, faster, more shareable form. They come together in minutes, bake in one pan, and are practically foolproof. Whether you’re baking for a party, prepping treats for the week, or just craving something sweet and comforting, these bars hit the spot every time. I hope they become a go-to favorite in your kitchen too—because once you try them, you’ll understand why I never go back to regular cookies!
Chewy Chocolate Chip Cookie Bars
- Prep Time: 10 minutes
- Cook Time: 25 minutes
- Total Time: 35 minutes
- Yield: 24 bars
Description
Get ready to fall in love with the ultimate comfort treat—Chewy Chocolate Chip Cookie Bars! These bars are everything you want in a cookie: thick, gooey, golden-edged, and packed with melty chocolate chips. The best part? No need to scoop or roll dough. Just mix, spread in a pan, and bake. This easy dessert is perfect for quick breakfasts, after-school snacks, party trays, or when you need a satisfying sweet in a hurry. Whether you’re craving classic cookie flavor or looking for fresh dessert ideas, this easy recipe has your back. Irresistibly soft, ridiculously simple, and always a crowd-pleaser—don’t be surprised if they disappear fast!
Ingredients
- 1 cup (2 sticks) unsalted butter, melted
- 1 cup brown sugar, packed
- 1/2 cup granulated sugar
- 2 large eggs
- 2 teaspoons vanilla extract
- 2 1/2 cups all-purpose flour
- 1 teaspoon baking soda
- 1/2 teaspoon salt
- 2 cups semi-sweet chocolate chips (plus extra for topping)
Instructions
- Preheat oven to 350°F (175°C). Line a 9×13-inch baking pan with parchment paper or grease lightly.
- Melt the butter and let it cool slightly.
- In a large bowl, whisk together melted butter, brown sugar, and granulated sugar until smooth.
- Add eggs and vanilla extract; mix until combined.
- Stir in flour, baking soda, and salt just until the dough forms.
- Fold in the chocolate chips.
- Spread dough evenly into the prepared pan and press extra chips on top.
- Bake for 25–30 minutes, until the edges are golden and the center looks just set.
- Cool completely in the pan before slicing into bars.