
Corn on the cob has always been one of those simple pleasures of life—crunchy, juicy, sweet, and endlessly customizable. I remember summer cookouts where the grill sizzled with fresh ears of corn, each one brushed in butter and devoured right off the cob. But this Cheesy Garlic Butter Corn recipe takes that nostalgia to a whole new level. It’s rich, savory, slightly smoky, and absolutely irresistible.
With a dreamy combination of melted cheese, roasted garlic, and herbed butter, every bite bursts with flavor. I love serving this dish as a side at family dinners, BBQs, or even as a fun snack. It’s comforting, quick to prepare, and delivers maximum satisfaction with minimal effort.
Why You’ll Love This Cheesy Garlic Butter Corn
- Incredible flavor: The buttery, garlicky richness paired with gooey cheese makes every kernel a delight.
- Perfect for any occasion: Whether you’re grilling, roasting, or baking, this dish fits right in.
- Quick and easy: Minimal prep and ingredients needed—just let the oven or grill do the magic.
- Crowd-pleaser: Kids and adults alike can’t resist the cheesy pull and golden goodness.
- Customizable: You can tweak the toppings, spice level, or type of cheese to your liking.
What Kind of Corn Should I Use?
For this Cheesy Garlic Butter Corn, fresh ears of sweet corn are your best bet. They’re naturally juicy and slightly sugary, which balances beautifully with the salty butter and savory cheese. If fresh corn isn’t available, you can absolutely use frozen corn on the cob—just make sure it’s thawed and patted dry before cooking. Grill it, bake it, or pan-sear it until tender and golden before slathering it in the buttery goodness.
Avoid using canned corn kernels for this particular recipe—it won’t give you that iconic cob-on-a-stick experience, and the texture just doesn’t hold up the same way.
Options for Substitutions
- Butter: If you’re dairy-free, opt for plant-based butter or olive oil. Both carry the garlic flavor well.
- Cheese: Mozzarella, cheddar, Monterey Jack, or even parmesan all work well. For a spicy kick, try pepper jack!
- Garlic: Roasted garlic adds a mellow depth, but fresh minced garlic can be used for a sharper punch. Garlic powder also works in a pinch.
- Herbs: Parsley is classic, but chives, cilantro, or basil bring interesting flavor twists.
- Spice Level: Add a sprinkle of smoked paprika, red pepper flakes, or chili powder for an extra kick.
Ingredients for This Cheesy Garlic Butter Corn
Each ingredient plays a key role in building the irresistible flavor of this dish. Here’s what you’ll need and why it matters:
- Fresh Corn on the Cob: The sweet, juicy base that soaks up all the cheesy garlic butter goodness.
- Unsalted Butter: Adds richness and smoothness, acting as the carrier for the garlic and herbs.
- Garlic (Minced or Roasted): Brings in bold, savory flavor—this is the soul of the recipe.
- Mozzarella Cheese (Shredded): Melts beautifully and delivers that stretchy, gooey texture everyone loves.
- Parmesan Cheese (Grated): Adds sharpness and a salty umami layer to deepen the flavor.
- Fresh Parsley (Chopped): Offers a touch of freshness and color that balances the rich ingredients.
- Salt & Black Pepper: Enhances every bite—essential for seasoning.
- Olive Oil (Optional): Helps roast or grill the corn to perfection if you’re not using butter at the start.
Step 1: Prep the Corn
Start by removing the husks and silk from your fresh corn cobs. Rinse them under cold water and pat them dry with a towel. If you’re using frozen corn, make sure it’s completely thawed and dry before proceeding.
Step 2: Make the Garlic Butter
In a small saucepan, melt the butter over low heat. Add minced or roasted garlic and cook gently for 2–3 minutes until fragrant. Stir in a pinch of salt and black pepper. You can also add a dash of paprika or chili flakes for a spicy note.
Step 3: Roast or Grill the Corn
Brush each cob generously with olive oil or a light coating of the garlic butter. Place them on a hot grill or in a preheated oven at 400°F (200°C). Roast or grill for about 15–20 minutes, turning occasionally until the corn is slightly charred and golden.
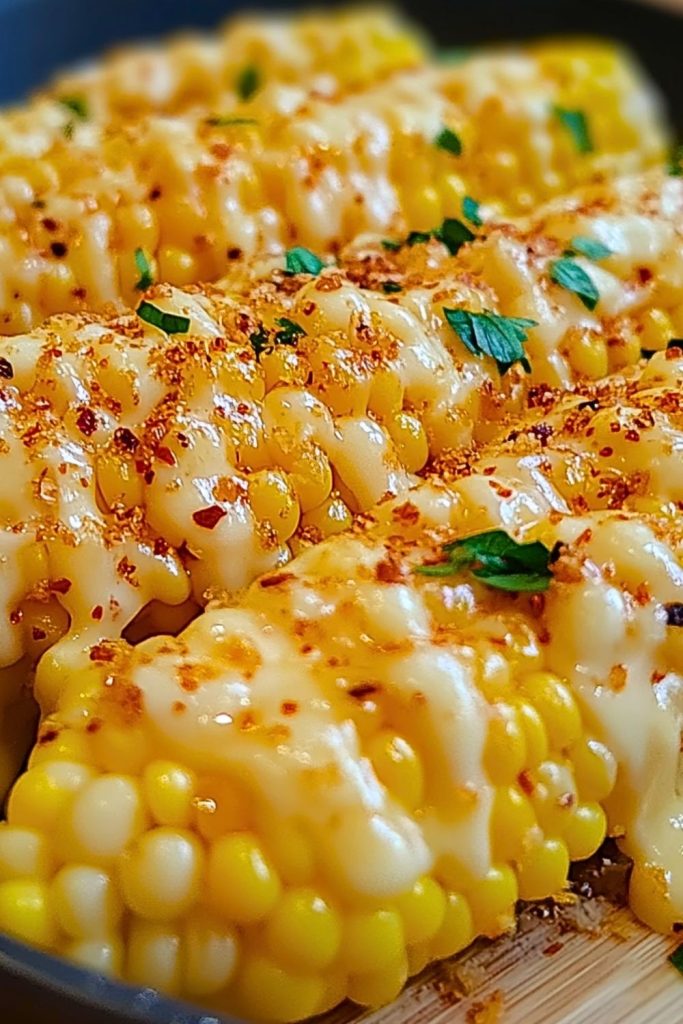
Step 4: Add the Cheese
Remove the corn from the heat and brush with the remaining garlic butter. While still hot, sprinkle a generous layer of shredded mozzarella and a light dusting of parmesan. You can return the corn to the oven for 2–3 minutes to help the cheese melt fully and become bubbly.
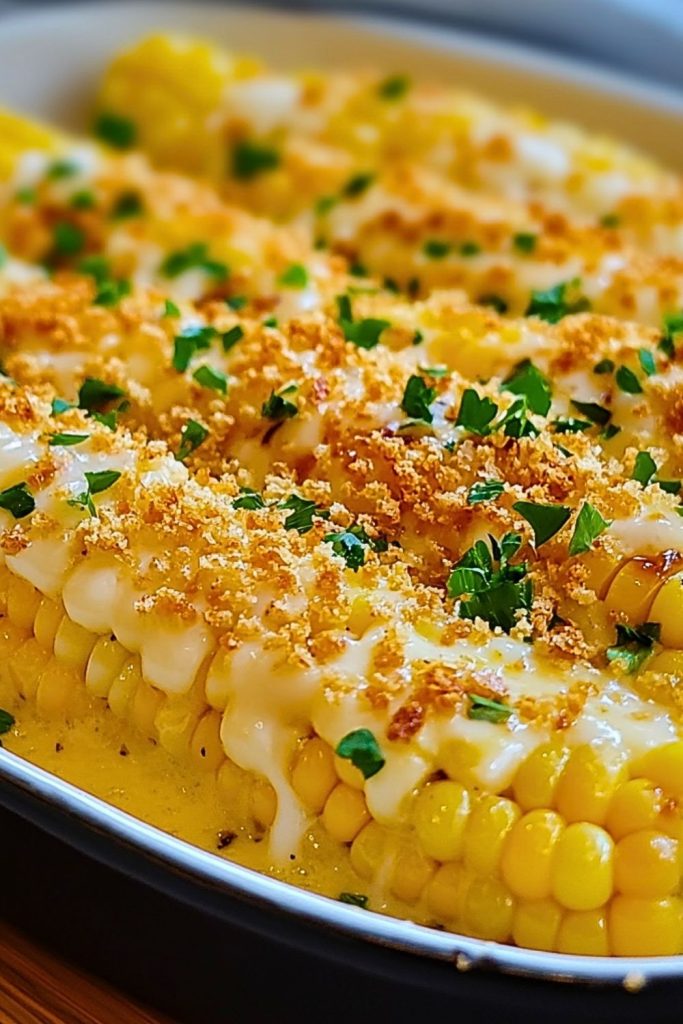
Step 5: Garnish and Serve
Finish with a sprinkle of chopped fresh parsley and an extra touch of parmesan or seasoning, if desired. Serve hot and enjoy that cheesy, buttery, garlicky bite right off the cob.
How Long to Cook the Cheesy Garlic Butter Corn
The total cooking time for this dish depends slightly on your method of cooking, but here’s a reliable guide:
- Grill: 15–20 minutes over medium-high heat, turning every 4–5 minutes to get an even char.
- Oven: Bake at 400°F (200°C) for about 20 minutes, flipping halfway through.
- Finishing Melt (Optional): Once cheese is added, return to the heat for another 2–3 minutes until bubbly and golden.
You’ll know the corn is ready when the kernels are tender and have a slightly golden hue, and the cheese is melted and starting to brown at the edges.
Tips for Perfect Cheesy Garlic Butter Corn
- Use freshly shredded cheese: It melts better than pre-shredded varieties, which often contain anti-caking agents.
- Preheat your grill or oven: A hot start ensures the corn cooks quickly and develops flavor-packed caramelized spots.
- Don’t skip the garlic butter baste: Apply some before and after cooking for maximum flavor infusion.
- Let the corn rest for 1–2 minutes after adding cheese so it sets slightly and doesn’t slide right off.
- Finish with flaky salt or a squeeze of lime for an extra burst of flavor and freshness.
Watch Out for These Mistakes While Cooking
Even a simple dish like Cheesy Garlic Butter Corn can go sideways if a few key details are overlooked. Here’s what to steer clear of:
- Overcooking the Corn: This leads to shriveled, chewy kernels. Keep a close eye, especially if grilling.
- Using Cold Butter: It won’t spread evenly or seep into the corn—make sure it’s melted and warm.
- Adding Cheese Too Early: It can burn before the corn is done. Always add it in the final minutes.
- Skimping on Seasoning: Corn needs salt and pepper to balance the sweetness—don’t be shy.
- Skipping the Turn: Whether roasting or grilling, rotate the cobs often for even cooking and char.
What to Serve With Cheesy Garlic Butter Corn?
This flavor-packed side pairs beautifully with a variety of dishes. Here are some delicious ideas:
Grilled Steak
Juicy and smoky beef slices are the perfect partner for buttery, cheesy corn.
BBQ Chicken
The sweet-savory glaze of BBQ chicken complements the garlicky richness of the corn beautifully.
Veggie Burgers
For a meatless meal, pair with hearty veggie burgers and a crisp side salad.
Pulled Pork Sandwiches
Tangy pulled pork and melty cheesy corn—an unbeatable comfort food duo.
Baked Salmon
The freshness of lemony salmon balances the creamy corn flavors perfectly.
Coleslaw
Add a crunchy, tangy contrast with a vinegar-based or creamy slaw.
Roasted Potatoes
Stick to the comfort food theme with crispy, herbed potatoes on the side.
Avocado Salad
A fresh, cooling side like an avocado-tomato salad lightens up the richness of the corn.
Storage Instructions
If you happen to have leftovers (though that’s rare with this dish!), storing Cheesy Garlic Butter Corn is simple:
- Refrigerate: Wrap each cob in foil or place in an airtight container. Store in the fridge for up to 3 days.
- Reheat: For best results, reheat in the oven at 350°F (175°C) for 10–12 minutes. You can also use a microwave, but the cheese might lose some of its texture.
- Freezing: Not recommended for fully cooked cheesy corn, as the texture of both corn and cheese can become soggy. However, you can freeze plain cooked corn and add fresh garlic butter and cheese after thawing.
Estimated Nutrition
While exact numbers may vary depending on portion size and ingredients, here’s an estimate for one serving (1 ear of corn with cheese and butter):
- Calories: ~250–300 kcal
- Protein: ~6 g
- Fat: ~18–20 g
- Carbohydrates: ~20–25 g
- Fiber: ~2 g
- Sugar: ~6 g
- Sodium: ~300–400 mg
- Calcium: ~100 mg
This recipe is indulgent but also naturally gluten-free and vegetarian, making it accessible to a wide range of diets.
Frequently Asked Questions
How do I keep the cheese from sliding off the corn?
Make sure the corn is hot when you add the cheese—it helps the cheese melt and grip better. Returning it to the oven or grill for a minute or two also helps it set nicely.
Can I make this ahead of time?
You can prepare the garlic butter and even roast the corn a few hours ahead. Just reheat the corn and add cheese right before serving for the best texture and flavor.
What cheese melts best for this recipe?
Mozzarella is a great go-to for meltiness, but Monterey Jack and cheddar also melt well and add different flavor profiles. A touch of parmesan adds sharpness.
Can I make it spicier?
Absolutely! Add chopped jalapeños, a dash of cayenne pepper, or sprinkle chili flakes into the garlic butter.
What if I don’t have fresh garlic?
Garlic powder works in a pinch—use about ½ teaspoon per cob. It won’t have the same depth as fresh or roasted garlic, but it still brings great flavor.
Is this recipe kid-friendly?
Very much so! Kids love the cheesy, buttery taste. You can omit any spicy ingredients to keep it mild for little ones.
Can I use vegan cheese and butter?
Yes. There are several plant-based butters and cheeses that melt well. Look for ones labeled as melt-friendly or made for grilling.
What’s the best way to serve this at a party?
Cut each cob in half or thirds for easy sharing. You can keep them warm on a tray in the oven set to low heat until ready to serve.
Conclusion
Cheesy Garlic Butter Corn is one of those side dishes that turns heads and wins hearts every single time. It’s simple but indulgent, rich yet balanced, and packs a punch of flavor in every buttery, garlicky, cheesy bite. Whether you’re grilling out in summer or roasting indoors for a cozy dinner, this recipe guarantees smiles around the table.

Cheesy Garlic Butter Corn
- Prep Time: 10 minutes
- Cook Time: 20 minutes
- Total Time: 30 minutes
- Yield: 4 servings
Description
If you’re looking for a quick side that steals the spotlight, this Cheesy Garlic Butter Corn delivers bold flavors with minimal effort. Perfect for summer cookouts, cozy dinners, or even a savory snack, this recipe combines juicy sweet corn, rich melted cheese, and aromatic garlic butter in a dish that’s impossible to resist. It’s the ultimate comfort food with a gourmet twist—ideal for anyone seeking easy dinner ideas, irresistible snack options, or crowd-pleasing food ideas that never disappoint. The golden melted cheese over perfectly roasted corn makes this a top contender for your next favorite easy recipe.
Ingredients
- 4 ears fresh corn on the cob
- 4 tablespoons unsalted butter
- 3 garlic cloves, minced or roasted
- 1 cup shredded mozzarella cheese
- 1/4 cup grated parmesan cheese
- 2 tablespoons chopped fresh parsley
- Salt and black pepper, to taste
- 1 tablespoon olive oil (optional, for roasting/grilling)
Instructions
- Husk and clean the corn. Pat dry.
- Melt butter in a saucepan over low heat. Add minced garlic and cook for 2–3 minutes until fragrant.
- Preheat your grill or oven to 400°F (200°C).
- Brush corn with olive oil or garlic butter and roast/grill for 15–20 minutes, turning occasionally.
- Remove from heat, brush with remaining garlic butter, and sprinkle with mozzarella and parmesan.
- Return to heat for 2–3 minutes until cheese melts and bubbles.
- Garnish with chopped parsley, salt, and pepper. Serve hot.