
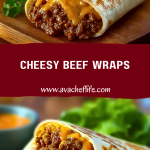
Cheesy Beef Wraps are the kind of comfort food I keep coming back to. They’re warm, melty, packed with flavor, and incredibly satisfying—especially on days when I need something quick but still crave something homemade. I love how easy it is to throw them together with just a handful of ingredients, and yet the result tastes like something you’d get from a casual diner or a food truck favorite. The gooey cheese wrapped around seasoned beef, all snug in a toasted tortilla—what’s not to love?
Over the years, I’ve played around with different variations of these wraps, trying out new cheeses, adding a touch of spice, or sneaking in a few veggies. But this version I’m sharing with you today is the one I go back to the most. It hits all the right notes: cheesy, beefy, with just the right crunch from the wrap when you toast it up. Whether it’s for lunch, dinner, or even a midnight snack, these Cheesy Beef Wraps always hit the spot.
Why You’ll Love This Cheesy Beef Wraps Recipe
Cheesy Beef Wraps are the ultimate no-fuss, all-flavor meal. They’re ideal for busy weeknights, picky eaters, or just when you need a break from the usual routine. You can prep the beef ahead of time, make extra for leftovers, or set up a build-your-own wrap station for a fun dinner with friends or kids. The versatility is unmatched—and let’s be honest, melted cheese and savory beef wrapped in a crispy tortilla is a combination that never disappoints.
What Kind of Tortilla Should I Use for Cheesy Beef Wraps?
For the best results, go with large flour tortillas—think burrito-sized. They’re soft, pliable, and sturdy enough to hold the beef and cheese without tearing or falling apart during cooking. Corn tortillas tend to crack and don’t roll as easily, and while whole wheat or low-carb versions are an option, they may not give you that same indulgent bite. If you’re after that golden, slightly crispy finish, make sure to toast or grill the wraps lightly after assembling.
Options for Substitutions
One of the best things about Cheesy Beef Wraps is how adaptable they are. You can easily tweak the ingredients to suit your preferences or dietary needs:
- Ground Turkey or Chicken: Swap out the ground beef for leaner meats if you want a lighter version.
- Plant-Based Meat: Use a beef alternative like Beyond Meat for a vegetarian-friendly option.
- Different Cheeses: Cheddar is classic, but try pepper jack for a spicy kick or mozzarella for extra meltiness.
- Add Veggies: Bell peppers, onions, or even shredded lettuce can add texture and flavor.
- Sauce It Up: A dash of hot sauce, chipotle mayo, or ranch inside the wrap can give it a fun twist.
- Low-Carb Tortillas: Great if you’re keeping an eye on carbs, just be careful—they’re a bit more delicate when folding.
Feel free to experiment—once you get the basic idea down, Cheesy Beef Wraps can become a customizable go-to in your kitchen.
Ingredients for This Cheesy Beef Wraps Recipe
- Ground Beef
The star of the show. Choose 80/20 ground beef for the perfect balance of flavor and moisture. Cooked until browned and seasoned, it brings the hearty, savory foundation to the wrap. - Taco Seasoning
This blend infuses the beef with bold flavor—spicy, smoky, and just a little bit tangy. You can use a store-bought packet or mix your own. - Shredded Cheddar Cheese
Melts beautifully and brings that irresistible cheesy pull. Cheddar adds richness and a sharpness that balances the beef. - Large Flour Tortillas
They hold everything together, wrap easily without tearing, and toast up to a satisfying crisp. - Olive Oil or Butter (for toasting)
Brushing the wraps with a bit of oil or butter before toasting adds flavor and helps them crisp up to golden perfection. - Optional Add-Ins
Think sliced jalapeños, sautéed onions, bell peppers, or even a spoonful of salsa—these ingredients can personalize each wrap to your taste.
Every item on this list contributes to the signature comfort and craveable texture of Cheesy Beef Wraps. Simple ingredients, big payoff.
Step 1: Cook the Ground Beef
In a large skillet over medium heat, cook the ground beef until browned and fully cooked, breaking it up with a spoon as it cooks. Drain excess fat if needed.
Step 2: Season the Beef
Add taco seasoning to the cooked beef along with a splash of water (usually about 1/4 cup). Stir well and let it simmer for 3–4 minutes until the seasoning blends in and thickens slightly.
Step 3: Warm the Tortillas
Lightly heat the flour tortillas in a dry pan or microwave for 10–15 seconds. This makes them more flexible and less likely to tear when wrapping.
Step 4: Assemble the Wraps
Lay each tortilla flat and spoon the seasoned beef into the center. Top generously with shredded cheddar cheese and any optional add-ins like peppers or onions.
Step 5: Fold and Roll
Fold in the sides of the tortilla, then roll it up tightly from the bottom to enclose the filling like a burrito. Make sure the seam is at the bottom to help keep it closed while cooking.
Step 6: Toast the Wraps
Heat a bit of olive oil or butter in a skillet over medium heat. Place the wraps seam-side down and cook until golden and crispy, about 2–3 minutes per side. Press down slightly with a spatula to help them crisp evenly.
Step 7: Slice and Serve
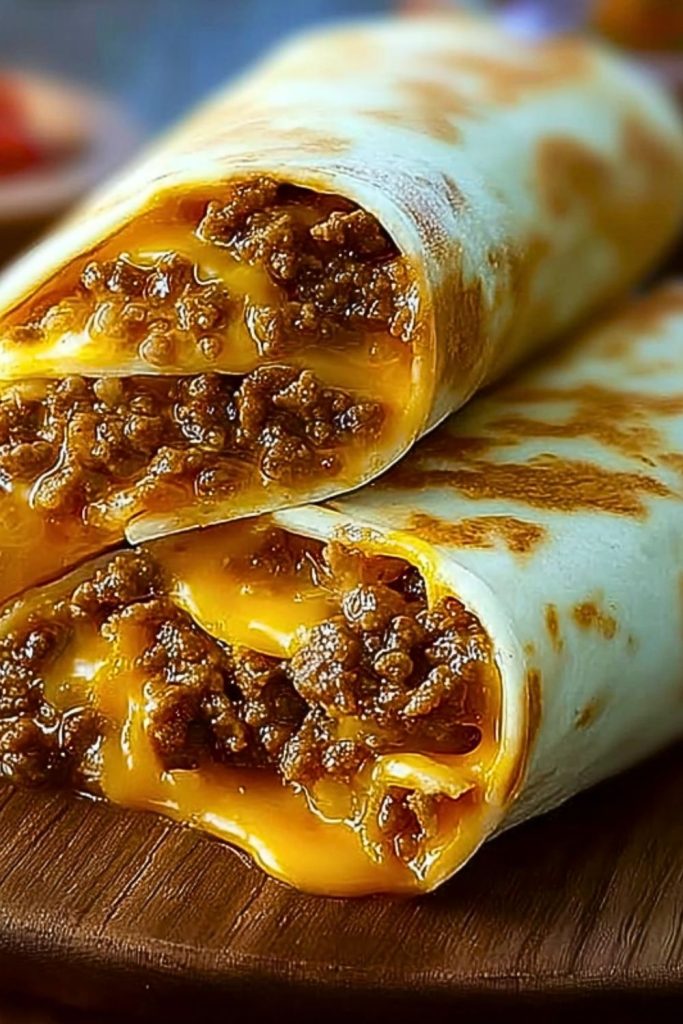
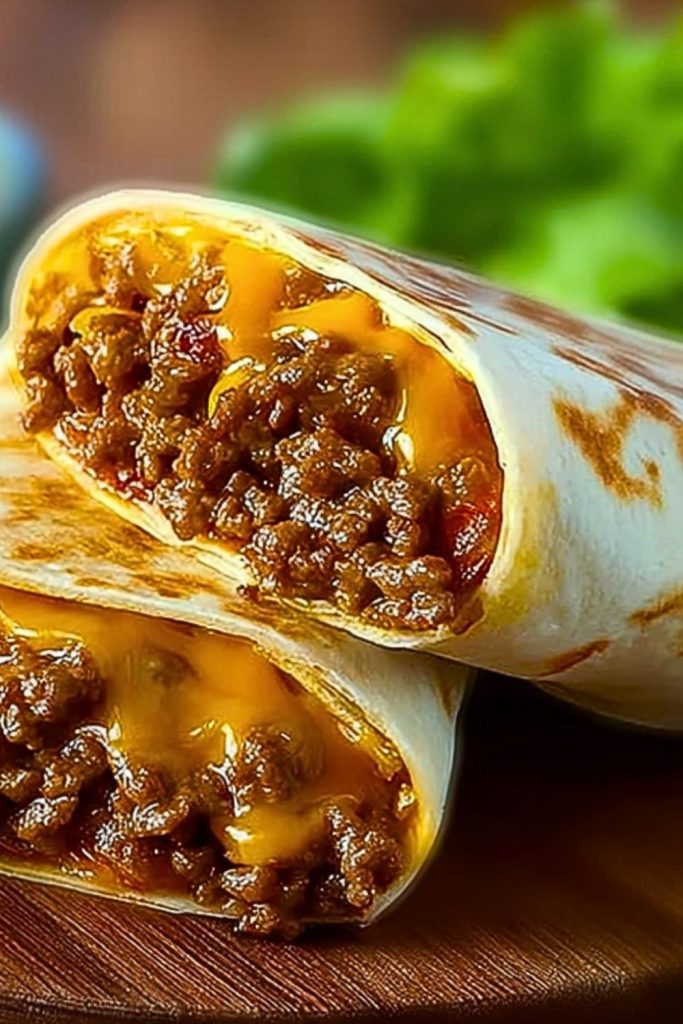
Once toasted, remove the wraps from the pan and let them rest for a minute. Slice in half on the diagonal and serve hot while the cheese is gooey and melty inside.
How Long to Cook the Cheesy Beef Wraps
The entire cooking process is quick and efficient—perfect for busy days. Browning and seasoning the ground beef takes about 10–12 minutes. Toasting the wraps in the skillet adds another 4–6 minutes (2–3 minutes per side). Altogether, you’re looking at roughly 15–20 minutes from start to finish, especially if you prep your ingredients in advance.
Tips for Perfect Cheesy Beef Wraps
- Drain the Beef Well: After browning, get rid of the excess fat. Too much moisture will make the wraps soggy and hard to crisp up.
- Don’t Overfill: It’s tempting to stuff them full, but too much filling makes it hard to roll and toast without bursting.
- Warm Tortillas First: Cold tortillas crack. A quick warm-up keeps them soft and easy to roll tightly.
- Seal with Cheese: Sprinkle a little extra cheese near the edge of the tortilla—it acts like glue when melted, helping keep the wrap closed.
- Press While Toasting: Gently press down on the wraps with a spatula while toasting to ensure full surface contact for even crisping.
- Use a Nonstick or Cast Iron Pan: Both help achieve a beautiful golden crust without sticking or tearing.
Follow these small tricks, and you’ll get a cheesy, beefy wrap with the perfect crunch every single time.
Watch Out for These Mistakes While Cooking
Even with a simple recipe like Cheesy Beef Wraps, a few missteps can affect the end result. Here’s what to avoid:
- Skipping the Tortilla Warm-Up: Cold tortillas crack and break when you roll them. Always warm them slightly before assembling.
- Overfilling the Wraps: Too much filling makes them hard to roll and more likely to burst open while toasting.
- Not Draining the Beef: Excess grease will make the inside soggy and could cause the wrap to leak or fall apart.
- Cooking on Too High Heat: High heat might burn the outside before the cheese melts inside. Stick to medium heat for a golden, crispy finish.
- Skipping the Toasting Step: This step not only adds crunch but also seals the wrap and melts the cheese perfectly. Don’t skip it!
What to Serve With Cheesy Beef Wraps?
These wraps are hearty on their own but pairing them with the right side dish can turn them into a full meal. Here are some tasty ideas:
Simple Side Salad
A light green salad with a zesty vinaigrette balances the richness of the beef and cheese.
Crispy Potato Wedges
Seasoned oven-baked or air-fried wedges are the perfect crunchy companion.
Mexican Street Corn
Sweet corn with mayo, chili powder, cotija cheese, and lime adds color and flavor contrast.
Guacamole & Chips
Creamy guacamole with crunchy tortilla chips gives a fun, snackable vibe.
Pickled Jalapeños or Veggies
These add a spicy and tangy kick that cuts through the richness.
Cilantro Lime Rice
A bright, citrusy rice side helps round out the meal, especially if you’re serving a crowd.
Black Bean Salad
A mix of black beans, corn, red onion, and lime is fresh, filling, and nutritious.
Garlic Yogurt Dip
A cool, creamy dipping sauce adds a new dimension—especially nice if your wrap has a bit of spice.
These pairings take Cheesy Beef Wraps from a simple snack to a satisfying dinner spread.
Storage Instructions
Cheesy Beef Wraps store surprisingly well, making them a great option for meal prep or leftovers. Once cooked and cooled, wrap each one tightly in foil or plastic wrap and store in the refrigerator for up to 3 days. To reheat, place them in a skillet over medium heat until warmed through and crispy again—this helps retain that toasty exterior. Alternatively, pop them in an air fryer or oven at 350°F for about 8–10 minutes. Microwaving is quicker but may result in a softer, less crispy wrap.
If you want to freeze them, it’s best to freeze the un-toasted wraps. Wrap tightly in plastic and then foil, and freeze for up to 2 months. When ready to eat, thaw overnight in the fridge and toast in a skillet as usual.
Estimated Nutrition
Per wrap (based on a standard recipe using 80/20 beef and cheddar cheese):
- Calories: ~450
- Protein: ~24g
- Carbohydrates: ~28g
- Fat: ~28g
- Saturated Fat: ~12g
- Fiber: ~2g
- Sugar: ~2g
- Sodium: ~620mg
- Cholesterol: ~70mg
These numbers can vary depending on your specific ingredients and portion sizes. Swap in leaner meat or low-fat cheese to lighten things up if needed.
Frequently Asked Questions
What kind of ground beef is best for Cheesy Beef Wraps?
I recommend using 80/20 ground beef. It has enough fat to stay juicy and flavorful without being too greasy. You can also go leaner if you’re watching fat content.
Can I make these wraps ahead of time?
Yes! You can cook the beef and even assemble the wraps in advance. Store them in the fridge, and toast them just before serving to keep them fresh and crispy.
How do I prevent the wrap from falling apart?
Warm your tortillas before rolling, don’t overfill, and make sure to place the seam side down in the skillet. Adding a little extra cheese near the edge also helps seal the wrap.
What cheese works best besides cheddar?
Try Monterey Jack, mozzarella, or pepper jack for extra meltiness or spice. Even a smoky gouda works great if you’re feeling adventurous.
Are Cheesy Beef Wraps spicy?
Not by default, but you can add heat with hot sauce, jalapeños, or spicy taco seasoning if you like a kick.
Can I make these wraps gluten-free?
Absolutely! Just use gluten-free tortillas. Make sure to check your taco seasoning too—some brands contain gluten.
How do I reheat them without making them soggy?
Use a skillet, air fryer, or oven to reheat and bring back the crispiness. Avoid the microwave unless you’re okay with a softer texture.
What can I add to make them more filling?
Sautéed veggies, black beans, rice, or even scrambled eggs can bulk them up and add extra nutrients.
Conclusion
Cheesy Beef Wraps are one of those recipes that hit every craving at once—warm, gooey, crispy, and satisfying. They’re fast to make, endlessly customizable, and great for everything from lunchboxes to casual dinners or even party platters. Whether you like them spicy, loaded with veggies, or straight-up classic, this is a recipe you’ll come back to again and again. Get ready to fall in love with how easy and delicious homemade wraps can really be.

Cheesy Beef Wraps
- Prep Time: 10 minutes
- Cook Time: 10 minutes
- Total Time: 20 minutes
- Yield: 4 wraps
- Category: Main Dish
- Method: Skillet
- Cuisine: American-Mexican
Description
Looking for an easy dinner idea that’s fast, satisfying, and packed with flavor? These Cheesy Beef Wraps are the ultimate solution for busy nights. With seasoned ground beef, melty cheddar cheese, and golden toasted tortillas, they’re the kind of comforting, customizable meal that fits any vibe—from weeknight dinners to party snacks. If you’re into quick breakfast options, easy recipe ideas, or even kid-approved food ideas, this one checks every box. Perfect for meal prepping, picky eaters, or just when you need a cheesy pick-me-up!
Ingredients
1 pound ground beef
1 packet taco seasoning
1/4 cup water
1 1/2 cups shredded cheddar cheese
4 large flour tortillas
1 tablespoon olive oil or butter
Optional: sautéed onions, sliced jalapeños, bell peppers, salsa
Instructions
1. In a large skillet over medium heat, cook the ground beef until browned, breaking it apart with a spoon. Drain excess fat.
2. Add taco seasoning and 1/4 cup water to the skillet. Stir and simmer for 3–4 minutes until thickened.
3. Warm tortillas slightly in a skillet or microwave to prevent cracking.
4. Lay tortillas flat and add seasoned beef to the center of each. Top with shredded cheese and any optional add-ins.
5. Fold in the sides, then roll tightly into a burrito-style wrap.
6. Heat olive oil or butter in a skillet over medium heat. Place wraps seam-side down and toast 2–3 minutes per side until golden and crisp.
7. Let rest for 1 minute before slicing. Serve warm.
Notes
Warm the tortillas before rolling to prevent cracking.
Use a nonstick or cast iron skillet for best toasting results.
Don’t overfill the wraps—keep them tight for even cooking and no leaks.
Nutrition
- Serving Size: 1 wrap
- Calories: 450
- Sugar: 2g
- Sodium: 620mg
- Fat: 28g
- Saturated Fat: 12g
- Unsaturated Fat: 14g
- Trans Fat: 0g
- Carbohydrates: 28g
- Fiber: 2g
- Protein: 24g
- Cholesterol: 70mg
Keywords: cheesy beef wraps, easy dinner, quick meal, beef recipe, tortilla wraps