
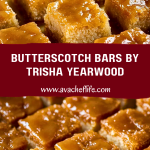
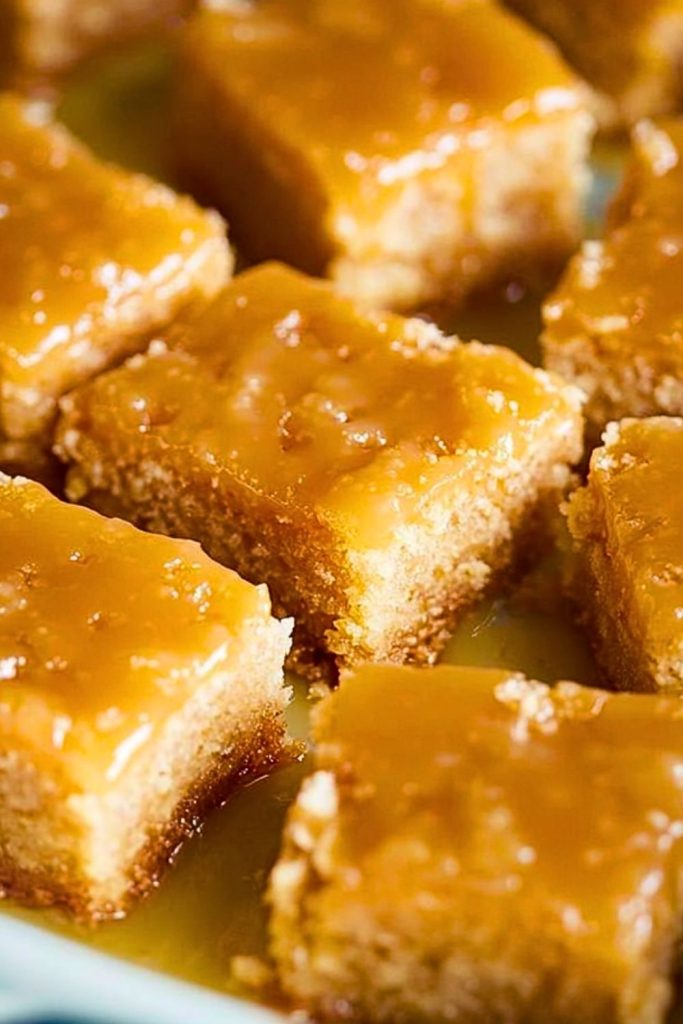
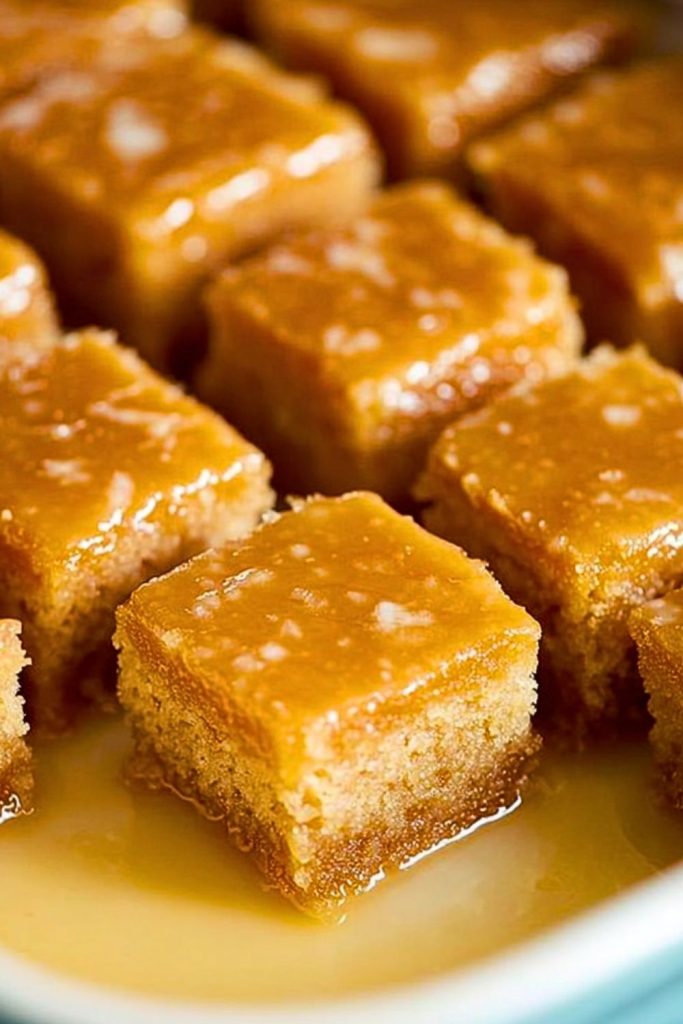
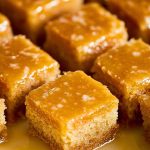
Golden, moist, and indulgently sweet—Trisha Yearwood’s Butterscotch Bars are the kind of dessert that brings comfort with every bite. These rich and buttery squares are baked to golden perfection and drenched in a warm butterscotch sauce that soaks into every crumb. The flavor is nostalgic, yet it never gets old—sweet with just the right amount of buttery richness and a tender texture that melts in your mouth.
Perfect for family gatherings, holidays, or just a cozy weekend treat, these bars are simple enough for beginner bakers and satisfying enough for anyone with a sweet tooth. Whether served warm straight out of the oven or enjoyed chilled the next day, they deliver that home-baked warmth we all crave in a dessert.
Why You’ll Love This Butterscotch Bars Recipe
- Classic flavor: Buttery and brown sugar-rich, it delivers the iconic butterscotch taste without fuss.
- Moist and gooey: The bars are incredibly soft with a sticky glaze that locks in flavor.
- Easy to make: Simple pantry ingredients and a one-pan process make it beginner-friendly.
- Crowd-pleaser: Perfect for potlucks, parties, or gifting.
- Make-ahead friendly: Stores well and tastes even better the next day.
- Great for all seasons: Comforting in the winter, yet light enough for spring or summer occasions.
Preparation Phase & Tools to Use (Essential Tools and the Importance of Each Tool)
Before you dive into making Trisha Yearwood’s Butterscotch Bars, having the right tools in place will make the entire process smoother and more enjoyable. These bars require simple equipment, but each plays a key role in achieving that perfectly baked, gooey finish.
- Mixing Bowls: You’ll need at least two—one for the dry ingredients and another for combining the wet. Use glass or stainless steel for easier mixing and cleanup.
- Whisk and Wooden Spoon: A whisk ensures the dry ingredients are evenly distributed, while a wooden spoon or silicone spatula is ideal for stirring the batter without overmixing.
- 9×13 Baking Dish: This size ensures even baking and gives the bars the perfect thickness. Glass or ceramic dishes work best to maintain steady heat.
- Saucepan: For making the rich butterscotch glaze, a small to medium-sized saucepan is essential. It needs to heat evenly to prevent burning the sugar.
- Measuring Cups and Spoons: Accuracy is key in baking. Dry and liquid measuring tools will keep the balance of ingredients just right.
- Cooling Rack: Once baked, cooling the bars properly is essential to let them set without overcooking in the pan’s residual heat.
- Sharp Knife or Bench Scraper: To cut clean, even squares after the bars have cooled.
Having everything prepped before you start baking (mise en place style) will save you time and prevent mistakes mid-way.
Preparation Tips
- Use room temperature ingredients: Especially the eggs and butter—this helps the batter combine more smoothly and evenly.
- Don’t overmix the batter: Stir just until the ingredients are incorporated. Overmixing can lead to dense, dry bars.
- Preheat your oven: Always start with a fully preheated oven to avoid uneven baking.
- Grease the baking dish: Or better yet, line it with parchment paper for easy removal and less cleanup.
- Make the glaze fresh: Prepare the butterscotch glaze while the bars are baking, so it’s warm and pourable when the bars come out.
- Pour the glaze evenly: Use a spoon or pour straight from the pan, and tilt the dish gently to help the sauce seep into every corner.
Ingredients for This Butterscotch Bars Recipe
To create Trisha Yearwood’s famous Butterscotch Bars, you’ll need just a handful of pantry staples. These simple ingredients work together to create a dessert that’s rich, moist, and packed with that signature butterscotch flavor.
For the Bars:
- 2 cups packed light brown sugar – The base of that deep, caramelized sweetness.
- 1/2 cup (1 stick) unsalted butter, melted – Adds richness and moisture.
- 2 large eggs – Bind the ingredients and give structure to the bars.
- 1 teaspoon vanilla extract – Rounds out the flavors with warm, aromatic notes.
- 2 cups all-purpose flour – Provides the foundation of the batter.
- 2 teaspoons baking powder – Gives the bars a soft rise and fluffy texture.
- 1/2 teaspoon salt – Balances the sweetness and enhances the overall flavor.
For the Butterscotch Glaze:
- 1/4 cup unsalted butter – The buttery base of the glaze.
- 1/2 cup packed light brown sugar – Melts into a rich, sticky butterscotch sauce.
- 2 tablespoons milk – Thins the glaze to a pourable consistency.
- 1/2 teaspoon vanilla extract – Finishes the glaze with warm flavor depth.
These everyday ingredients come together quickly, and once combined and baked, they produce a dessert that tastes far more decadent than its humble components suggest.
Step-by-Step Instructions for Butterscotch Bars by Trisha Yearwood
Follow these simple steps to bake the most irresistible butterscotch bars with a gooey, golden glaze. Each stage brings you closer to warm, buttery bliss!
Step 1: Preheat the Oven and Prepare the Dish
Preheat your oven to 350°F (175°C). Lightly grease a 9×13-inch baking dish with butter or nonstick spray, or line it with parchment paper for easy removal.
Step 2: Mix the Wet Ingredients
In a large mixing bowl, whisk together the melted butter and brown sugar until smooth and glossy. Then add the eggs and vanilla extract, whisking until fully incorporated.
Step 3: Add Dry Ingredients
In a separate bowl, combine the flour, baking powder, and salt. Gradually add the dry mixture into the wet mixture. Stir with a wooden spoon or spatula until just combined—don’t overmix.
Step 4: Transfer and Bake
Pour the batter into the prepared baking dish and smooth the top with a spatula. Bake for 25–30 minutes, or until a toothpick inserted in the center comes out clean.
Step 5: Make the Butterscotch Glaze
While the bars are baking, combine 1/4 cup butter, 1/2 cup brown sugar, and 2 tablespoons milk in a small saucepan over medium heat. Stir constantly until the mixture comes to a gentle boil. Remove from heat and stir in 1/2 teaspoon vanilla extract.
Step 6: Glaze the Bars
Once the bars are out of the oven, let them cool for 5–10 minutes, then pour the warm butterscotch glaze evenly over the surface. Use a spoon or offset spatula to help spread the glaze into all the corners.
Step 7: Cool and Slice
Allow the bars to cool completely so the glaze sets slightly. Then cut into squares and serve.
Notes
- Glaze Absorption: Pouring the glaze while the bars are still warm allows it to soak in slightly, making each bite ultra moist and flavorful.
- Serving Warm vs. Cold: These bars are delicious both ways. Warm bars are softer and more gooey, while chilled ones become a bit firmer and more caramel-like.
- Customize It: Add-ins like chopped pecans or a sprinkle of flaky sea salt on top can elevate the flavor and add texture without altering the original essence.
- Double the Glaze: If you’re a fan of extra gooeyness, doubling the glaze recipe is a great idea. Just make sure to pour slowly so it doesn’t pool too heavily in spots.
- Freezer Friendly: These bars freeze exceptionally well. Just wrap them tightly in plastic wrap and place in an airtight container.
Watch Out for These Mistakes While Cooking
- Overmixing the Batter: Stir only until the ingredients are combined. Overmixing can cause the bars to become dense and tough instead of soft and chewy.
- Skipping the Cooling Time: Cutting the bars while still hot may cause them to crumble and lose their shape. Allow them to cool at least partially.
- Overbaking: Even a few extra minutes in the oven can dry these out. Check at the 25-minute mark and use a toothpick to test doneness.
- Burning the Glaze: The glaze comes together quickly—keep an eye on it and stir constantly once it begins to boil. Overcooking it will lead to a bitter, burnt sugar taste.
- Uneven Spreading of Glaze: Pour slowly and use a spatula to spread the glaze evenly. Otherwise, some pieces will be soaked while others stay dry.
- Using Dark Brown Sugar: Stick with light brown sugar for the perfect balance of molasses flavor without overpowering the bars.
- Using Cold Eggs or Butter: Room temperature ingredients combine more smoothly and help the bars bake evenly.
- Skipping the Liner: While not required, lining the baking dish with parchment makes for a much easier clean-up and cleaner cuts.
What to Serve With Butterscotch Bars?
Butterscotch Bars by Trisha Yearwood are indulgent on their own, but when paired with the right accompaniments, they shine even brighter. Whether you’re hosting a dessert table, planning a brunch spread, or just want to elevate your sweet treat, here are some delicious serving ideas.
8 Recommendations:
- Vanilla Bean Ice Cream
The classic pairing—cool, creamy, and the perfect contrast to warm, gooey bars. - Fresh Berries
Strawberries, raspberries, or blueberries cut through the sweetness with tartness and color. - Salted Caramel Drizzle
Amp up the indulgence by adding a salty-sweet caramel drizzle over the bars or plate. - Espresso or Strong Coffee
The rich, roasted flavor of coffee complements the sweetness and brings out the brown sugar notes. - Chopped Toasted Pecans
Sprinkle on top or serve on the side for a crunch that balances the soft texture of the bars. - Whipped Cream with Cinnamon
A light, airy topping with a hint of spice that adds warmth without overpowering the butterscotch. - Apple Slices or Baked Apples
A fall-inspired side that echoes the brown sugar and butter combo beautifully. - Dark Chocolate Chunks or Sauce
Add a sophisticated edge with bittersweet chocolate—drizzle, dip, or sprinkle.
Storage Instructions
Keeping your Butterscotch Bars fresh is easy—and they actually taste even better the next day once the glaze fully settles into the bars. Here’s how to store them properly:
- Room Temperature: Store in an airtight container at room temperature for up to 3 days. Keep parchment or wax paper between layers to prevent sticking.
- Refrigerator: For longer freshness, refrigerate in an airtight container for up to 7 days. Let them sit at room temp for 10–15 minutes before serving for best texture.
- Freezer: Wrap each bar individually in plastic wrap and place in a freezer-safe container. Freeze for up to 2 months. Thaw overnight in the fridge or at room temperature before serving.
Tip: If you love that gooey texture, microwave a chilled bar for 10–15 seconds before eating.
Estimated Nutrition (Per Serving – based on 1 bar, cut into 24 pieces)
These bars are a treat, so they’re naturally on the indulgent side. Here’s an estimate:
- Calories: 210
- Total Fat: 9g
- Saturated Fat: 5g
- Unsaturated Fat: 3g
- Trans Fat: 0g
- Cholesterol: 40mg
- Sodium: 90mg
- Carbohydrates: 30g
- Fiber: 0g
- Sugars: 21g
- Protein: 2g
- Serving Size: 1 bar
- Category: Dessert
- Method: Baked
- Cuisine: American
- Diet: Vegetarian
- Prep Time: 10 minutes
- Cook Time: 25–30 minutes
- Total Time: 40 minutes
- Yield: 24 bars
Frequently Asked Questions
1. Can I use dark brown sugar instead of light brown sugar?
Yes, but expect a deeper molasses flavor. Light brown sugar is recommended for a more balanced, classic butterscotch taste.
2. Can I make these bars gluten-free?
You can! Substitute the all-purpose flour with a 1:1 gluten-free baking flour. The texture may be slightly softer but still delicious.
3. Do the bars need to be refrigerated?
Not immediately. They can be stored at room temperature for a few days. If you’re keeping them longer or live in a warm climate, refrigerating helps preserve freshness.
4. Can I freeze these bars with the glaze?
Yes, the glaze holds up well in the freezer. Just make sure they are completely cool before wrapping and freezing.
5. Can I double the recipe for a crowd?
Absolutely. Use a larger baking sheet (like a 12×17 jelly roll pan) and adjust the baking time slightly—start checking around 30 minutes.
6. Can I add nuts or chocolate chips to the batter?
Definitely! Chopped pecans or walnuts, or even butterscotch or dark chocolate chips, make tasty additions.
7. Why is my glaze grainy?
This usually happens if the sugar doesn’t fully dissolve. Be sure to stir constantly while bringing the glaze to a boil, and don’t rush it.
8. What’s the best way to cut clean squares?
Let the bars cool completely, then use a sharp knife wiped clean between each cut. You can also chill the bars slightly for firmer slicing.
Conclusion
Trisha Yearwood’s Butterscotch Bars are a dessert that balances simplicity with indulgence. Rich with buttery brown sugar flavor, glazed in a warm butterscotch sauce, and soft enough to melt in your mouth—these bars are the kind of treat that brings comfort to every occasion.
They’re easy to make, crowd-pleasing, and versatile enough for potlucks, holidays, or a quiet evening at home. Whether you’re a seasoned baker or just starting out, this recipe guarantees sweet success. So go ahead—bake a batch, share the love, and enjoy every golden bite.
Butterscotch Bars by Trisha Yearwood
- Prep Time: 10 minutes
- Cook Time: 30 minutes
- Total Time: 40 minutes
- Yield: 24 bars
- Category: Dessert
- Method: Baked
- Cuisine: American
- Diet: Vegetarian
Description
These Butterscotch Bars by Trisha Yearwood are a perfect fusion of buttery richness and gooey brown sugar goodness. Easy to make and impossible to resist, they’re the ultimate comfort dessert for both everyday cravings and special gatherings. Whether you’re after easy dessert recipes, holiday treats, or quick baking ideas, these bars check all the boxes. The smooth butterscotch glaze poured over the warm, tender base creates an unforgettable flavor and texture combination that keeps people coming back for seconds. Great for potlucks, lunchboxes, or cozy nights in, this is one of those classic dessert ideas that never goes out of style.
Ingredients
2 cups packed light brown sugar
1/2 cup unsalted butter, melted
2 large eggs
1 teaspoon vanilla extract
2 cups all-purpose flour
2 teaspoons baking powder
1/2 teaspoon salt
1/4 cup unsalted butter
1/2 cup packed light brown sugar
2 tablespoons milk
1/2 teaspoon vanilla extract
Instructions
1. Preheat oven to 350°F (175°C). Grease or line a 9×13-inch baking dish.
2. In a large mixing bowl, whisk together melted butter and brown sugar until glossy.
3. Add eggs and vanilla extract. Mix until fully combined.
4. In a separate bowl, whisk together flour, baking powder, and salt.
5. Gradually stir dry ingredients into the wet mixture until just combined.
6. Spread batter evenly in prepared baking dish.
7. Bake for 25–30 minutes, or until a toothpick inserted in the center comes out clean.
8. While baking, make the glaze: combine butter, brown sugar, and milk in a saucepan. Stir over medium heat until it reaches a gentle boil.
9. Remove glaze from heat and stir in vanilla.
10. After removing the bars from the oven, let them sit for 5–10 minutes.
11. Pour glaze evenly over the warm bars and spread to cover the top.
12. Let bars cool completely before slicing into squares.
Notes
Make sure to let the bars cool fully before cutting to get clean edges.
Use room temperature ingredients for a more even batter.
Don’t rush the glaze—stir constantly to avoid a grainy texture.
Nutrition
- Serving Size: 1 bar
- Calories: 210
- Sugar: 21g
- Sodium: 90mg
- Fat: 9g
- Saturated Fat: 5g
- Unsaturated Fat: 3g
- Trans Fat: 0g
- Carbohydrates: 30g
- Fiber: 0g
- Protein: 2g
- Cholesterol: 40mg
Keywords: butterscotch bars, Trisha Yearwood, easy dessert, quick baking, brown sugar bars