
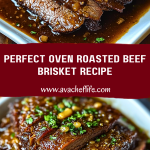
Few dishes deliver the deep, comforting satisfaction of a Perfect Oven Roasted Beef Brisket. With its rich, juicy layers and that melt-in-your-mouth tenderness, this dish is the definition of hearty home-cooked perfection. Slowly roasted to achieve that ideal balance between crusty edges and a fork-tender center, brisket becomes a centerpiece worthy of Sunday dinners, special occasions, or meal prep for the week.
What sets this brisket apart is its slow-cooked transformation. Marinated and rubbed in a savory, slightly sweet seasoning blend, then slow-roasted in the oven, the meat soaks up layers of flavor while turning beautifully caramelized on top. Paired with its own deep, umami-rich juices, every bite is laced with savory comfort. Whether you’re a seasoned cook or just stepping into the world of brisket, this recipe brings serious flavor without needing a smoker or fancy equipment.
Why You’ll Love This Perfect Oven Roasted Beef Brisket
- Unbeatable Texture: Roasted low and slow, the brisket turns fall-apart tender without becoming dry.
- Deep Flavor: The dry rub and roasting juices create a bold flavor profile that’s both smoky and subtly sweet.
- Hands-Off Cooking: Once it’s in the oven, you can sit back and relax while the magic happens.
- Versatile: Serve it with mashed potatoes, roasted vegetables, or pile it high on a sandwich bun.
- Crowd-Pleaser: Whether you’re hosting guests or just cooking for the family, this dish wins hearts every time.
- Leftovers Reheat Beautifully: Slice it up for the next day—brisket only gets better with time.
Preparation Phase & Tools to Use for Perfect Oven Roasted Beef Brisket
Before diving into the cooking process, it’s important to set yourself up for success with the right tools and a solid game plan. Beef brisket is a cut that demands a bit of patience and precision—but with the right equipment, it becomes a breeze.
Essential Tools and Equipment
- Roasting Pan or Dutch Oven: A heavy-duty roasting pan or an enameled Dutch oven is key. It retains and distributes heat evenly, ensuring the brisket cooks low and slow without drying out.
- Sharp Chef’s Knife: Brisket is a large cut, so a quality knife helps you trim excess fat and slice evenly after cooking.
- Cutting Board (with juice groove): Useful for both trimming the brisket beforehand and slicing it post-roast without making a mess.
- Aluminum Foil or Lid: Covering your brisket during the first phase of roasting locks in moisture.
- Meat Thermometer: Don’t play the guessing game. A digital thermometer ensures your brisket reaches that sweet spot of doneness.
- Basting Brush (optional): Helpful for reapplying juices or glaze during the final uncovered roast for a caramelized finish.
Preparation Tips
- Let It Rest Before Cooking: Take the brisket out of the fridge 30–60 minutes before roasting. This helps it cook more evenly.
- Trim the Fat—But Not All: Leave a thin layer of fat on top (about ¼ inch). It bastes the meat as it cooks and adds flavor.
- Dry Rub in Advance: Apply your seasoning at least a few hours ahead, or better yet, overnight. This allows the flavors to penetrate the meat deeply.
- Low and Slow Is the Motto: Rushing the process will lead to tough meat. Trust the oven to work its magic over several hours.
- Use the Juices: Save those pan drippings! They’re liquid gold and can be spooned over the meat or thickened into a gravy.
Ingredients for This Perfect Oven Roasted Beef Brisket
To achieve that unforgettable, slow-roasted flavor and melt-in-your-mouth texture, it all begins with a handful of carefully chosen ingredients. Here’s what you’ll need to bring this brisket to life:
Main Ingredients
- 1 whole beef brisket (4 to 6 pounds) – Look for a cut with a good fat cap on one side. It’s essential for self-basting during roasting.
- 2 tablespoons olive oil – Helps the rub adhere and begins the searing process.
- 1 large onion, sliced – Forms a flavorful base under the meat and enriches the pan juices.
- 4 cloves garlic, minced – Adds depth and warmth to the overall profile.
Dry Rub Seasoning
- 2 tablespoons brown sugar – Balances the savory with a touch of caramelized sweetness.
- 1 tablespoon smoked paprika – Gives a subtle smokiness, even without a smoker.
- 1 tablespoon kosher salt – Enhances the beef’s natural flavors.
- 1 teaspoon black pepper – Adds a gentle heat and classic bite.
- 1 teaspoon chili powder – For a little kick and a rich color.
- 1 teaspoon ground cumin – Earthy and slightly nutty, it deepens the flavor.
- ½ teaspoon onion powder – Boosts the umami, working with the fresh onions.
- ½ teaspoon mustard powder (optional) – Adds a slight tang and rounds out the rub.
Braising Liquid
- 1 cup beef broth – Keeps the meat juicy during its long roast and builds the base of your sauce.
- ½ cup balsamic vinegar or red wine – Offers a hit of acidity to tenderize and brighten.
- 2 tablespoons Worcestershire sauce – Delivers that deep, savory umami punch.
Step 1: Prep the Brisket
Remove your brisket from the refrigerator about 30–60 minutes before cooking. Trim off any excessive fat, leaving a ¼-inch layer on top for moisture retention. Pat the meat dry with paper towels, then rub it with olive oil to help the seasoning stick.
Step 2: Apply the Dry Rub
In a small bowl, mix all the dry rub ingredients: brown sugar, smoked paprika, kosher salt, black pepper, chili powder, ground cumin, onion powder, and mustard powder (if using). Generously coat the brisket on all sides with the rub, pressing it firmly into the meat. If time allows, cover and refrigerate the brisket overnight for deeper flavor.
Step 3: Preheat and Sear
Preheat your oven to 300°F (150°C). While it’s heating up, sear the brisket in a large Dutch oven or skillet over medium-high heat for about 2–3 minutes per side, until you get a good crust. This step is optional but adds extra depth to the flavor and texture.
Step 4: Prepare the Roasting Pan
In a large roasting pan or Dutch oven, lay out the sliced onions and minced garlic. Place the seared brisket on top, fat-side up. Pour in the beef broth, balsamic vinegar (or wine), and Worcestershire sauce around the meat—not directly on top—to avoid rinsing off the seasoning.
Step 5: Cover and Roast Low and Slow
Cover tightly with aluminum foil or a fitted lid. Roast in the preheated oven for 3 to 4 hours, depending on the size of your brisket. You’re aiming for an internal temperature of 190–200°F (88–93°C). At this point, the meat should be fork-tender.
Step 6: Uncover for Final Browning
Once the brisket is tender, uncover the pan and raise the oven temperature to 350°F (175°C). Let it roast for another 30–45 minutes, basting occasionally with the pan juices. This step gives the top a beautiful caramelized finish.
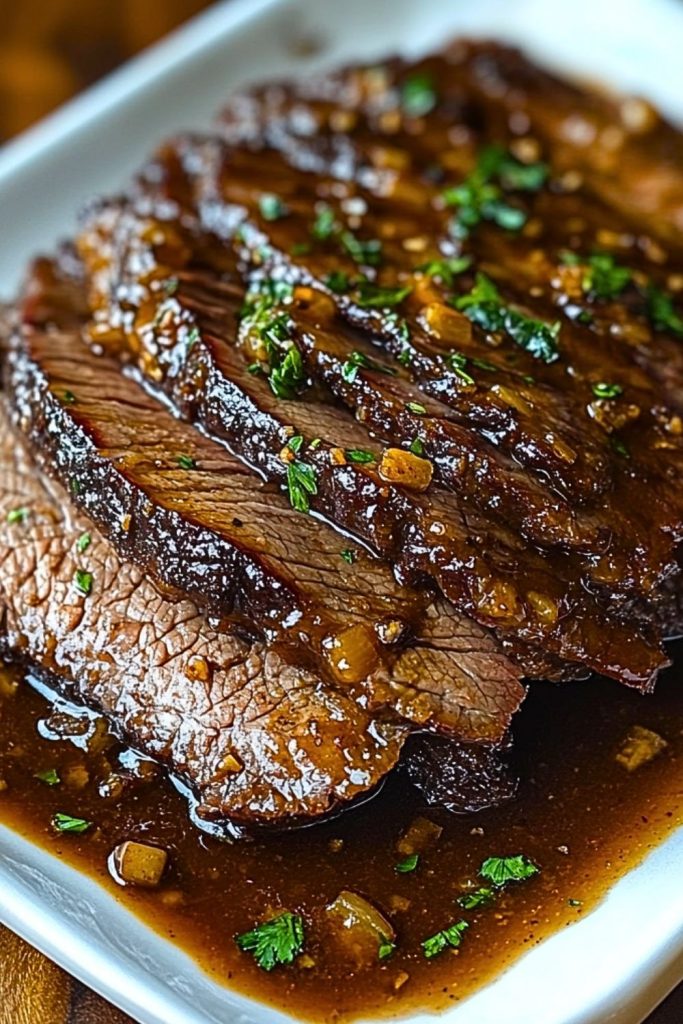
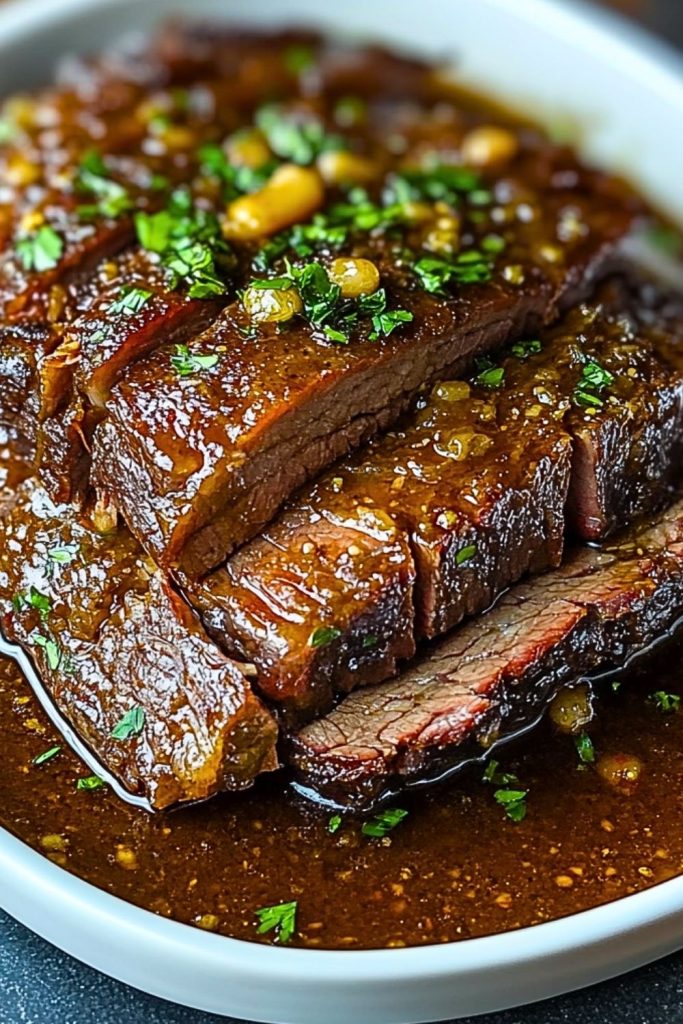
Step 7: Rest and Slice
Remove the brisket from the oven and let it rest for 20–30 minutes before slicing. Use a sharp knife to slice against the grain into ¼-inch thick slices. Spoon some of the pan juices over the top just before serving for maximum flavor.
Notes
- Make-Ahead Friendly: Brisket tastes even better the next day. You can roast it the night before, refrigerate it in the pan juices, and gently reheat it covered at 300°F before serving.
- Fat Cap Side Up: Always roast with the fat side facing up. This allows the fat to slowly baste the meat as it renders down.
- Use the Drippings: The pan juices are liquid gold. Serve them on the side, or simmer them down into a thicker gravy.
- Let It Rest: This is non-negotiable. Resting helps redistribute the juices and gives you cleaner slices.
- Flavor Customization: Feel free to adjust the seasoning based on your taste. Add rosemary, thyme, or a splash of soy sauce for more layers of flavor.
Watch Out for These Mistakes While Cooking
- Skipping the Rest Time: Slicing brisket too soon will lead to dry, messy cuts. Letting it rest is key to moist slices.
- Not Cooking Long Enough: Brisket needs time to break down its connective tissue. If it’s still tough, it likely needs more time in the oven.
- Slicing the Wrong Way: Always cut against the grain to shorten the muscle fibers. This makes the meat tender rather than chewy.
- Too Much Liquid: Don’t submerge the brisket entirely in broth. You want it to braise, not boil. About halfway up the side of the brisket is enough.
- Overcrowding the Pan: Give the brisket room in the pan. If it’s crammed in with too many onions or vegetables, the heat won’t circulate properly.
- Opening the Oven Too Often: Resist the temptation! Each time you open the oven door, heat escapes and slows the cooking process.
- Skipping the Sear (Optional but Powerful): Searing caramelizes the outside of the meat and intensifies flavor. It’s worth the extra step.
- Using Low-Quality Meat: Brisket quality matters. Choose a well-marbled piece for the best results.
What to Serve With Perfect Oven Roasted Beef Brisket?
Beef brisket may be the star of the show, but it shines even brighter when paired with the right supporting cast. Whether you’re going for a comforting, down-home spread or an elevated dinner experience, these sides will complete your brisket feast beautifully.
8 Recommendations
1. Creamy Mashed Potatoes
Classic, buttery mashed potatoes soak up those brisket juices like a dream. The smooth texture complements the tender beef perfectly.
2. Roasted Root Vegetables
A colorful medley of carrots, parsnips, and sweet potatoes roasted with olive oil and herbs brings both flavor and nutrition to the table.
3. Garlic Green Beans
Sautéed in butter with fresh garlic and a splash of lemon, green beans add a crisp, refreshing balance to the richness of the meat.
4. Macaroni and Cheese
For a soul-comforting combo, nothing beats creamy, cheesy mac and cheese next to a slice of smoky brisket.
5. Buttery Dinner Rolls
Perfect for mopping up the pan drippings or building mini brisket sliders—these are a must-have side.
6. Coleslaw
A tangy, crunchy slaw made with cabbage, carrots, and vinegar dressing cuts through the richness and brightens each bite.
7. Cornbread
With its slightly sweet, crumbly texture, cornbread is a Southern staple that pairs beautifully with oven-roasted meats.
8. Pickled Red Onions or Pickles
These sharp, acidic bites are excellent for adding contrast and cutting through the heaviness of the brisket.
Storage Instructions
Proper storage ensures that your Perfect Oven Roasted Beef Brisket remains just as delicious in the days that follow. Whether you’re planning ahead or saving leftovers, follow these tips to preserve flavor and moisture.
In the Refrigerator:
- Cool First: Let the brisket come to room temperature before storing.
- Slice or Whole: You can refrigerate it whole or sliced, but if sliced, store it with the pan juices to keep it moist.
- Storage Containers: Use airtight containers or wrap tightly with foil/plastic wrap. Add some of the juices over the meat before sealing.
- Shelf Life: Keeps well in the fridge for up to 4 days.
In the Freezer:
- Wrap in Layers: Wrap brisket slices or chunks in foil, then place in a freezer-safe zip-top bag or airtight container.
- Label Clearly: Write the freezing date on the bag.
- Freezer Life: Good for up to 3 months.
- Reheating: Thaw overnight in the fridge. Reheat gently at 300°F, covered with a splash of broth or pan juices to rehydrate.
Estimated Nutrition (Per Serving – based on 6 servings from a 4.5 lb brisket)
Note: These values are approximate and can vary depending on the exact cut and ingredients used.
- Calories: 470 kcal
- Protein: 42g
- Total Fat: 30g
- Saturated Fat: 11g
- Carbohydrates: 6g
- Sugar: 3g
- Fiber: 0g
- Sodium: 620mg
- Cholesterol: 115mg
Brisket is protein-rich and satisfying, making it a hearty main for both weekday meals and special occasions.
Frequently Asked Questions
1. Can I cook brisket ahead of time?
Absolutely. In fact, it’s even better the next day. Cook it fully, let it cool in its juices, refrigerate overnight, and reheat gently the next day. The flavors deepen beautifully over time.
2. Do I have to sear the brisket before roasting?
Searing isn’t strictly necessary, but it does add a flavorful crust and enhances the depth of flavor. If you’re short on time, you can skip it, but for best results, take the extra few minutes to sear.
3. What’s the best temperature to cook brisket in the oven?
Low and slow is key. A temperature of 300°F (150°C) allows the collagen in the meat to break down slowly, giving you a tender and juicy result.
4. How do I know when brisket is done?
Use a meat thermometer. The internal temperature should reach 190–200°F (88–93°C). It should feel fork-tender when pierced.
5. Should I roast brisket fat side up or down?
Always roast fat side up. This allows the fat to naturally baste the meat, keeping it moist and flavorful throughout the cooking process.
6. Can I use the same recipe for a smaller or larger brisket?
Yes, just adjust the cooking time accordingly. A smaller brisket (3 lbs) may take around 2½–3 hours, while a larger cut (6+ lbs) could take up to 5 hours or more.
7. How do I slice brisket properly?
Let it rest for 20–30 minutes after roasting. Then, slice against the grain using a sharp knife for tender, easy-to-chew slices.
8. Can I add vegetables to roast with the brisket?
Yes! Root vegetables like carrots, potatoes, and parsnips roast beautifully in the pan alongside the meat. Just ensure they’re cut into large chunks so they don’t overcook.
Conclusion
Perfect Oven Roasted Beef Brisket is more than just a meal—it’s an experience. The kind of dish that brings people together, fills your kitchen with incredible aromas, and delivers deep satisfaction in every bite. Whether it’s your first brisket or your fiftieth, this recipe guides you step by step to savory success. With tender slices bathed in bold, rich juices, you’re not just cooking dinner—you’re creating a memory.
Perfect Oven Roasted Beef Brisket Recipe
- Total Time: 4 hours 50 minutes
- Yield: 6-8 servings
Description
Sink your teeth into this juicy, fork-tender Perfect Oven Roasted Beef Brisket, a show-stopping centerpiece ideal for any occasion. This easy recipe transforms a tough cut of meat into something spectacular with slow-roasting, a robust dry rub, and deep, savory pan juices. Perfect for easy dinner ideas, holiday meals, or quick meal prep, this brisket brings rich flavor without the need for a smoker. Whether you’re cooking for a crowd or slicing up leftovers for sandwiches, it’s hearty, delicious, and absolutely unforgettable.
Ingredients
Main:
- 1 whole beef brisket (4 to 6 lbs)
- 2 tablespoons olive oil
- 1 large onion, sliced
- 4 cloves garlic, minced
Dry Rub:
- 2 tablespoons brown sugar
- 1 tablespoon smoked paprika
- 1 tablespoon kosher salt
- 1 teaspoon black pepper
- 1 teaspoon chili powder
- 1 teaspoon ground cumin
- 1/2 teaspoon onion powder
- 1/2 teaspoon mustard powder (optional)
Braising Liquid:
- 1 cup beef broth
- 1/2 cup balsamic vinegar or red wine
- 2 tablespoons Worcestershire sauce
Instructions
- Prep the Brisket: Let brisket come to room temp. Trim excess fat, leaving a 1/4-inch cap. Pat dry and rub with olive oil.
- Apply the Dry Rub: Mix rub ingredients and coat brisket evenly. Let it sit at least 1 hour, preferably overnight.
- Preheat & Sear: Heat oven to 300°F. Optional: Sear brisket in a Dutch oven on all sides for extra flavor.
- Set Up the Pan: Layer onions and garlic in a roasting pan. Place brisket fat-side up on top. Add broth, vinegar/wine, and Worcestershire around meat.
- Roast Covered: Cover tightly with foil or lid. Roast 3 to 4 hours until internal temp reaches 190°–200°F.
- Finish Uncovered: Uncover and raise oven temp to 350°F. Roast 30–45 mins to brown the top, basting occasionally.
- Rest and Slice: Let brisket rest 20–30 mins before slicing against the grain. Spoon pan juices over slices.
- Prep Time: 20 minutes
- Cook Time: 4 hours 30 minutes